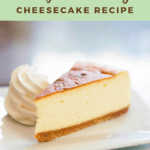
Warning: this is not your typical New York style, dense cheesecake. Despite its appearance of looking overbaked when it comes out of the oven, this is a light and creamy cheesecake recipe that’s a cross between a New York, Japanese, and European cheesecake.
This cheesecake uses a combination of cream cheese, mascarpone cheese, and heavy cream.
And it’s absolutely melt in your mouth amazing.
What exactly is the cheesecake project?
I’ve decided one of my (many) ambitious projects for this blog is to feature a different cheesecake recipe every month. Why cheesecakes? Cheesecake is such a classic dessert that can be made many ways and I think cheesecake is the one dessert my family and I can’t get sick of. (Which is important if I have to keep making them, right? I mean, someone’s got to eat them). Furthermore, when coming up with cheesecake ideas, the possibilities seemed endless!
Since this is my first cheesecake post, I wanted the first post to be about my go to cheesecake recipe.
It all began with what I thought was a mistake.
One day Ryan (the hubby) wanted to go out and buy cheesecake from the local grocery store. Instead, (thinking this would be a great time to finally make a cheesecake) I convinced him that I could make the cheesecake. I mean, I make delicate chiffon cakes and temperamental caramel. How hard can making a cheesecake really be?
You see, I’ve never really made an honest to goodness cheesecake before then (unless dozens of jello no-bake cheesecakes count? no? okay). The worst thing that could happen is that it would crack right?
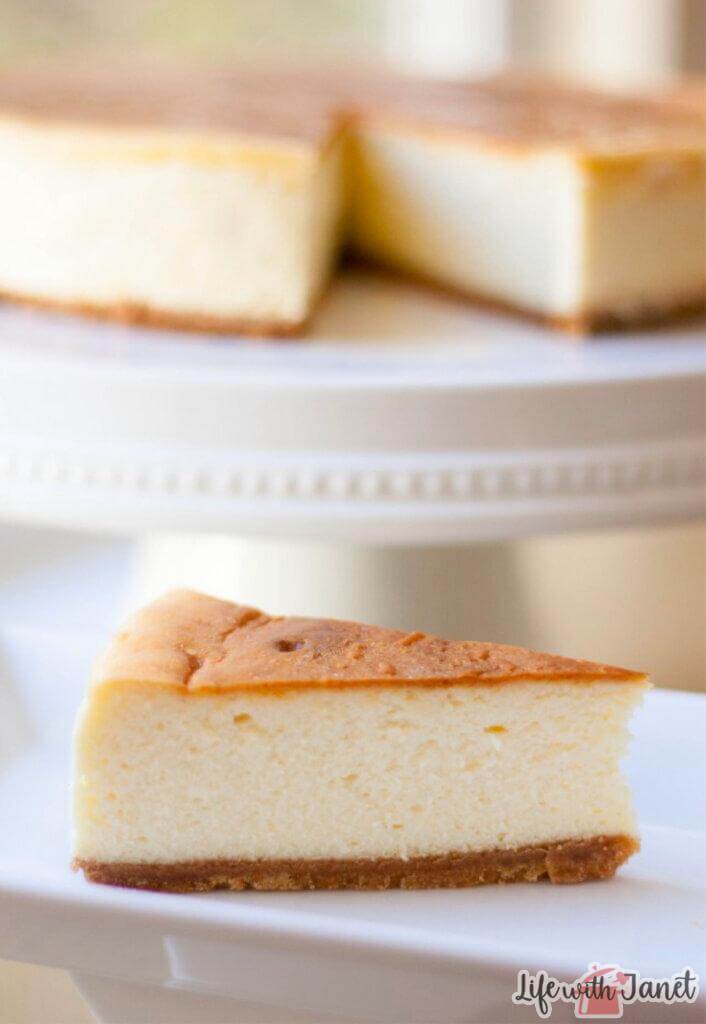
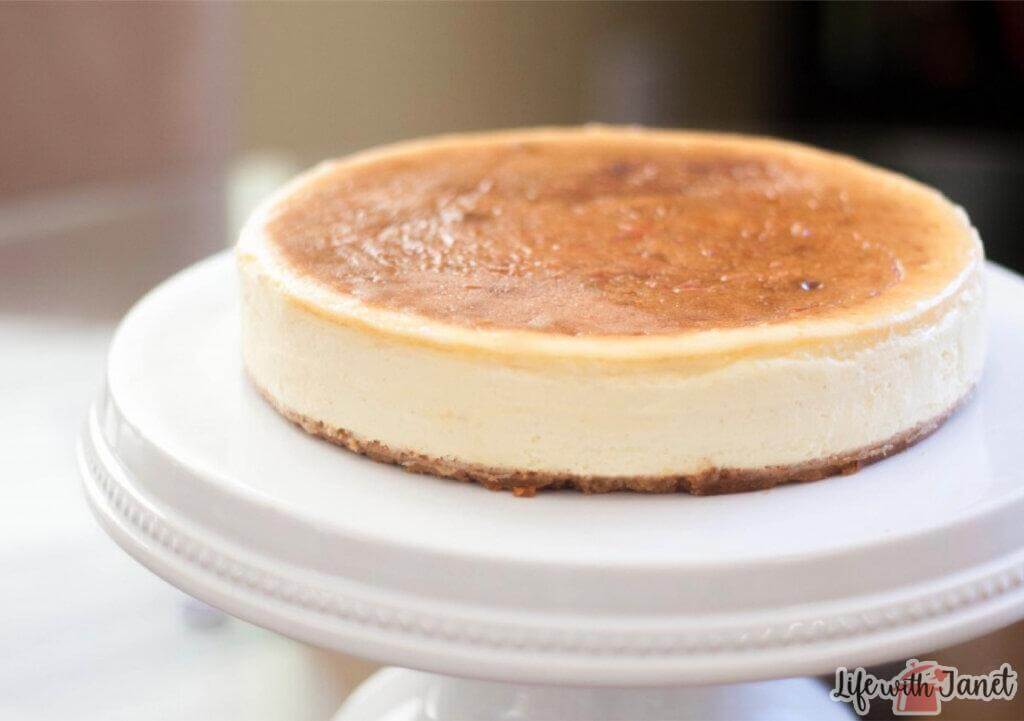
I was wrong. The worst thing that could (and did) happen is that the top turned brown! (At least there wasn’t a single crack!) <-sarcasm. I’ve never seen a cheesecake with a brown crust on it!
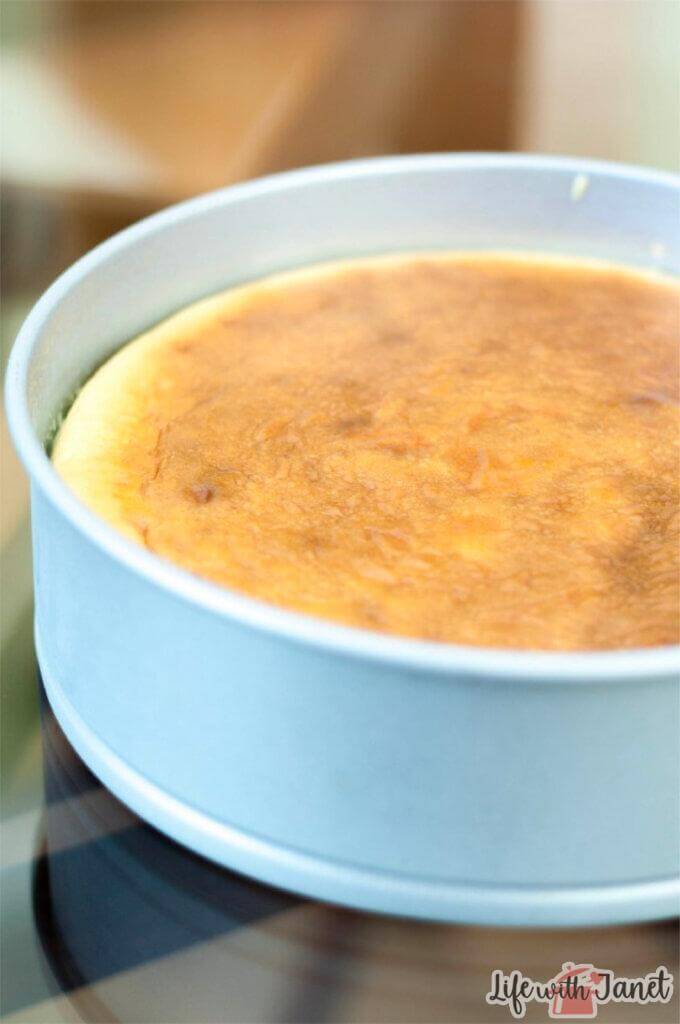
I immediately thought I overbaked it. But I couldn’t tell because it had puffed up as it was baking (are cheesecakes supposed to do that as well?) and after it deflated when I turned the oven off, it was still slightly jiggly in the center which meant it was still okay.
What the (bleep) went wrong?
Oh yeah. It was probably because I decided to alter the recipe without even trying the original one first. (Facepalm) If you haven’t noticed by my Frankenstein recipes by now (take part of this recipe, add part of another, you get the picture), I’m a serial recipe tweaker. I just can’t help myself. I should be committed.
So, I started brainstorming ways to salvage it. Dozens of ideas went through my mind. Top it with fruit compote (eh.. I’m not a big fan), turn it into a salted caramel and ganache cheesecake (I’m definitely going to have to post a recipe on that!), or remove the top and crust and turn it into a cake filling were just some of them. **This is where the idea of the cheesecake project was born!!
I showed Ryan what happened and he just exclaimed that it looked really good. He said that’s what “real” cheesecakes are supposed to look like (and then he did an imitation of his french chef instructor from his culinary school).
I looked at him like he was crazy, and not because of his attempt at a french accent (which was pretty bad).
He insisted he wanted to try the cheesecake, just as I made it, and scoffed at my ideas to “save it”.
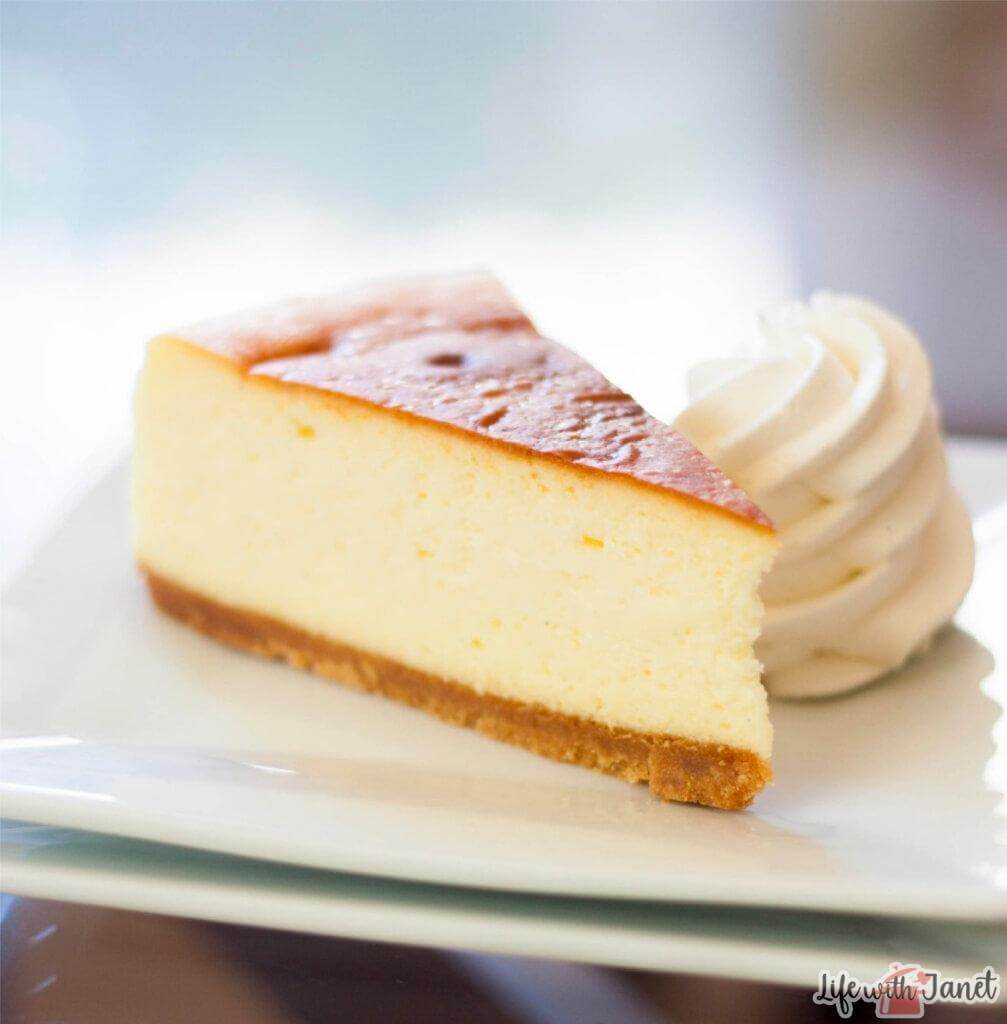
When I took a bite, I was expecting a dense, crumbly cheesecake from possibly being overbaked. Instead, it was perfectly light and creamy and just a little bit fluffy. And that brown top made a thin crust that was a nice contrast to the creamy main body of the cheesecake.
It’s the texture I never knew I wanted in a cheesecake, and now this is my go to recipe. **Just so you know – the cheesecake top doesn’t always get as brown as in the picture. I’ve had it come out lighter, but it always has a bit of color to it. Your cheesecake will also be a bit taller than in my pictures (not a bad thing, right?) because I tried to make some mini cheesecakes with the filling (which was an epic fail).
I urge you to try this light and creamy cheesecake recipe if you’re looking for something a little bit different.

Light, Creamy Cheesecake
Ingredients
Method
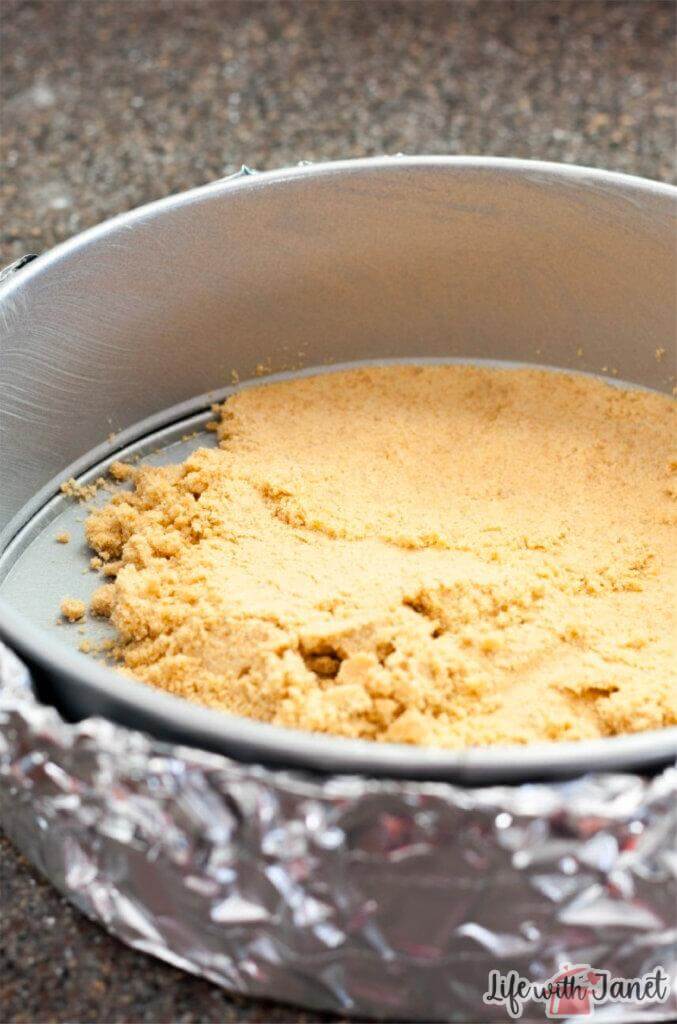
- Preheat oven to 350 degrees, Prepare the pan
- *this is important because it will prevent water from entering your springform pan while baking and making your crust soggy.
- Using 18″ wide foil, tear off 2 roughly square pieces (3 pieces if foil is not heavy duty)
- Place your springform pan in the center of one piece of foil and gently fold the pan around the sides.
- Repeat with remaining foil and then crinkle any pieces extending past the top of the pan down to be level with the top edge of the pan.
- Grease the pan with the 2 tablespoons room temperature butter around the bottom and sides.
- In large bowl, mix the graham cracker crumbs and sugar until evenly mixed.
- Add the melted butter and mix into crumb mixture until evenly moistened.
- Press mixture evenly onto bottom of pan (not up the sides). I like to use the bottom of a dry measuring cup to firmly pack it.
- Place on high sided roasting pan (to prevent tears in foil) and bake in center of oven for 15 minutes.
- Remove from oven and allow to cool.
- Turn oven down to 325 degrees.
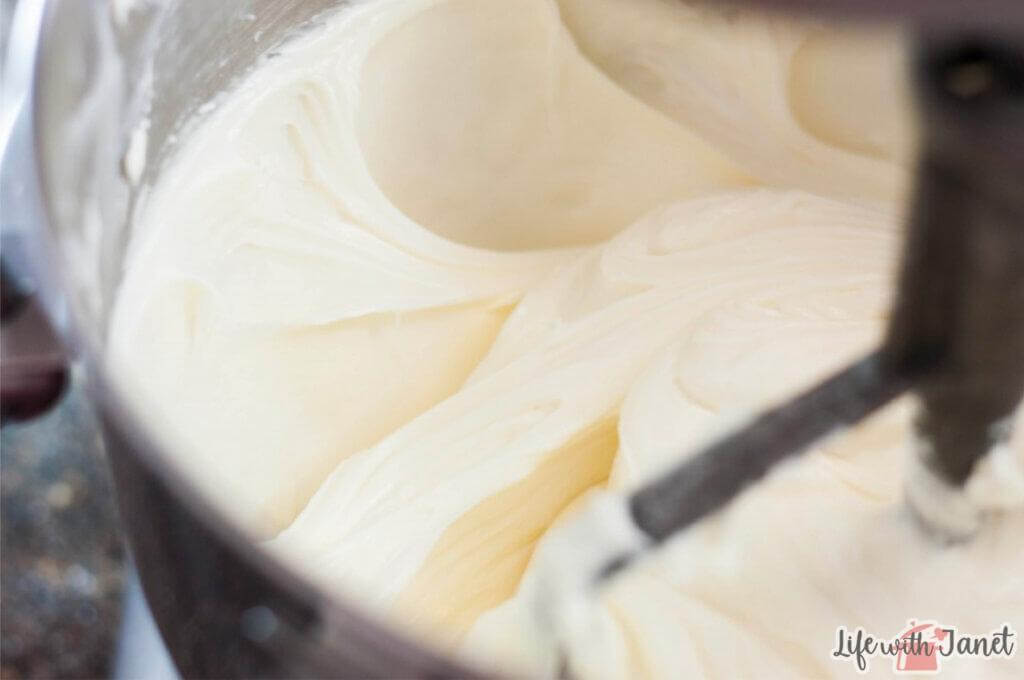
- Place cream cheese and mascarpone cheese in mixer bowl and, mix on medium speed until light and creamy, about 3 minutes.
- While mixing, add the sugar and mix 3 minutes longer.
- Scrape down bowl, add vanilla and lemon juice and mix 1 minute longer.
- Add eggs, one at a time, beating well after each addition.
- Scrape down bowl again and mix 30 seconds.
- Add heavy cream and mix 1 minute until fully incorporated.
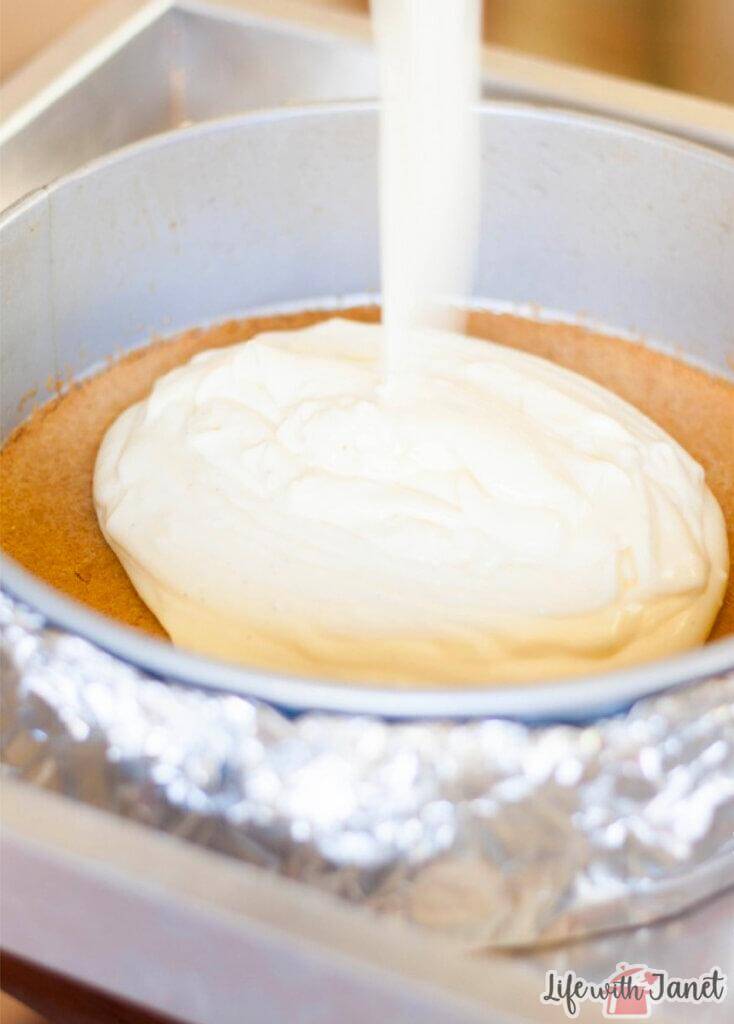
- Pour intospringform pan over cooled crust.Bake the cheesecake:
- Place pan (inside high sided roasting pan) on oven rack so it sits in the center of the oven.
- Pour hot water into the roasting pan until it reaches halfway up the side of the springform pan, taking care not to burn yourself or splash water into your cheesecake filling. [i]Tip: pull rack out halfway, place pan on rack and fill with water, then carefully push rack back into oven.
- Bake at 325 degrees for 1 hour and 20 minutes.
- *at one point the filling will puff up and then start browning and that’s OKAY!
- After baking, turn oven off, open oven door a crack and leave cheesecake inside the oven to cool gradually for 1 hour.
- Remove from oven and water bath and allow to cool to room temperature on counter.
- Once cooled, chill at least 5 hours in refrigerator before removing from pan.
- To remove from pan, take a butter knife and run it around the edge of the pan before releasing the sides. Carefully remove the sides and place on platter for serving.