My grandma was famous amongst our family and friends for her incredible pies. Flaky, buttery, and full of flavor, her crust was always perfectly golden. Baking pie crust from scratch takes a little bit of time and patience, but I’m here to walk you through my grandma’s can’t-fail technique for a pie crust that’s worth the effort. Read on for her time-tested recipe and crust-making tips she shared with me over the years.
Why Make Pie Crust from Scratch?
While store-bought crust is convenient, nothing compares to the taste of homemade. Going through the simple process of cutting butter into flour, adding a touch of vinegar for tang, and gently gathering into a ball creates a flaky texture and depth of flavor that’s unmatched. As you roll out that first homemade crust, you’ll discover why it’s worth those few extra minutes. The pride that comes with creating such a tasty crust from scratch makes the praises you’ll get as folks devour your pies even sweeter.
What Do You Need to Make Pie Crust?
Part of why my grandma’s recipe works so well is that it calls for simple, high quality ingredients. All you need is:
- Butter – Grandma used Crisco, but I prefer the flavor of butter
- All-purpose flour – Go for unbleached
- An egg – Fresh from your fridge
- Vinegar – Apple cider vinegar is my choice
- Water
- A pinch of salt
With just these basic ingredients that you likely have on hand, you’re on your way to pie crust perfection.
How Long Does It Take to Make the Crusts?
From start to finish, my grandma’s recipe takes about an hour and 20 minutes. Here’s a breakdown:
- Prep time: 10 minutes
- Roll out time: 10 minutes
- Chill time: 1 hour
Most of that time is hands-off chilling. The active work of cutting the butter in, adding liquids, and gathering the dough takes just 20 minutes.
What’s the Trick to Rolling Out the Dough?
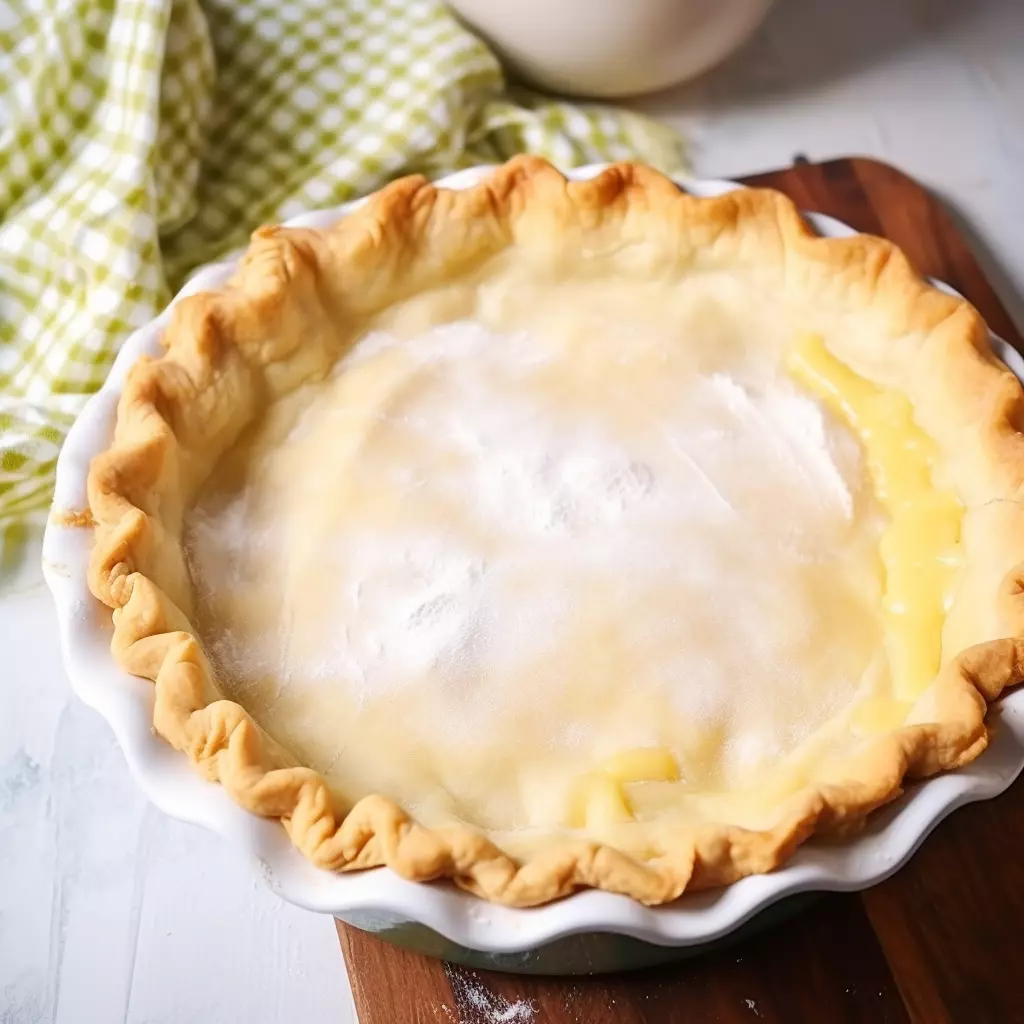
A lightly floured surface is key for rolling out grandma’s pie dough without things getting messy. Sprinkle your work surface and rolling pin generously with flour. Gently press the dough into a disc before rolling so it starts off evenly. Roll slowly from the center outward, adding a dusting more flour whenever needed to prevent sticking.
If the dough tears, don’t worry! Just pinch it together gently with your fingers once you’ve transferred it to the pie dish. The texture will still come out beautifully flaky after baking.
How Do You Get Those Fluted Edges?
Crimping the dough edges to decorate your pie can seem intimidating. But you don’t need perfect fluted pleats to create a stunning homemade pie. My best advice is to simply press the tines of a fork around the perimeter of the crust. Not only does it create a pretty design, but it seals the edges nicely too.
For a fluted look, use your index and middle fingers to pinch and twist the dough. Whatever method you choose, have fun making that final touch your own.
Grandma always said not worry about appearances and focus instead on flavor. Her easy, delicious crust recipe does just that. For the flakiest, butteriest pie crust that’s sure to impress, give this no-fail method a try for your next baking day.
Grandma’s No-Fail Pie Crust Recipe
- Preparation: 10 minutes
- Rolling: 10 minutes
- Chilling: 1 hour
- Total Time: 1 hour and 20 minutes
Ingredients (Organized and Quantified)
- 1 1/4 cups Butter, chilled
- 3 cups Unbleached Organic All-Purpose Flour (additional flour needed for rolling)
- 1 Large Egg
- 1 teaspoon Sea Salt
- 2 teaspoons Apple Cider Vinegar
- Water (as required)
Step-by-Step Instructions
- Dough Preparation:
- Combine the flour and sea salt in a large bowl.
- Using a pastry blender or a fork, cut in the chilled butter until the mixture resembles fine crumbs.
- In a separate cup, crack the egg, add apple cider vinegar, and then pour in enough water to fill up to 7/8 of the cup. Whisk well.
- Gradually add this liquid mixture to the flour, stirring gently with a fork. Reserve about a quarter cup of liquid and add more if needed, but be careful not to overmix.
- Dough Binding:
- Once the dough begins to come together, transfer it to a floured surface.
- Gently press the mixture, forming a solid ball. Avoid over-kneading.
- Wrap the dough ball in a damp kitchen towel and refrigerate for an hour.
- Rolling the Dough:
- Split the dough into two equal parts.
- On a well-floured surface, roll out each half, ensuring it’s large enough to hang over the edges of your pie plate by an inch or two.
- Fold the dough in half for easy transfer to the pie pan, then unfold and press it gently into the bottom and sides of the pan.
- Pie Assembly:
- For a single crust pie (like pumpkin or lemon meringue), tuck and crimp the edges.
- For a double crust pie, add your filling, then top with the second rolled-out crust. Tuck and crimp the edges of both crusts together.
- Baking:
- Follow the baking instructions specific to your pie recipe.
Notes and Tips
- Crimping Mastery: Achieving the perfect crimp takes practice, but it adds a delightful touch to your pies.
- Versatility: This recipe yields enough dough for a double crust (top and bottom). If you’re making a single crust pie, you can freeze the second half for future use.