

Step One: Combine 2 cups of flour and 3/4 teaspoon salt in a mixing bowl. No sweat.
Step Two: Take 2/3 cup (10-2/3 tablespoons) cold butter and cut it into cubes — roughly 1/2 inch or so — and throw them into the bowl with the flour. They don’t have to be perfect because . . .
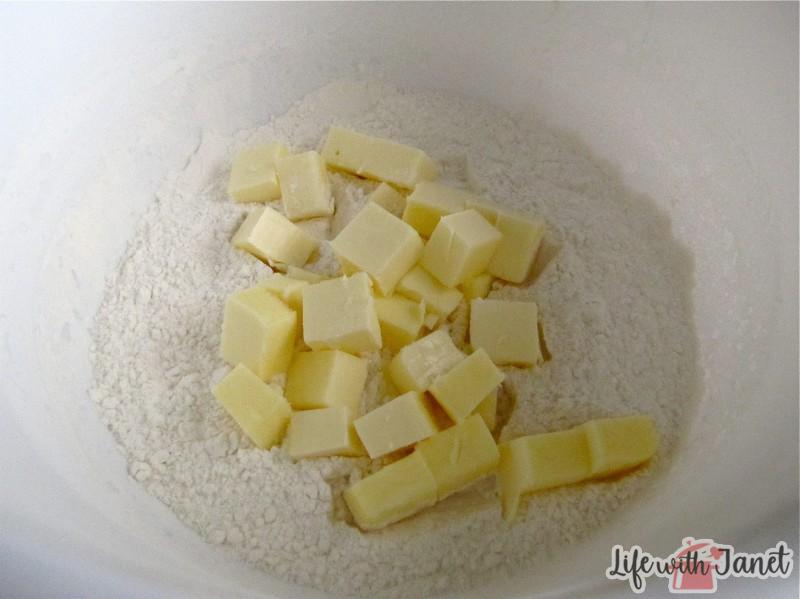
Step Three: You cut the butter into the flour. This just means breaking up the butter into smaller pieces, without blending or creaming the two together. Having pockets of cold butter in your pastry dough will result in a flakier and more tender crust.
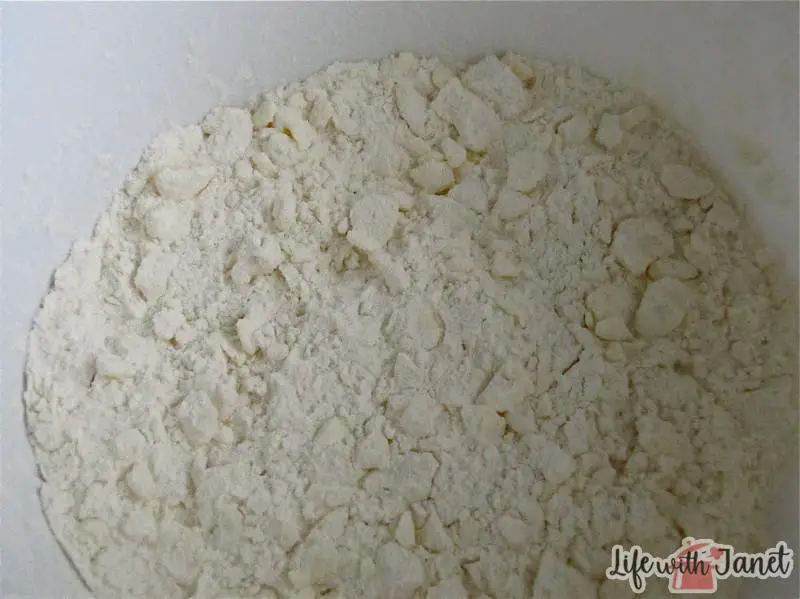
So. I use my bare fingers to flatten the chunks of butter and break up the pieces until I’ve got flakes about the size of my fingernails, and — I don’t know, maybe 1/8-inch thick. It doesn’t have to be exact. Some people do this with a pastry blender, or even a food processor, and those methods work too. I just like to be more in control, and to feel how big the butter pieces are. Now, remember our Rule #2 up there? If the heat from your hands starts to soften the butter, throw the whole bowl into the freezer for 5 minutes before continuing.
Step Four: Add 6-7 tablespoons of water, 1 tablespoon at a time, and toss the mixture lightly with a fork between each addition. You want to get enough water that the dough looks kind of shaggy, and starts to stick together, but not so much that it is actually sticky, or soggy. This is where our Rule #1 becomes really important. If you add too much water, you’ll end up with a tough pie crust.
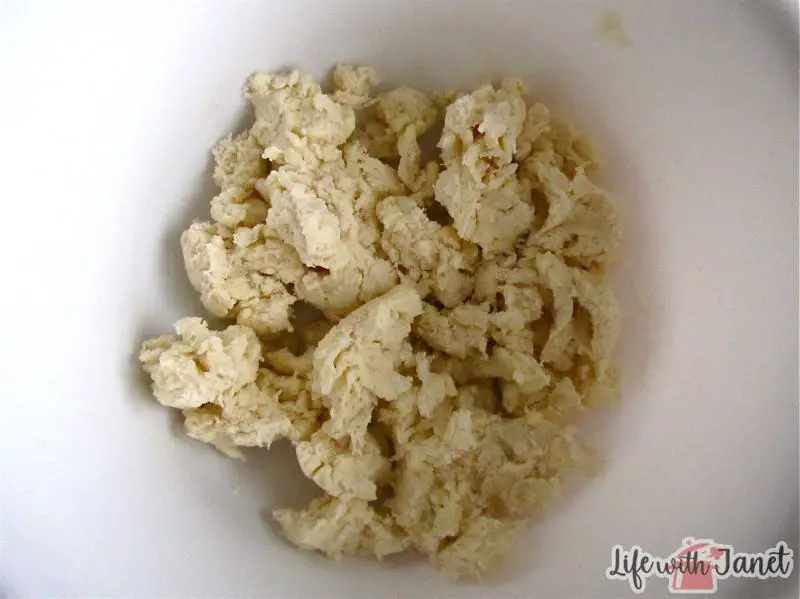
Step Five: At this point, you’ve got some shaggy dough sitting in a bowl. Congratulations! You’ve over the scariest part. Divide the dough into two balls, one slightly larger than the other. Form the balls into disks, about 5 or 6 inches in diameter. The dough should have kind of a marble-ish appearance from the pockets of butter. When you’re forming the dough, keep Rule #3 in mind. Kneading the dough will develop the gluten in the flour, which makes for a tough pie crust. The less you play with it, the better.
Wrap the disks tightly in plastic wrap and place them in the fridge for 3-4 hours, or overnight. Or even up to 2-3 days.
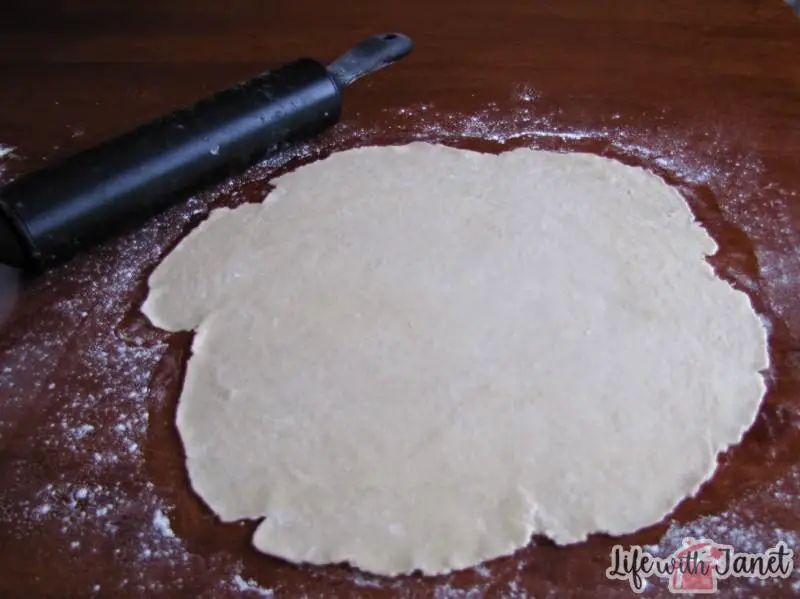
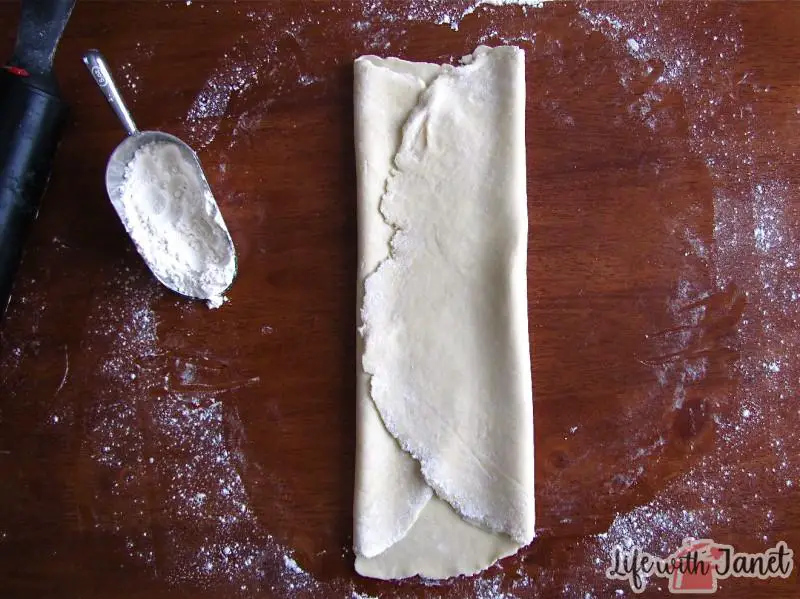
Step Six: Take the larger disk out of the fridge and let it sit at room temperature for 10 minutes. Roll the dough, on a lightly-floured surface, into a 12-inch circle. You want enough flour that the dough doesn’t stick to your surface, or your rolling pin; but if you use too much flour, it will dry out your dough and — again — tough pie crust. And remember our rule about keeping it all cold. You’ll want to work fairly quickly here.
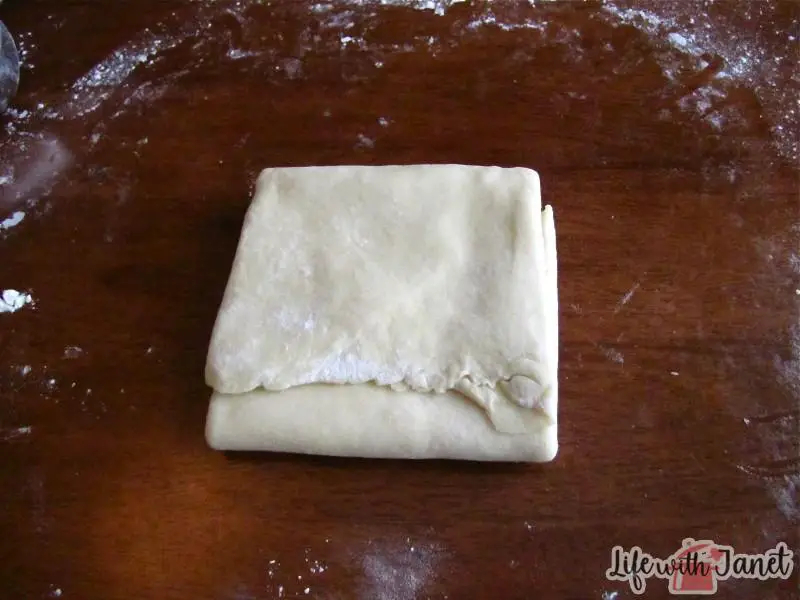
After rolling it out, fold the dough into thirds horizontally, then into thirds vertically. Re-wrap in plastic wrap and put it back into the fridge for 30-60 minutes. Repeat this step with the smaller disk. (To tell the truth, this part of the process isn’t entirely necessary, but I always do it because it creates several layers in the dough, which translates to the most awesome, flaky, puffy, tender crust in the universe. It’s totally worth the extra 30-60 minutes.)
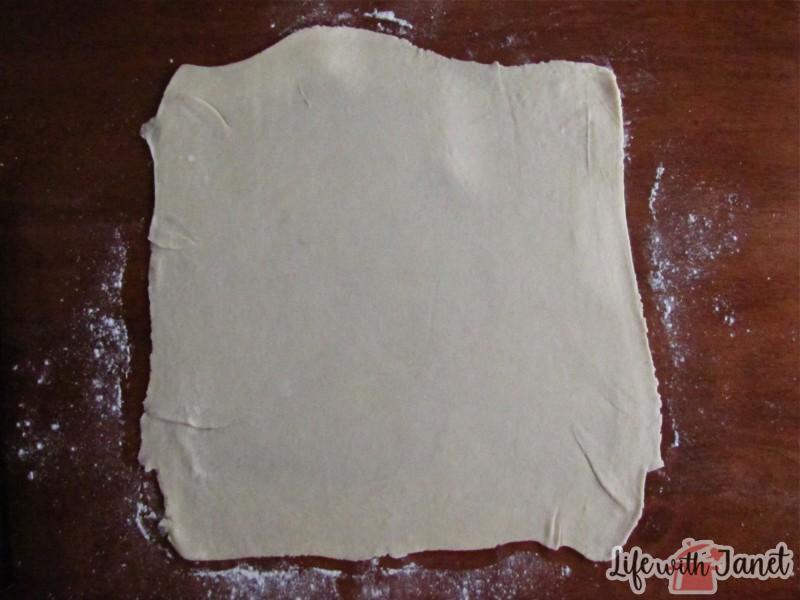
Step Seven: Once they’re sufficiently chilled, take the larger disk of pastry dough, and roll it out again, still folded up, on a lightly floured surface until it is about 12 inches in diameter. Transfer to a pie pan (I like to roll it loosely around my rolling pin, then unroll it onto the pie pan), and trim the edges 1 inch from the edge of the pan. Place the pan with the dough in the fridge, and roll out the other disk of dough into another 12-inch square.
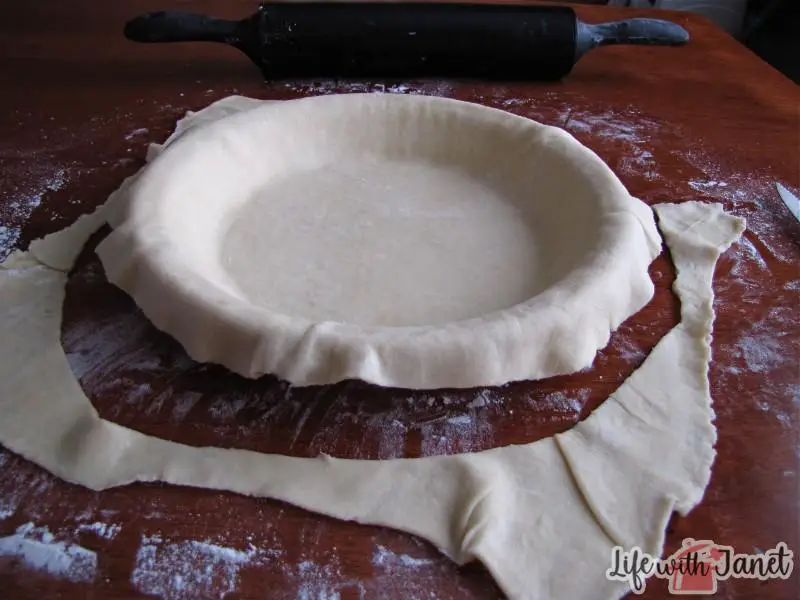
At this point, you can add the pie filling, and either throw the second piece of dough on top and cut vents for a double-crust pie, or cut it into strips to create a lattice top. Trim and flute the edges of the pie.
Step Eight: Once the pie is assembled, I like to throw it into the freezer for five minutes, just to firm up the butter again before it goes into the oven. But! Right before you throw it in the oven, don’t forget to brush it lightly with milk, and sprinkle some sugar on top. This will help it bake into a beautiful golden color with a pretty sparkle.
After about 20-25 minutes in the oven, the edge of the crust will be about as brown as you want it, so it’s a good idea to take it out and cover the edges with aluminum foil at that point. I used to mess around with strips of foil, but I’ve found a better way: Take a square of foil, about 12 inches across, and fold it into quarters. Hold on to the folded corner, and cut a 3-3/4 inch arc around that corner. Did that make sense? I don’t have a photo of this, but basically, once you unfold the foil, you’ll have a 7-1/2 inch circle cut out of the center. Then you can just place the outer piece of foil over the pie crust and gently fold the edge of the foil around the edge of the crust. Voila! No burnt pie crusts.


I take a alumn.pie pan & cut the center out.fits over the pie crust perfect.Through in dish washer for next time.So much easier than cutting foil to fit!!
I have tried these recipes and I LOVE THEM.