
Do you remember the dad in My Big Fat Greek Wedding and his obsession with Windex? …Have a zit? Put some Windex on it. Unwanted mole? Put some Windex on it. Any weird physical ailment? Put some Windex on it.
Have a stomachache? Eat some sauerkraut. Indigestion after meal? Eat some sauerkraut. Fatigue? Eat some sauerkraut. If you’re not into fermented foods yet, I think you will be soon.
Fermented foods are a really important part of our diet and have been used in many cultures as a way to preserve foods and make them more digestible. Why are fermented foods important? Here’s the deal. We all have microflora (bacteria) in our intestine which is absolutely necessary to keep us healthy.
In the body, there is “good” bacteria and “bad” bacteria and it’s important to keep the “good” bacteria thriving. Fermented foods contain populations of the “good” bacteria that help to keep the microflora balanced. This is necessary because antibiotics are so prevalent in our world (especially in modern agriculture production) and they kill the bacteria in your body, regardless of whether it is “good” or “bad.”
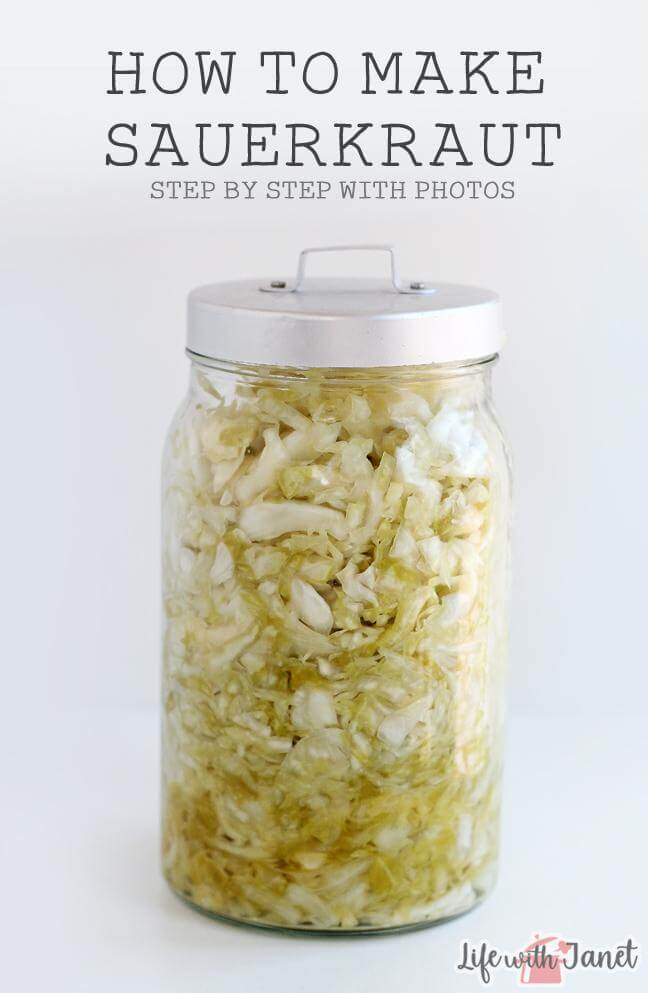
One of my favorite tutorials I’ve created on this blog is a step-by-step post on how to make kimchi at home. I love this stuff. It’s so spicy and tangy and it goes great in fried rice and spicy kimchi soup! However, a lot of folks don’t like spicy foods so sauerkraut is a fabulous alternative. Since it’s summer and cabbage is in season, I thought I’d share a step-by-step tutorial to show you how to make sauerkraut!
It’s soo easy (I promise!) and once you get the hang of it you’ll be making it all the time. And, your tastebuds (and your digestion) will thank you! So, let’s get to it!
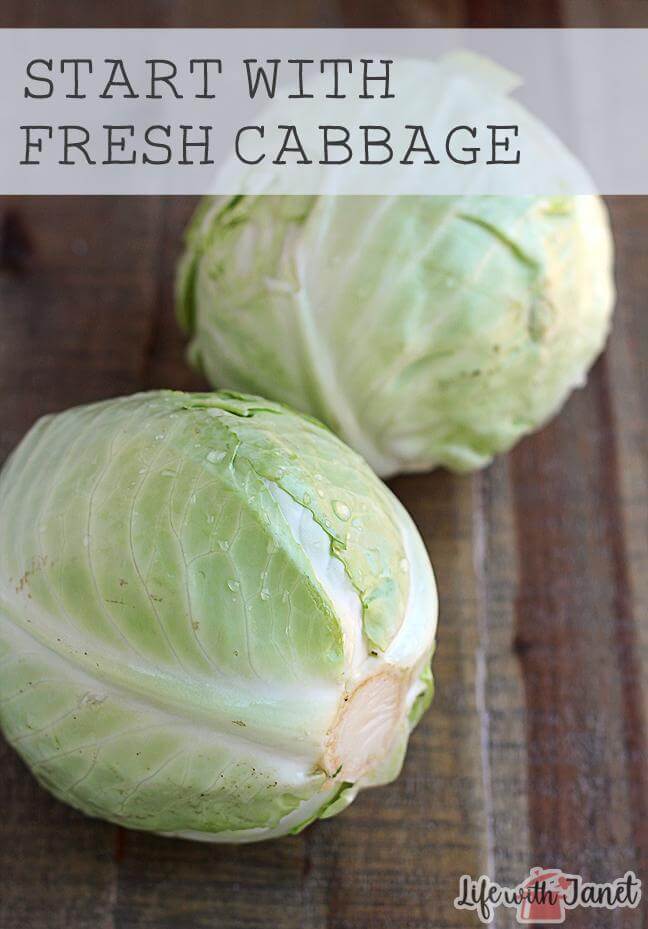
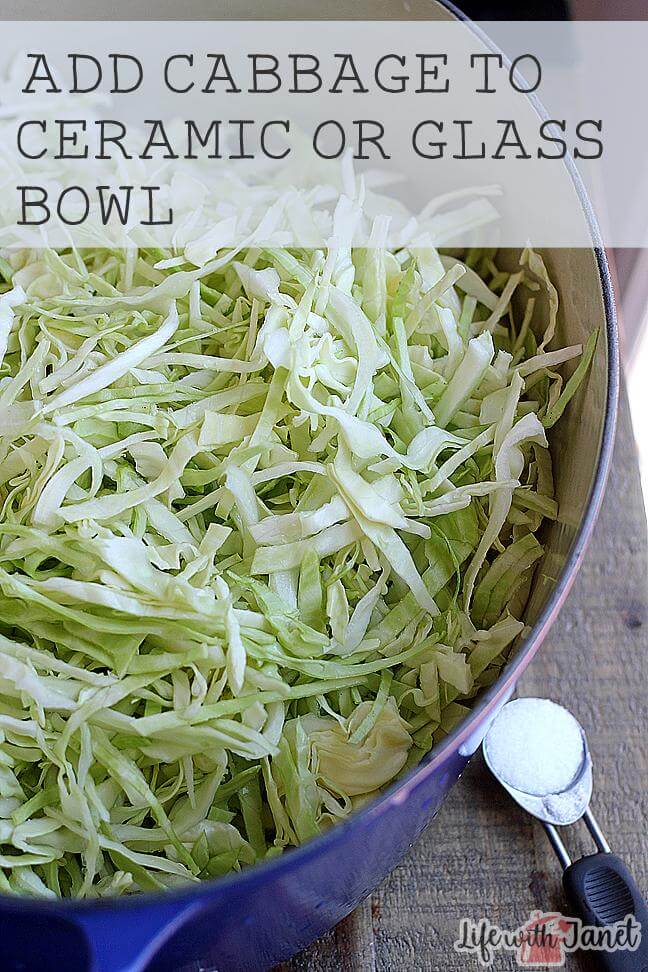
Fresh cabbage is vital to this recipe. You don’t want cabbage that’s been sitting around for weeks getting all brown. Fresh cabbage has more moisture, which makes it easier to create the brine needed for fermentation. I highly recommend buying local cabbage from a farmers market and choosing organic if possible. Rinse the cabbage to remove any dirt or debris before using.
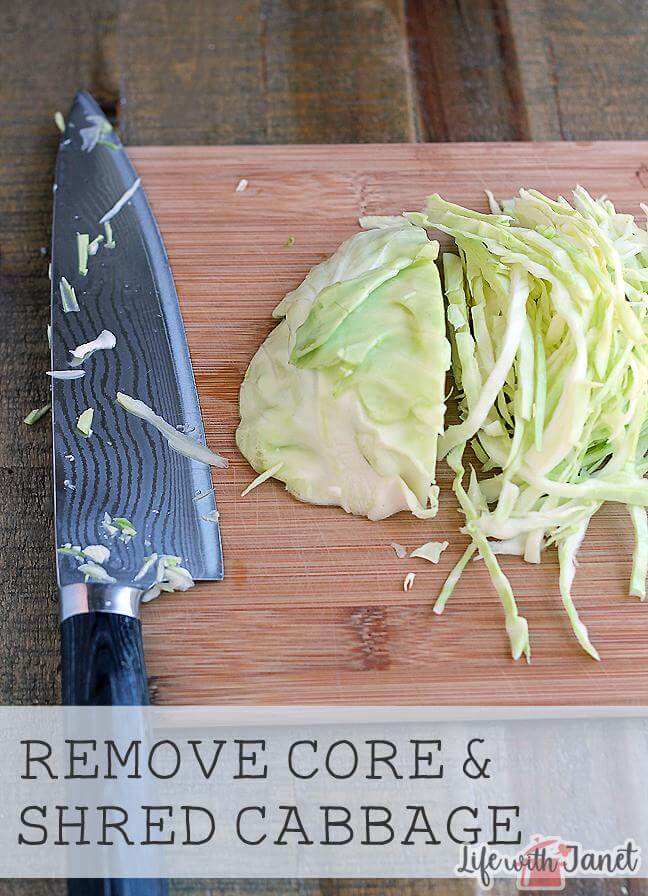
Shredding the cabbage can be done by hand or in a food processor. I was only making a small batch for this tutorial so I chose to do this by hand, but it is quicker to use a food processor if you are making a larger batch.
Fermented foods often rely on salt because salt inhibits bad bacteria and mold. Salt is especially important for making sauerkraut because salt helps draw the moisture out of the cabbage to create a brine.
There are two important things to know about salt:
1. Salt reacts with metal. For fermentation (or anytime something with salt will be sitting for a while), do not use metal bowls. Sauerkraut can be fermented in a ceramic crock or a glass jar, but do not make sauerkraut in a metal bowl or leave metal utensils sitting in the sauerkraut.
2. Do not use iodized salt because this can affect the bacteria in the fermentation process. Sea salt and kosher salt are great alternatives.
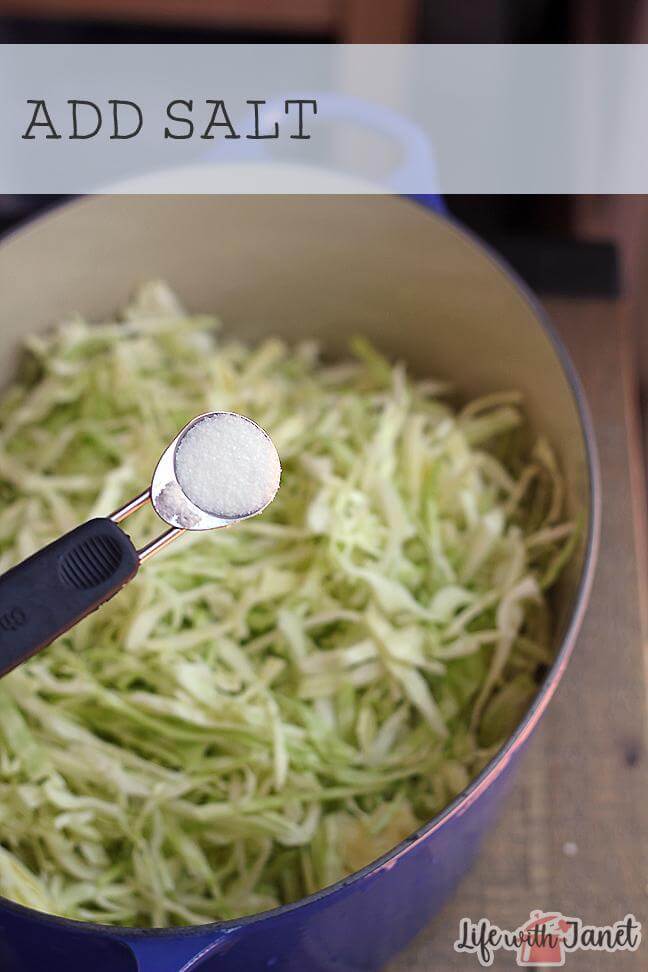
Sprinkle the salt over the cabbage. A good rule of thumb is about 1 – 2 teaspoons of salt per pound of cabbage. I like my sauerkraut less salty so I’ve even used as little 1/2 teaspoon of salt per pound of cabbage.
You do need a fair amount of salt because salt is an important part of the fermentation process. If you are making your first batch, I would recommend starting with at least 1 – 2 teaspoons and then decreasing it in your next batch if you found this ratio too salty. I know some recipes call for a tablespoon of salt per pound of cabbage so my version is already less-salty than other recipes out there. Once you try making a batch you can see how you like yours!
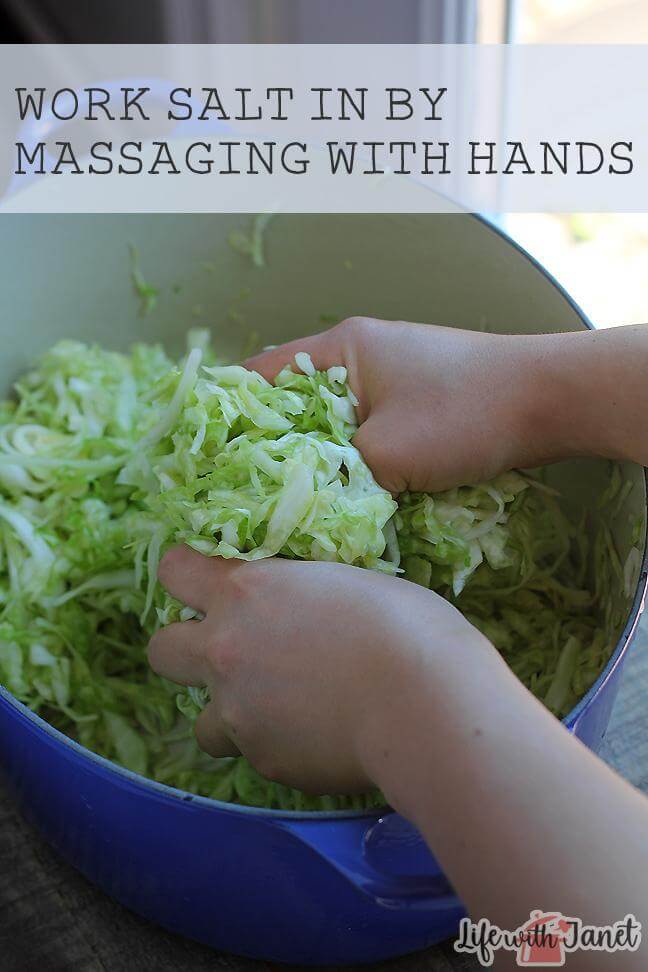
As I mentioned above, the salt’s job is to draw moisture out of the cabbage to create a brine (aka salty liquid). One of the ways to speed up this process is massage the cabbage after you have sprinkled on your salt. Using clean hands, massage the cabbage to work the salt in and help break down the cellular walls.
Then leave the cabbage to sit for about an hour. At that point, the cabbage should be much softer and there should be a fair amount of liquid (brine) in your bowl.
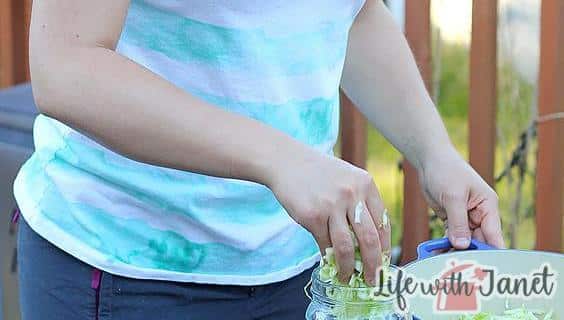
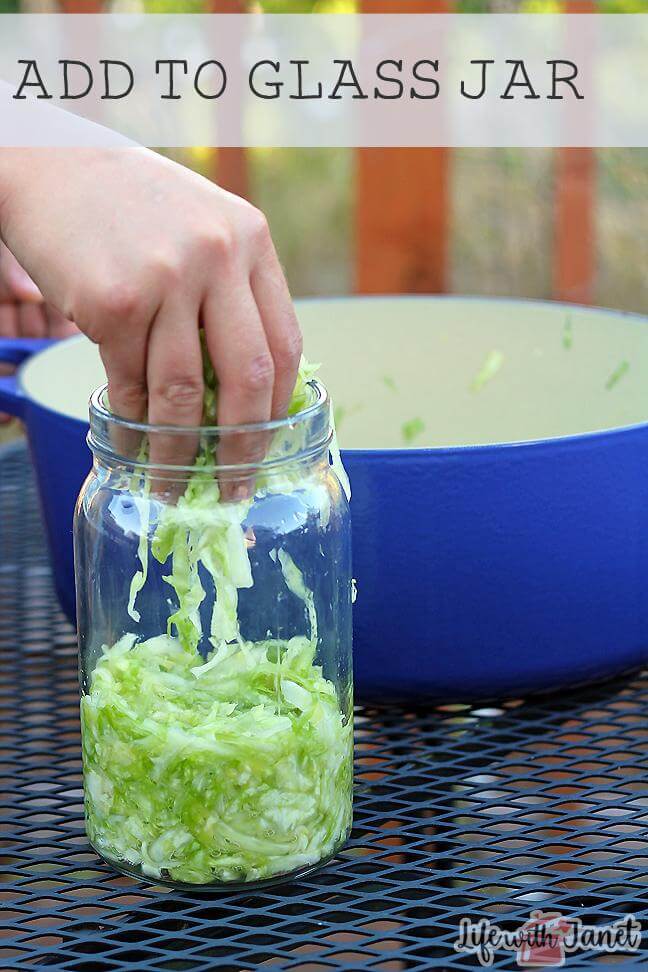
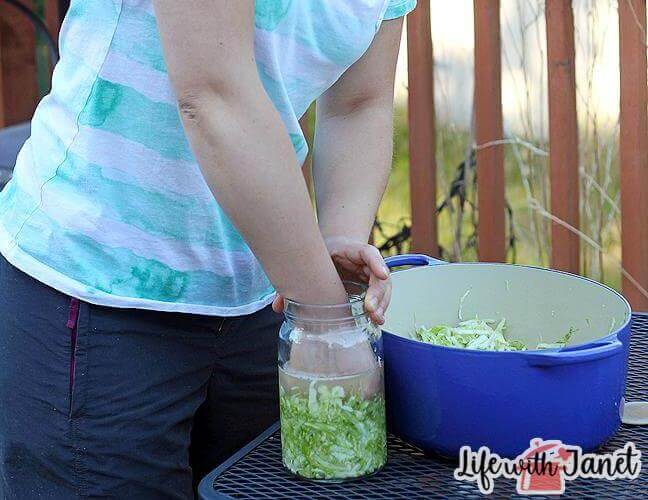
The next step involves adding your cabbage to a glass jar or ceramic crock. I have a collection of canning jars and glass jars from IKEA that I really love for fermenting. You want to make sure your jar is clean (it doesn’t need to be sterilized) and has a wide enough mouth that you can stick your hand it in. You can also buy a ceramic crock specifically made for fermenting, but I like the idea of being able to see my food so I tend to stick with glass. It’s a personal preference whatever works best for you.
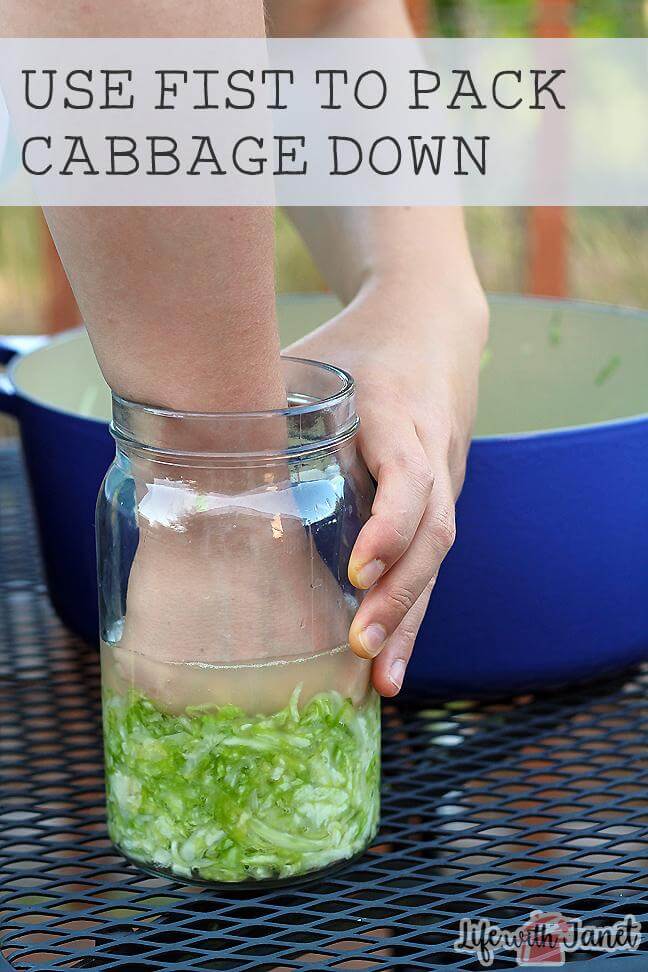
If you learn anything from this tutorial about making sauerkraut, please let it be this: your cabbage must stay submerged in the brine the entire time. The brine is what protects your cabbage from mold because mold will form if the cabbage is exposed to air for a period of time.
In order to keep the cabbage submerged under the brine, after you add a bit of cabbage to your jar, use your fist to pack it down. You can see in the photo above that packing it down causes the brine to rise above the cabbage, which is exactly what you want. It is easiest to add a few handfuls of cabbage and then pack it down as you go.
P.S. When making sauerkraut, it’s absolutely essential that you wear your new big glasses. Okay, it’s really not, but I’m obsessed with mine right now.
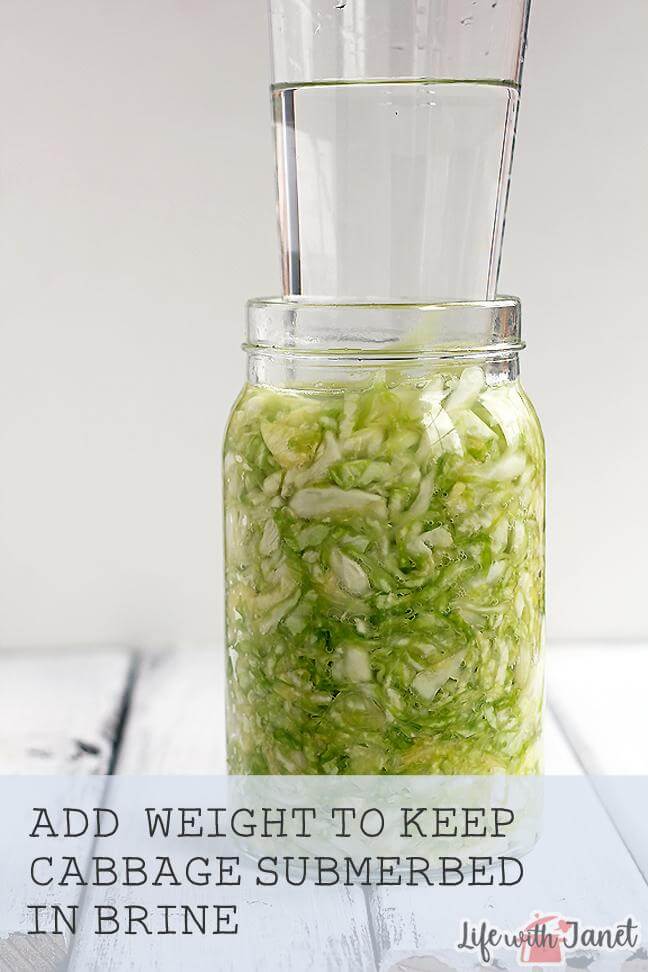
After you have your cabbage all packed into the jar, you’ll want to add something to keep the cabbage submerged under the brine. I typically use a glass of water because it fits nicely inside of the jar. If you’re using a large jar or a ceramic crock, you can also use a plate to keep everything submerged.
As the cabbage ferments and sits, more liquid will continue to be drawn out of the cabbage and it might cause the jar to overflow. I usually put my jar on top of a large plate or in a ceramic bowl to catch any stray liquid. (Remember: don’t use a metal bowl because it will react with the salt.)
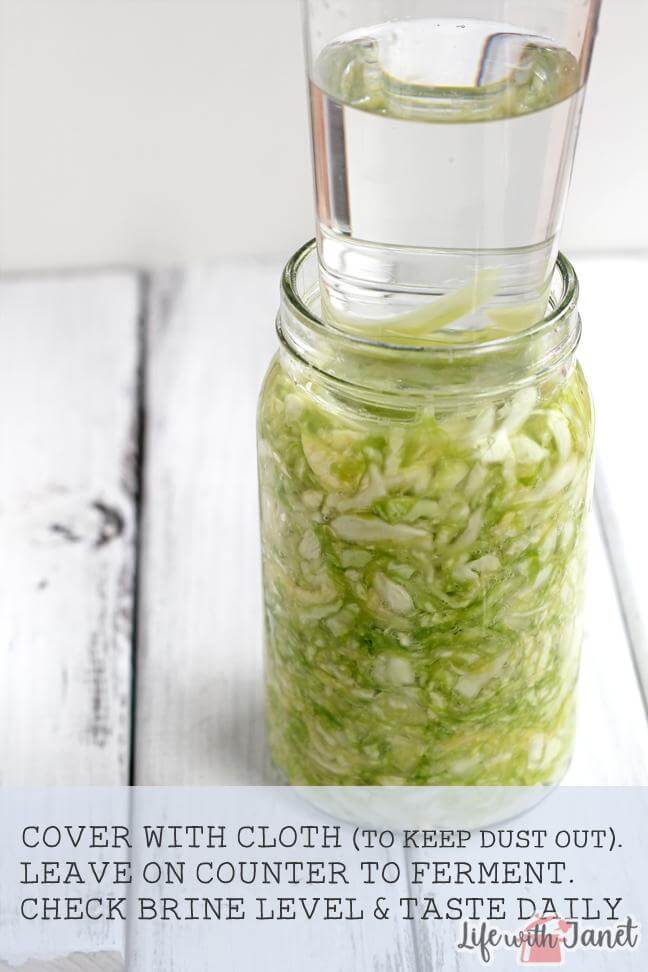
Then, make sure to cover your jar with a cloth. This helps keep dust and pests out (including my cats!)
Allow the sauerkraut to ferment for at least 24 hours and then taste it. Be sure to check the brine level and make sure the cabbage stays submerged. I usually ferment it in my kitchen and this time of year, my kitchen stays between 70 – 80 degrees F so I usually only need to ferment my sauerkraut for about 3 days and then it’s perfectly tangy for me. A stronger taste will develop the longer it sits so once you try making your first batch, you’ll come to learn how long you like yours to ferment.
Once the sauerkraut has achieved the desired taste, store it in the fridge. As long as it stays submerged below the brine it will easily keep for months.
And that’s it! Now you’re off to go make sauerkraut!
For folks new to sauerkraut, if you have any questions, please leave a comment below and let me know! And, for folks who have been making fermented foods at home, what are some of your tips for making sauerkraut?
Cheers,


When how if you want to can the kraut?