

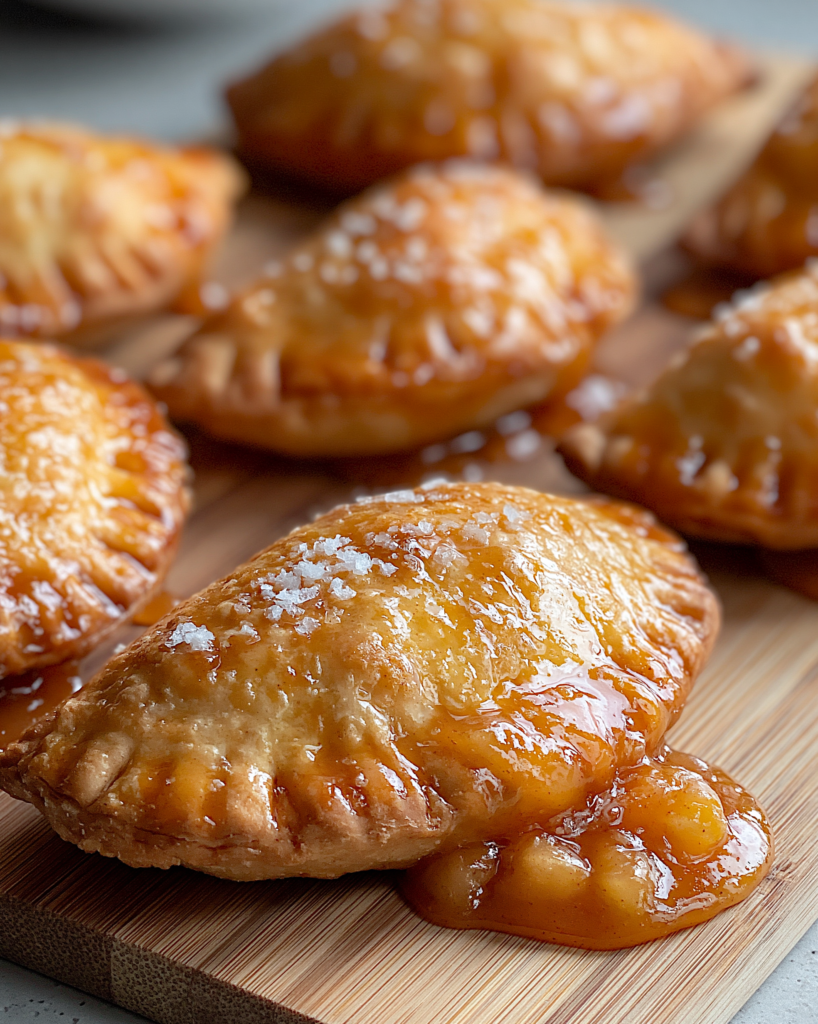
These Fried Apple Pies are the ultimate handheld comfort food dessert. Warm, spiced apple filling wrapped in a golden, crispy pastry shell and drizzled with a simple vanilla glaze — they are so good and so easy to make at home!
A Homemade Fried Pie Recipe You’ll Make Again and Again
If you have ever had one of those little fried apple pies from a fast food window, you already know the magic. But I promise you — homemade is a thousand times better. The filling is warm and cinnamony, the dough fries up perfectly golden and crisp, and that glaze drizzled on top is everything. This is one of those recipes that sounds fancier than it actually is. Once you make these, you will completely understand why they disappear so fast!
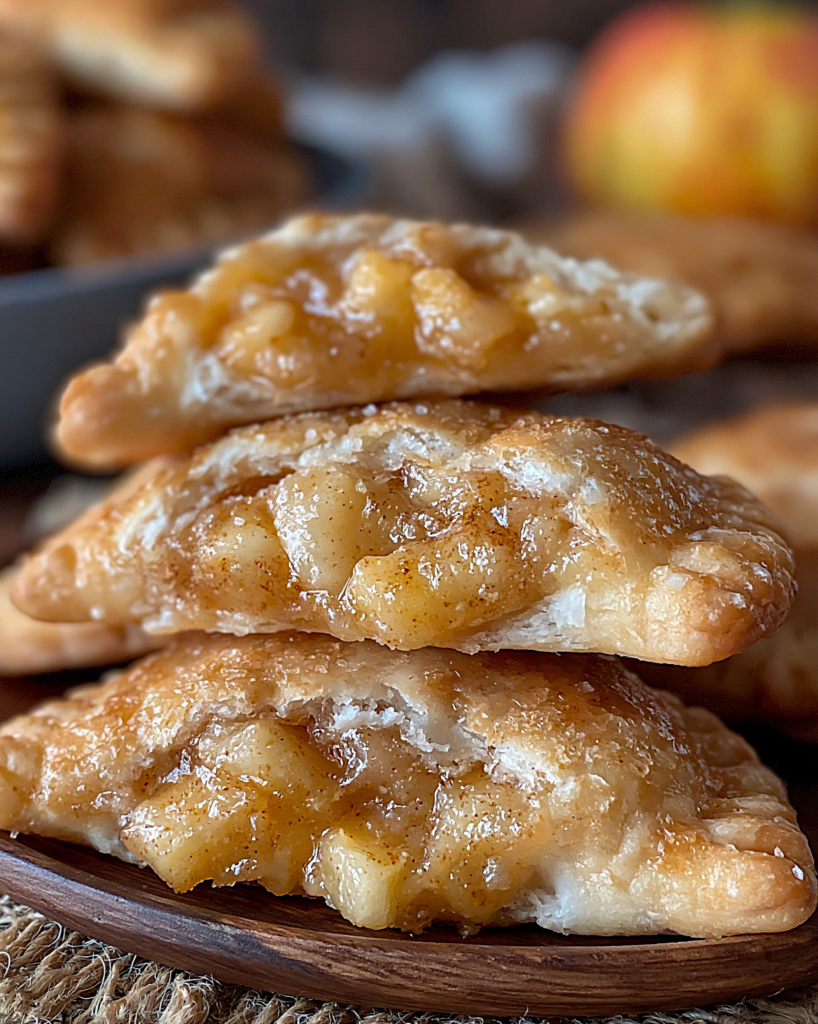
I especially love making these in the fall when apples are at their best, but honestly? My family requests these year-round. Serve them warm with a scoop of vanilla ice cream and I am a very happy camper!
“I made these for a family gathering and they were gone in about ten minutes flat. Everyone asked for the recipe. These are absolutely incredible and so easy to follow. Thank you!”
— Carolyn
Frequently Asked Questions
What kind of apples work best for this recipe?
I love using Granny Smith apples because they hold their shape really well when cooked and that slight tartness balances the sweetness of the filling perfectly. Honeycrisp or Gala apples also work great. Really, you can use whatever apples you have on hand or what is in your budget — just try to avoid anything too soft like Red Delicious, as they can turn mushy.
Can I use store-bought pie crust dough?
Absolutely! A store-bought refrigerated pie crust works just fine here and saves a lot of time. Just roll it out a bit thinner if needed so your circles are the right size. Homemade dough does give you that extra flaky texture, but on a busy weeknight, store-bought is totally the way to go. No judgment here!
Can I bake these instead of frying them?
You can! Brush them with an egg wash and bake at 375°F for about 20-25 minutes until golden brown. They will not have that same deep-fried crispy shell but they are still really delicious. It is a great option if you prefer a lighter result.
Can I make the filling ahead of time?
Yes! You can make the apple filling up to 2 days ahead of time. Just let it cool completely, put it in a covered container, and store it in the refrigerator. When you are ready to assemble and fry, pull it out and go. It makes the whole process so much faster.
Can these be frozen?
Yes! You can freeze them before frying. Assemble the pies, place them on a parchment-lined baking sheet, and freeze until solid. Then transfer to a freezer-safe bag and keep for up to 3 months. Fry straight from frozen, just add a couple of extra minutes to the cooking time. You can also freeze them after frying — just reheat in the oven at 350°F until warmed through and crispy again.
How do I store leftover fried apple pies?
Allow them to cool completely and then store in a covered container at room temperature for up to 2 days. If you need to keep them longer, store them in the refrigerator for up to 4 days and reheat in the oven or air fryer to bring that crispiness back. I do not recommend the microwave — it will make the shell soft and a little sad.
What oil is best for frying?
You want to use an oil with a high smoke point. Vegetable oil or canola oil are my go-to choices here. They are neutral in flavor so they will not interfere with that beautiful apple-cinnamon filling at all.
Ingredients Needed: (See Recipe Card Below for the Full Recipe)
- all-purpose flour — this is for the homemade dough. If you are using store-bought refrigerated pie dough, you can skip the dough ingredients entirely. Just make sure you do not pack your measuring cup when measuring flour.
- cold butter and cold water — keeping everything cold is the secret to getting a really flaky, tender dough. Do not skip this step.
- Granny Smith apples — peeled, cored, and diced small. You want them in small pieces so they fit nicely inside the little pies and cook all the way through.
- granulated sugar and light brown sugar — using both gives the filling a deeper, more caramel-like flavor. The brown sugar is packed when measuring.
- cinnamon and nutmeg — the classic warm spice combination that makes everything smell amazing. Feel free to add a pinch of allspice or cloves if you like a spicier filling.
- lemon juice — just a small amount brightens up the whole filling and balances the sweetness.
- cornstarch — this thickens the filling so it stays put inside the pies and does not leak out during frying. It is an important one, so do not skip it.
- salted butter — for cooking the apple filling. It adds richness and a little nutty flavor as it cooks down.
- egg — this is your egg wash to seal the edges of the pies shut so the filling stays inside while frying.
- vegetable oil — for frying. You need enough to fill your pan about 2 inches deep.
- powdered sugar, milk and vanilla extract — these three things come together quickly to make the simple glaze that gets drizzled over the top. It is completely optional but I really think it takes these over the top.
How to Make Fried Apple Pies
Make the dough. In a large bowl, whisk together flour, sugar and salt. Add cold cubed butter and use a pastry cutter (or two forks) to cut the butter into the flour until the mixture looks like coarse crumbs with some pea-sized butter pieces remaining. Those little butter pieces are exactly what you want — they create the flakiness! Drizzle in the cold water, one tablespoon at a time, mixing gently with a fork just until the dough comes together. Do not overwork it. Shape into a flat disk, wrap in plastic wrap and refrigerate for at least 30 minutes.
Make the apple filling. In a medium saucepan over medium heat, melt butter. Add the diced apples, both sugars, cinnamon, nutmeg and lemon juice. Stir to combine and cook for about 5-7 minutes until the apples start to soften. Stir the cornstarch together with 2 tablespoons of water until smooth, then pour it into the apple mixture. Stir and cook for another 1-2 minutes until the filling thickens up nicely. Remove from heat and allow to cool completely before assembling. This step is really important — hot filling in the dough will make it too soft to work with.
Assemble the pies. On a lightly floured surface, roll the chilled dough out to about ⅛-inch thickness. Use a 4 to 5-inch round cutter (or the rim of a bowl) to cut out circles. Re-roll the scraps to get as many circles as possible. Beat the egg with a tablespoon of water to make your egg wash. Brush the edges of each circle with the egg wash. Place about 1½ to 2 tablespoons of the cooled apple filling onto one half of each circle — do not overfill or they will burst open! Fold the dough over the filling to form a half-moon shape. Press the edges firmly together with your fingers, then crimp with a fork to seal them completely. Make sure there are no gaps — that seal is what keeps all that delicious filling where it belongs.
Fry the pies. In a large, deep skillet or heavy-bottomed pot, heat about 2 inches of vegetable oil over medium heat until it reaches 350°F. A thermometer is really helpful here. Working in batches of 2 to 3 at a time (do not crowd the pan), gently lower the pies into the hot oil. Fry for about 2-3 minutes per side until deep golden brown and crispy. Remove with a slotted spoon and place on a paper towel-lined plate to drain. Allow to cool for just a few minutes before glazing.
Make the glaze and serve. Whisk together powdered sugar, milk and vanilla extract in a small bowl until smooth. Drizzle over the warm fried pies and serve right away. The glaze is going to settle into all those beautiful crimped edges and it is absolutely wonderful.
Pro Tips for the Best Fried Apple Pies
- Keep your dough cold. This is the single most important rule when it comes to flaky pastry. If at any point your dough feels warm or greasy while you are working with it, pop it back in the refrigerator for 10-15 minutes. Cold butter in dough is what creates those flaky layers.
- Let the filling cool completely. I know it is tempting to rush, but filling that is still warm will soften your dough and make it really difficult to seal. Give it a full 20-30 minutes on the counter or speed things up by putting it in the refrigerator for about 15 minutes.
- Do not skip the fork crimp. Pressing and then crimping with a fork creates a double seal that holds up really well during frying. If you only press with your fingers, you risk the pies opening up in the oil — and that is a mess you do not want to deal with!
- Watch your oil temperature. If the oil is too hot, the outside will brown before the inside is warmed through. Too cool and the pies will absorb a lot of oil and turn greasy. Keeping it right around 350°F is the sweet spot. A simple candy or fry thermometer makes this totally foolproof.
- Fry in small batches. Crowding the pan drops the oil temperature quickly and leads to uneven cooking. Two to three pies at a time is plenty.
What to Serve with Fried Apple Pies
These are honestly perfect all on their own with just that simple vanilla glaze, but if you want to make them extra special, serve them warm with a big scoop of vanilla ice cream. The contrast of the warm, crispy pie with cold, creamy ice cream is really something. A dusting of powdered sugar and a sprinkle of cinnamon on top also makes them look really pretty if you are serving these for guests. A drizzle of caramel sauce is another option that my family absolutely loves!

Fried Apple Pies
Ingredients
Method
- In a large bowl, whisk together 2 ½ cups all-purpose flour, 1 tablespoon granulated sugar and ½ teaspoon salt. Add ½ cup cold cubed butter and cut in with a pastry cutter or two forks until the mixture resembles coarse crumbs with pea-sized pieces of butter throughout. Drizzle in cold water, 1 tablespoon at a time, mixing gently with a fork after each addition until the dough just comes together. Shape into a flat disk, wrap tightly in plastic wrap and refrigerate for at least 30 minutes.
- In a medium saucepan over medium heat, melt 2 tablespoons of butter. Add the diced apples, 3 tablespoons granulated sugar, 2 tablespoons brown sugar, 1 teaspoon cinnamon, ¼ teaspoon nutmeg and 1 teaspoon lemon juice. Stir to combine and cook for 5–7 minutes, stirring occasionally, until apples are softened. Whisk together 1 tablespoon cornstarch with 2 tablespoons cold water until smooth. Pour into the apple mixture and stir. Cook for 1–2 more minutes until the filling is thick and glossy. Remove from heat and allow to cool completely (about 20–30 minutes).
- On a lightly floured surface, roll out the chilled dough to about ⅛-inch thickness. Cut out 10 circles, each about 4½–5 inches in diameter, re-rolling scraps as needed. Beat 1 egg with 1 tablespoon water to make egg wash.
- Brush the edges of each dough circle with egg wash. Place 1½ to 2 tablespoons of cooled apple filling in the center of one half of each circle. Fold the dough over to create a half-moon shape. Press edges firmly together, then crimp all the way around with a fork to seal completely. Repeat with all remaining dough circles and filling.
- Pour vegetable oil into a large, deep skillet to a depth of about 2 inches. Heat over medium heat until oil reaches 350°F on a fry thermometer. Working in batches of 2–3, gently lower the pies into the hot oil. Fry for 2–3 minutes per side until deep golden brown and crispy. Remove with a slotted spoon and transfer to a paper towel-lined plate. Repeat with remaining pies, allowing oil to return to 350°F between batches.
- While the pies cool slightly, whisk together 1 cup powdered sugar, 2–3 tablespoons milk and ½ teaspoon vanilla extract in a small bowl until smooth. Add milk a little at a time until you reach a drizzleable consistency. Drizzle glaze generously over the warm pies and serve right away.


What recipe do we use for the glaze?
Typo—you have “chilles” shorting when it should be “chilled”!!!
definitely chilled expecting to bake not fried but will try
I use a 29oz can sliced peaches drained, they made wonderful fried peach pies, using your recipe.. I also made some apple, but like the peach better
Where do the canned biscuits come in?
In the steps for the dough,” moisten flour salt mixture with tablespoon”, I assume water?