The iconic Red Velvet cake has a rich history that many might find intriguing. While there’s debate about its exact origins, its popularity surged around the late 1930s. The cake’s unique reddish-brown hue originally came from the reaction between Dutch cocoa, vinegar, baking soda, and buttermilk. This chemical reaction resulted in a funky color change, transforming the cake from brown to reddish-brown.
However, most of today’s cocoa powder contains an alkalizing agent, neutralizing much of the acidity and, consequently, the color-changing properties. This is why modern Red Velvet cakes often rely on food coloring to achieve their vibrant red shade. The cake’s name, “Red Velvet,” doesn’t just refer to its color but also its velvety texture, which sets it apart from other cakes.
Interestingly, Red Velvet isn’t just a chocolate cake with food coloring. While it contains cocoa, it’s not in amounts that would classify it as a chocolate cake. The cocoa taste is usually very mild, if detectable at all. Instead, the cake boasts flavors of sweet vanilla, tangy buttermilk, mild cocoa, and butter.
For those interested in trying a twist on the classic Red Velvet, Red Velvet Cinnamon Rolls offer a delightful variation worth exploring.
The Unique Taste and Texture of Red Velvet Pound Cake
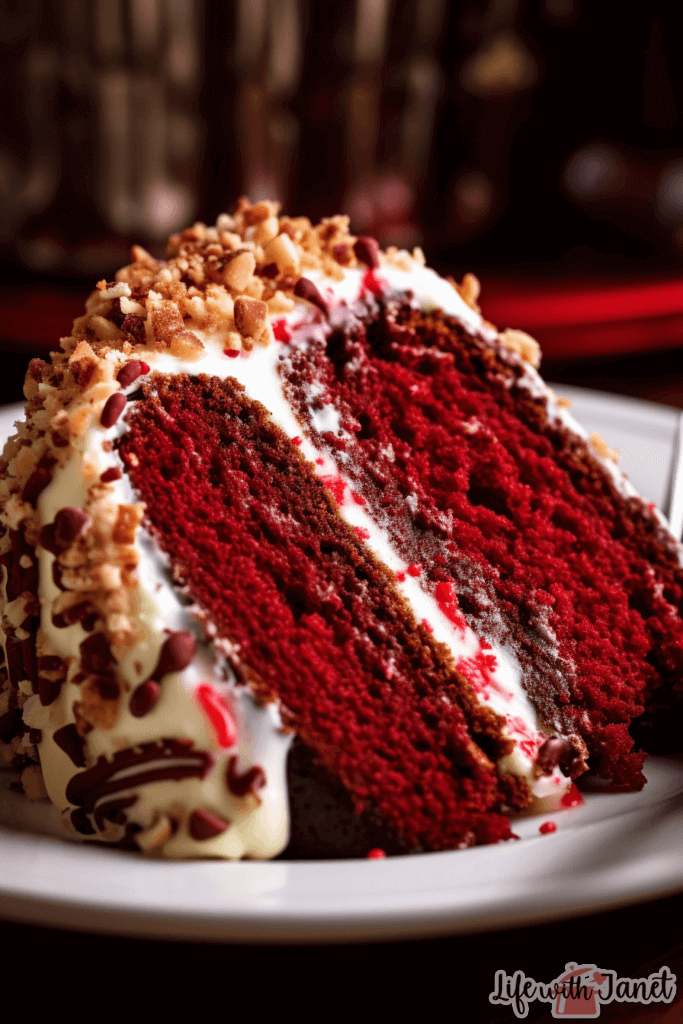
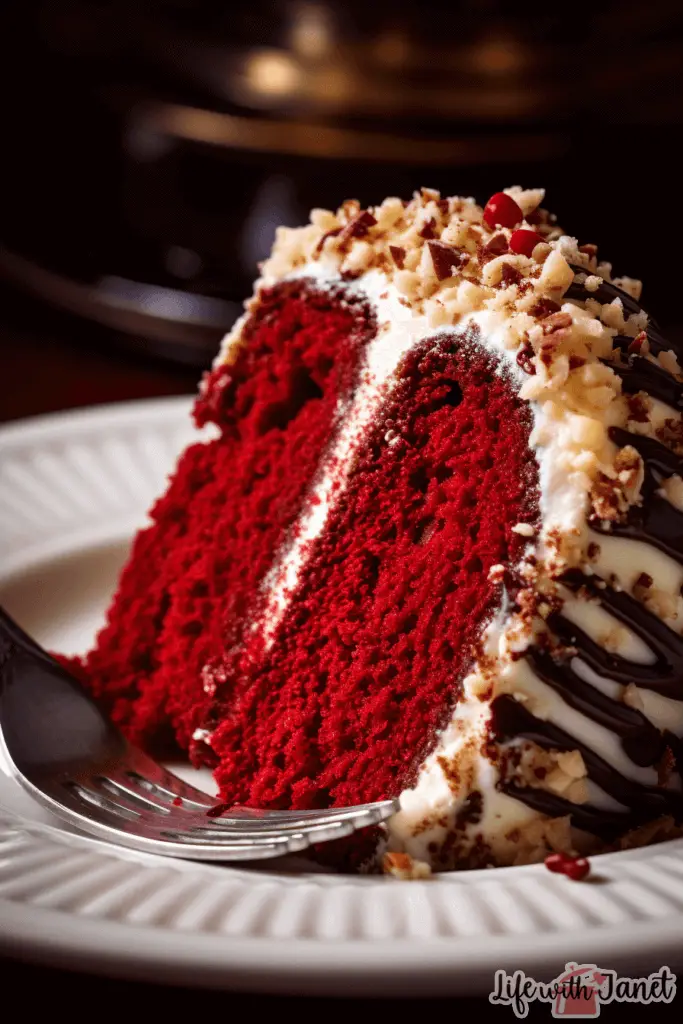
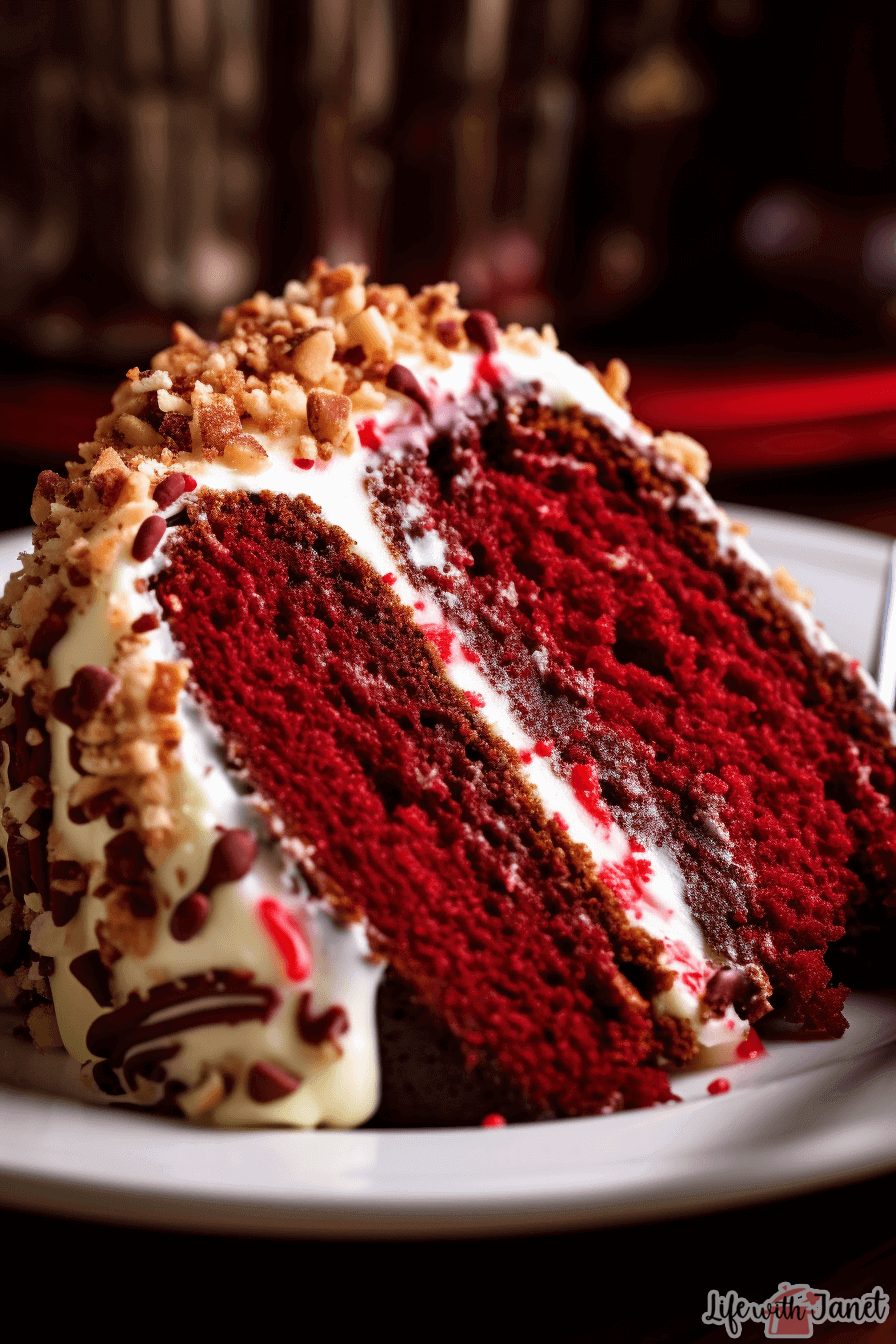
Red Velvet Pound Cake stands out not just for its vibrant hue but also for its distinct taste and texture. Unlike most cakes that use water or milk, Red Velvet incorporates buttermilk and vinegar, resulting in a light, soft texture. This combination gives the cake its signature “velvety” feel, which is where it gets its name.
The flavor profile of Red Velvet is also unique. While many might assume it’s just a chocolate cake with food coloring, this isn’t the case. Yes, it contains cocoa, but in such minimal amounts that the cocoa flavor is often barely noticeable. Instead, the cake offers a harmonious blend of sweet vanilla, tangy buttermilk, mild cocoa, and rich butter.
This cake’s taste is so distinct that if you were to ask several people to describe it, you’d likely receive a variety of answers. Some might emphasize the tanginess from the buttermilk, while others might highlight the subtle cocoa undertones.
For those who love the taste of Red Velvet but want to try it in a different form, the Red Velvet Cheesecake is a must-try. This dessert combines the classic flavors of Red Velvet with the creamy richness of cheesecake, resulting in a treat that’s truly divine.
The Science Behind Red Velvet Pound Cake’s Color and Flavor
The vibrant red hue of the Red Velvet Pound Cake is one of its most distinguishing features. But have you ever wondered why it’s red? The answer lies in its history and the ingredients used. Originally, the reddish-brown color of the cake came from a chemical reaction between Dutch cocoa, vinegar, baking soda, and buttermilk. This combination caused the cake to undergo a color change, turning it from brown to a unique reddish-brown.
However, with changes in the processing of cocoa powder over the years, this natural color change became less pronounced. Most of today’s cocoa powder contains an alkalizing agent, which neutralizes much of its acidity. As a result, the natural color-changing properties of the cocoa are diminished. To achieve the bright red color we associate with Red Velvet today, food coloring is often added.
In terms of flavor, Red Velvet is a delightful enigma. It’s not a chocolate cake, even though it contains cocoa. The cocoa is present in such small amounts that its flavor is often very mild, if detectable at all. Instead, the cake is characterized by a blend of sweet vanilla, tangy buttermilk, mild cocoa, and butter. This combination of ingredients gives Red Velvet its unique taste, setting it apart from other cakes.
Tips and Variations for the Perfect Red Velvet Pound Cake
Achieving the perfect Red Velvet Pound Cake requires a blend of the right ingredients, techniques, and a touch of love. Here are some expert tips to ensure your cake turns out perfectly every time:
- Pan Choice: While the recipe suggests using regular bread pans, you can also opt for a bundt pan. Just ensure you grease it well to prevent sticking.
- Room Temperature Eggs: Starting with room temperature eggs is crucial. At this temperature, the yolks break up more easily, ensuring a smoother mix and a better crumb.
- Baking Time: Patience is key. Depending on various factors like altitude and oven differences, baking can take up to 90 minutes. However, avoid overcooking. The cake is ready when a toothpick inserted comes out clean.
- Cooling: Resist the temptation to remove the cake from the pan immediately after baking. Letting it cool in the pan reduces the risk of it breaking.
- Storage: For optimal flavor, store the pound cake at room temperature in an airtight container. It remains fresh for 4-5 days. If refrigerated, it can last for 6-7 days, but the flavor is best at room temperature.
- Freezing: If you wish to save some for later, the pound cake freezes exceptionally well. Wrap it tightly in plastic wrap, then in foil, and store in a freezer bag for up to 6 months.
With these tips in hand, you’re well on your way to creating a Red Velvet Pound Cake that’s sure to impress!
Storing and Preserving Your Red Velvet Pound Cake
After investing time and effort into baking the perfect Red Velvet Pound Cake, it’s essential to store it correctly to maintain its freshness and flavor. Here’s a guide to ensure your cake remains as delightful as the day you baked it:
- Room Temperature Storage: The ideal way to store your pound cake is at room temperature. Place it in an airtight container, and it will stay fresh for 4-5 days. This method preserves the cake’s flavor and texture.
- Refrigeration: If you prefer, you can refrigerate the pound cake. In this case, it can last for 6-7 days. However, for the best flavor experience, allow it to come to room temperature before serving.
- Freezing: The Red Velvet Pound Cake is freezer-friendly. To freeze, wrap the cake tightly in plastic wrap, followed by a layer of foil. Place it in a freezer bag, ensuring all air is removed. Stored this way, the cake can last for up to 6 months. When you’re ready to enjoy it, let it thaw at room temperature.
- Avoiding Moisture: Moisture is the enemy of freshness. Ensure your storage container is completely dry before placing the cake inside. If using a cake dome, ensure it’s free from condensation.
- Serving: If you’ve refrigerated or frozen your cake, let it come to room temperature before slicing. This ensures the best texture and flavor.
- Leftovers: If you’ve sliced more than you can eat, store the remaining slices in an airtight container to prevent them from drying out.
With these storage tips, you can enjoy your Red Velvet Pound Cake over several days, savoring its rich flavors and moist texture with each bite.
Red Velvet Pound Cake: A Rich Delight
Ingredients
Method
- Oven Preparation: Set your oven to preheat at 325°F (163°C).
- Pan Preparation: Take two standard bread pans. Spray them generously with cooking spray and give them a light flour dusting to ensure the cake doesn’t stick.
- Mixing the Batter: Start by whisking the eggs briskly until they turn foamy. Gradually add in the remaining ingredients, ensuring a smooth blend. Be cautious not to overdo the mixing to retain the cake’s texture.
- Pouring the Batter: Evenly distribute the cake batter into the two prepared loaf pans.
- Baking: Place the pans in the oven and bake for 60-90 minutes. The baking time might vary based on the oven’s efficiency and altitude. The cake is ready when a toothpick inserted into its center comes out clean.
- Cooling: Once baked, let the cake cool in the pans. After it has cooled down, you can easily remove it from the pans.