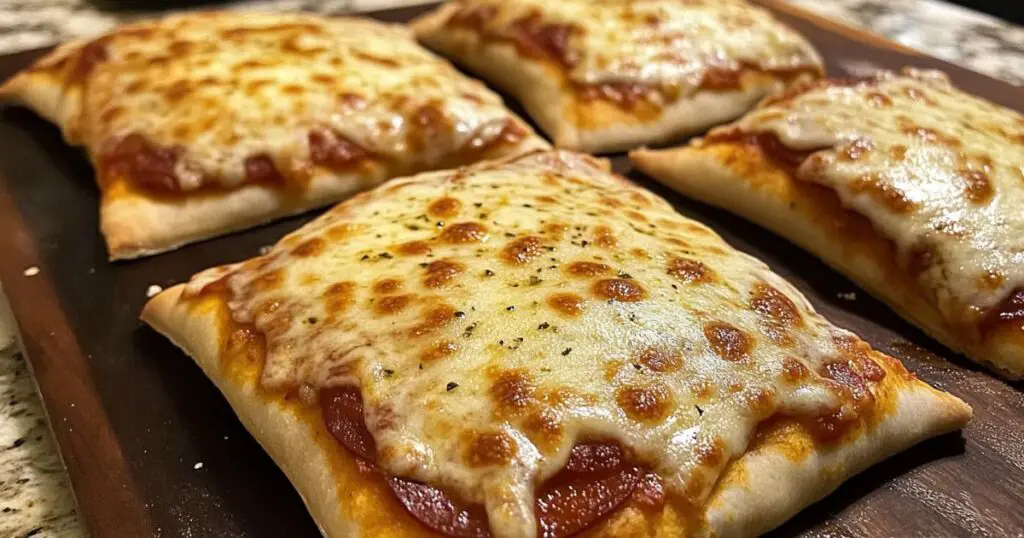
These homemade Pepperoni and Cheese Calzones are so satisfying and delicious! You can make these Italian-inspired pockets so easily and there’s no need for delivery pizza!
A CROWD-PLEASING MEAL THAT’S EASIER THAN YOU THINK
Pepperoni and Cheese Calzones are the perfect way to bring pizzeria flavors into your home kitchen! This recipe is wonderfully simple, using basic ingredients that transform into something special when baked to golden perfection. You don’t need any special skills to create these delicious pockets of cheesy goodness!
I’ve always loved the idea of calzones as a fun alternative to pizza night. There’s something so satisfying about cutting into that crispy exterior to reveal the melty cheese and savory pepperoni inside. Plus, they’re completely portable, making them perfect for casual dinners, game days, or even packed lunches!
What makes calzones special is how they encase all those delicious fillings in a neat package. Unlike pizza where toppings are exposed, calzones seal everything inside, creating pockets of flavor that stay hot and gooey. The dough gets crispy on the outside while remaining soft and chewy on the inside – it’s truly the best of both worlds!
FREQUENTLY ASKED QUESTIONS:
Can I make these calzones ahead of time? Absolutely! You can assemble the calzones completely, then refrigerate them (unbaked) for up to 24 hours. Just add a few extra minutes to the baking time when you’re ready to cook them. You can also freeze assembled calzones – just thaw them in the refrigerator overnight before baking.
What if my calzones leak during baking? A little leakage is normal and actually creates delicious crispy cheese on the baking sheet! To minimize leaks, make sure you’re not overfilling your calzones, leave a good border around the edge when adding fillings, and really press the edges firmly to seal. The folding and twisting technique also helps create a stronger seal.
Can I use different cheeses? While mozzarella is traditional and melts beautifully, you can definitely mix it up! Try adding a sprinkle of parmesan for extra flavor, some provolone for a more pronounced taste, or even a bit of ricotta for creaminess. Just keep mozzarella as the main cheese for that perfect stretchy texture.
Do I need to let store-bought dough come to room temperature? Yes! Cold dough is much harder to roll out and more likely to tear. For best results, let refrigerated dough sit on the counter for about 30 minutes before using. If using frozen dough, follow the package instructions for thawing, which typically involves letting it thaw in the refrigerator overnight, then bringing it to room temperature.
Why do calzones need vents on top? Those small cuts serve an important purpose! They allow steam to escape during baking, which prevents the calzones from becoming soggy inside and helps them cook evenly. Don’t skip this step – it’s crucial for perfect calzones!
INGREDIENTS NEEDED:
- pizza dough – forms the foundation of our calzones. Store-bought dough saves time and works perfectly, but homemade is great too if you have a favorite recipe.
- pepperoni – provides that classic pizza flavor with its spicy, savory profile. I like to use regular-sized pepperoni slices, but mini pepperoni works too.
- mozzarella cheese – creates that perfect melty, stretchy texture that makes calzones so satisfying. Freshly grated melts more smoothly than pre-shredded.
- pizza sauce – adds moisture and rich tomato flavor inside the calzone. Keep it to a tablespoon per calzone to prevent sogginess.
- olive oil – brushed on the exterior for beautiful browning and extra flavor. A little goes a long way here!
- flour – for dusting your work surface to prevent the dough from sticking while rolling.
HOW TO MAKE PEPPERONI AND CHEESE CALZONES
Start by preheating your oven to 210°C (410°F) with the fan on. If your oven doesn’t have a fan setting, you might want to increase the temperature to 220°C (425°F). Line a baking tray with parchment paper or a silicone mat to prevent sticking.
Divide your pizza dough into four equal portions. I find it easiest to use a kitchen scale for this, but eyeballing it works too! Roll each portion into a ball and let rest for 5 minutes – this helps the gluten relax and makes rolling easier.
Lightly dust your work surface with flour. Take one ball of dough and roll it out into a circle about 20 cm (8 inches) in diameter. Don’t worry if it’s not perfectly round – homemade calzones have character!
Now for the filling – this is where the magic happens! On one half of your dough circle, spread 1 tablespoon of pizza sauce, leaving a 2 cm border around the edge. This border is crucial for creating a good seal.
Layer 4 slices of pepperoni over the sauce, then sprinkle about 40g (⅓ cup) of shredded mozzarella on top. Try not to overfill – it’s tempting to add more, but excess filling makes it harder to seal and can lead to leaks.
Fold the empty half of the dough over your filling to create a half-moon shape. Press the edges together firmly with your fingers to seal. For an extra-secure seal and decorative touch, fold the edge over itself and twist slightly as you work your way around the perimeter.
Transfer your calzone to the prepared baking sheet and repeat the process with the remaining dough balls until you have four calzones. Make sure to leave some space between them as they will expand during baking.
Using a sharp knife or kitchen scissors, cut two small vents in the top of each calzone. This allows steam to escape during baking, preventing soggy calzones and potential filling explosions!
Brush the tops lightly with olive oil – this helps achieve that beautiful golden brown color and adds a subtle flavor to the crust.
Bake in your preheated oven for 20-25 minutes until the calzones are puffed up and golden brown. The exact time will depend on your oven, so start checking at the 18-minute mark.
Allow the calzones to cool for about 5 minutes before serving. This resting time is important – it allows the filling to set slightly so it doesn’t all pour out when you cut into them, and it prevents burning your mouth on molten cheese!
Serve these delicious calzones with extra pizza sauce on the side for dipping if desired. A simple green salad makes a perfect accompaniment for a complete meal.

Pepperoni and Cheese Calzones
Ingredients
Method
- Preheat the oven to 210°C (410°F) fan bake. Line a baking tray with parchment paper.
- Divide the pizza dough into 4 equal portions and shape into balls.
- On a lightly floured surface, roll each dough ball into a circle about 20 cm (8 inches) in diameter.
- On one half of each circle, spread 1 tablespoon of pizza sauce, leaving a 2 cm border around the edge.
- Place 4 pepperoni slices on top of the sauce, then sprinkle with approximately 40g (⅓ cup) of shredded mozzarella.
- Fold the empty half of the dough over the toppings to create a half-moon shape. Press the edges firmly to seal, then fold and twist the edge for a secure closure.
- Transfer to the prepared baking tray. Repeat with remaining dough and fillings.
- Cut two small vents in the top of each calzone using a sharp knife.
- Brush the tops with olive oil.
- Bake for 20-25 minutes until golden brown and crisp.
- Allow to cool for 5 minutes before serving.
Notes
- For convenience, you can use refrigerated or frozen store-bought pizza dough. Just make sure to bring it to room temperature before rolling.
- Feel free to customize your calzone fillings! Try ham, cooked sausage, sautéed mushrooms, bell peppers, onions, or spinach.
- Serve with extra pizza sauce on the side for dipping.
- Store leftover calzones in an airtight container in the refrigerator for up to 3 days.
- Reheat in a 180°C (350°F) oven for 10 minutes or until heated through.
- To freeze, place assembled unbaked calzones on a baking sheet and freeze until solid. Wrap individually in plastic wrap and store in a freezer bag for up to 3 months. Thaw in the refrigerator before baking.