So I was scrolling Pinterest last week looking for something to do with all these apples I bought and then forgot about. You know how it is – good intentions at the grocery store, reality in the kitchen a week later.
I see this weird recipe for apple pie made with rice paper and I’m thinking that can’t possibly work. Rice paper is for spring rolls, not dessert. But I had nothing else planned and these apples were going to go bad anyway so I figured what the heck.
Turns out this is the most brilliant thing ever. They taste exactly like apple pie but way easier to make. No rolling out pie crust, no fancy techniques, just wrap some apples in rice paper and stick them in the oven.
My neighbor stopped by while they were baking and goes “What smells so good? Are you making apple pie?” When I told her what they actually were she didn’t believe me until I showed her the leftover rice paper package.
Why These Work When Regular Pie Is Too Much
Let’s be honest – making real apple pie is a pain. The crust never turns out right, it takes forever, and half the time the bottom gets soggy anyway. These little rolls give you all the good parts of apple pie without any of the annoying parts.
Plus they’re portion controlled. Instead of cutting yourself a huge slice of pie and then feeling guilty, you eat one or two of these and you’re satisfied. Each one is like a perfect little bite of apple pie.
And they’re way faster. From start to finish we’re talking maybe 45 minutes including prep time. Perfect for when you want something homemade but don’t want to spend your whole afternoon in the kitchen.
Also – and this is huge – they’re gluten free and vegan without even trying. I wasn’t specifically going for that but it’s nice to have something I can serve to anyone without worrying about dietary restrictions.
The Day I Discovered Rice Paper Desserts
I’d only ever used rice paper for summer rolls before. You know, those fresh Vietnamese ones with shrimp and vegetables. Never occurred to me you could bake the stuff.
But I’m looking at this recipe thinking the worst that happens is I waste some apples and rice paper, both of which are pretty cheap. So I gave it a shot.
The hardest part was figuring out how wet to get the rice paper. Too dry and it cracks when you try to fold it. Too wet and it falls apart in your hands. But once you get the hang of it, it’s actually really easy.
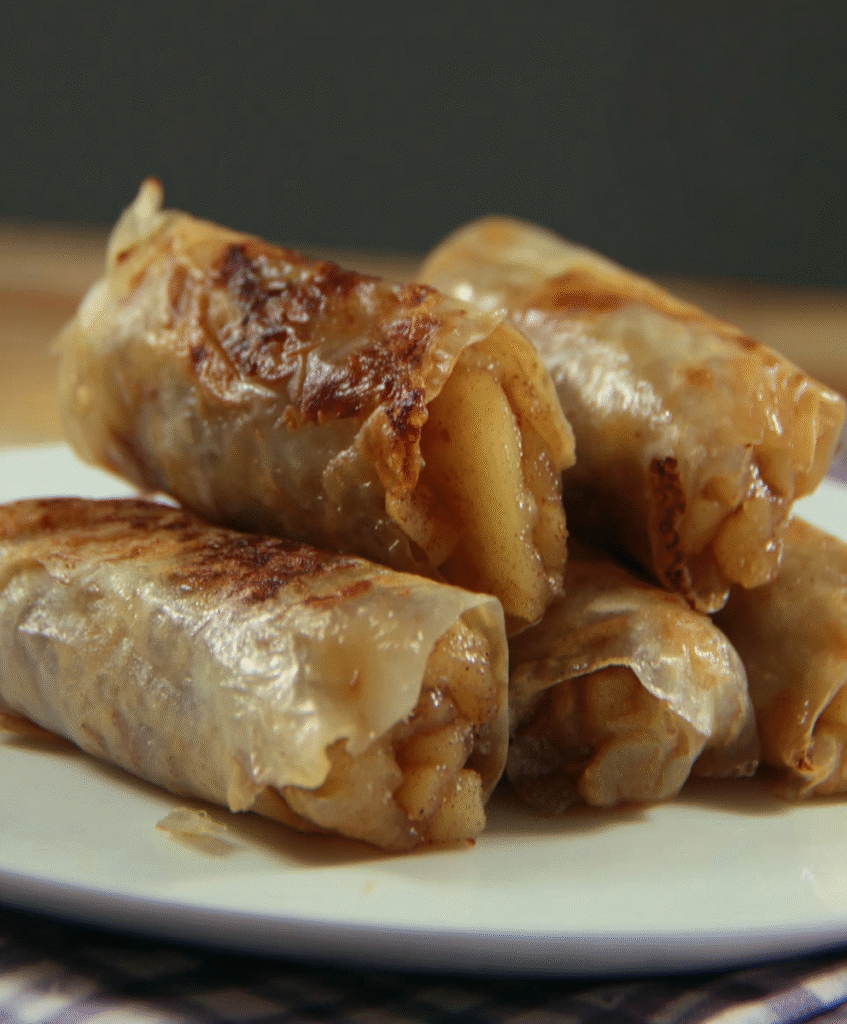
When they came out of the oven all golden and crispy, I was shocked. They looked like actual pastry. My husband tried one and said “These taste like apple turnovers. How did you make these?”
Now I keep rice paper in my pantry specifically for making these. They’ve become my go-to dessert when I need something quick that still feels special.
What You Actually Need
The ingredient list is ridiculously simple. Apples obviously – I use whatever’s on sale, doesn’t really matter what kind. Granny Smith work great because they hold their shape, but I’ve used Gala, Honeycrisp, whatever.
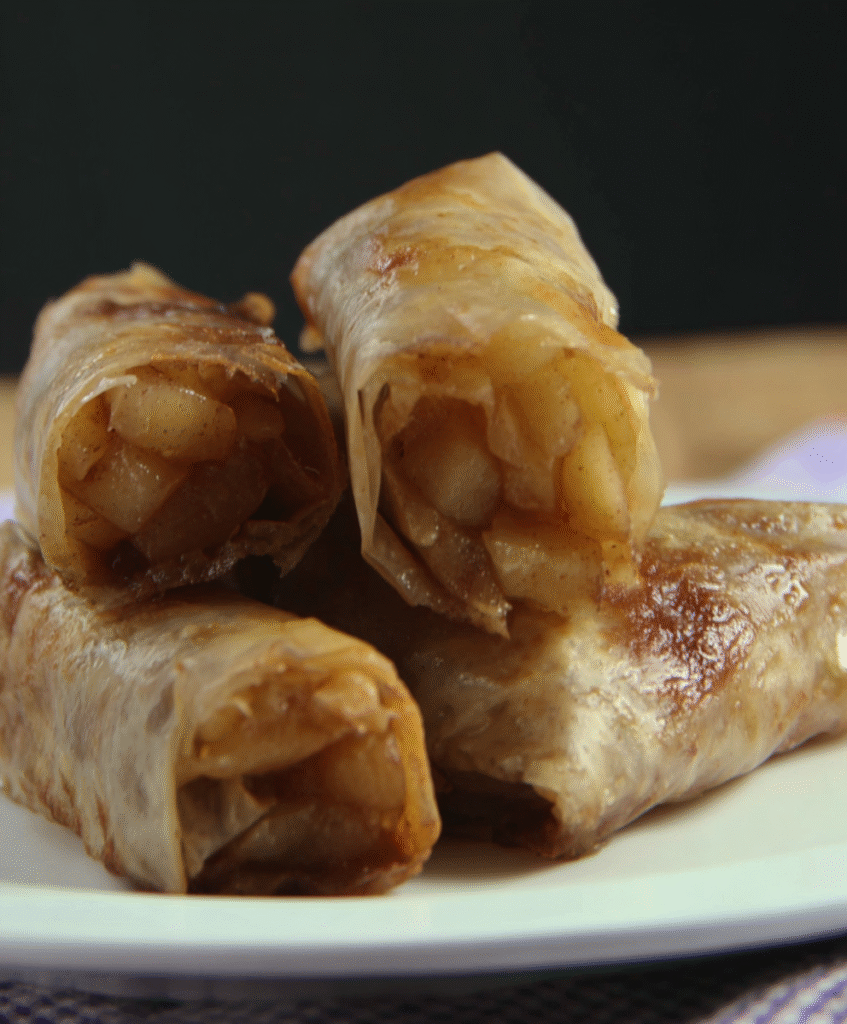
Brown sugar and cinnamon. That’s literally all you need for the filling. The brown sugar caramelizes while they bake and creates this amazing gooey center.
Rice paper wrappers – you can find these in the Asian section of most grocery stores. They’re super cheap, like three bucks for a whole package.
A little oil for brushing. I use whatever cooking oil I have on hand.
That’s it. Five ingredients total and you probably already have most of them.
How I Make Them Now
I peel and slice the apples pretty thin so they cook evenly. Mix them with the brown sugar and cinnamon in a bowl. Nothing fancy, just toss it all together.
Then comes the tricky part – the rice paper. I fill a big bowl about a quarter full with room temperature water. One sheet at a time, I dip the rice paper in just until it starts to soften. You don’t want it completely soft or it’ll tear.
I lay it flat on my counter and put a couple tablespoons of the apple mixture in the center. Then fold it like a burrito – bottom up first, sides in, then top down. Takes a little practice but you get the hang of it.
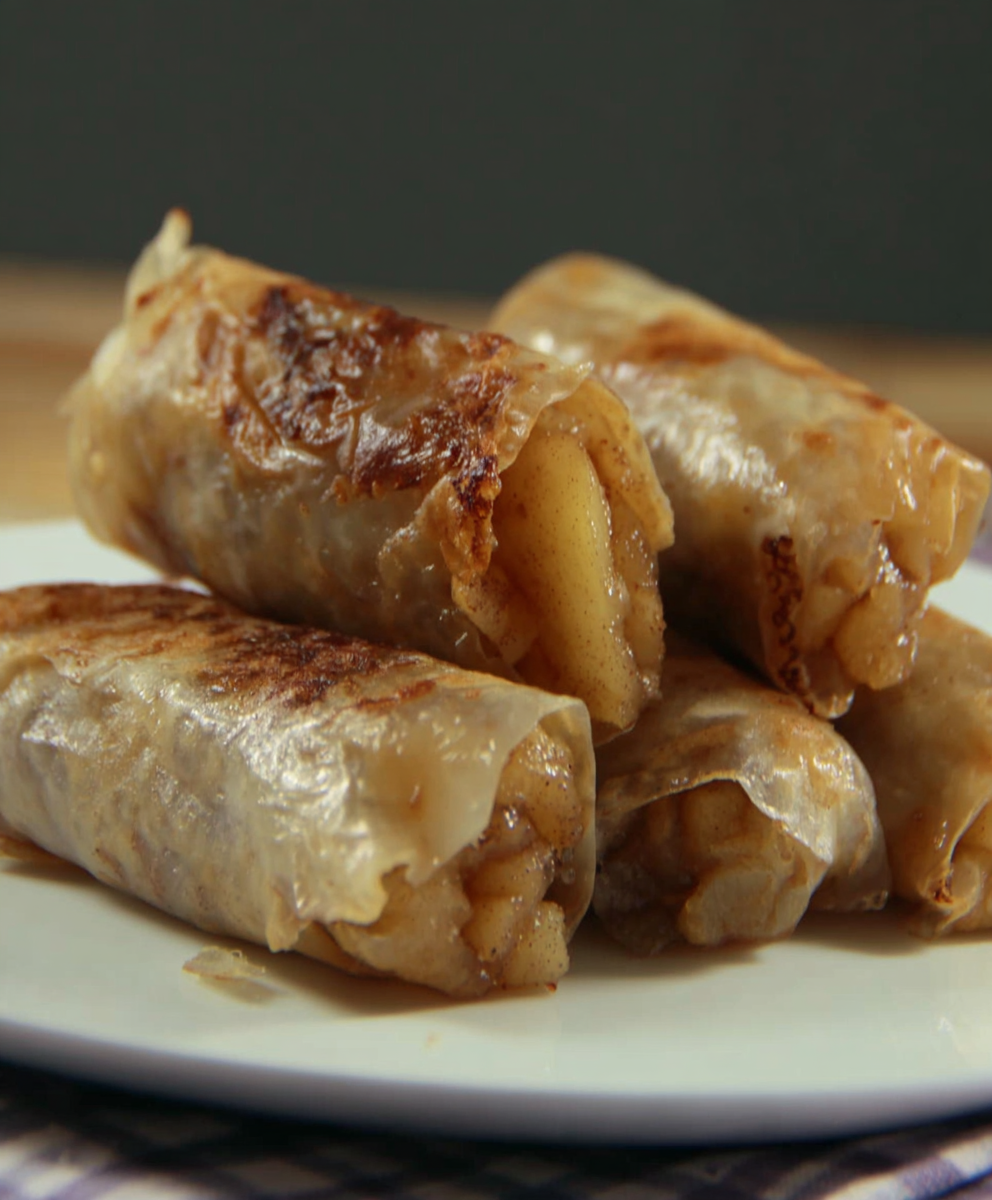
Line them up on a baking sheet brushed with oil. Brush the tops with oil too so they get crispy. Into a 450 degree oven for about 25-30 minutes, turning them a few times so they brown evenly.
When they’re golden brown and crispy, they’re done. Let them cool for a few minutes because the filling is molten hot.
Things I Learned the Hard Way
Don’t overfill them. I made that mistake with my first batch and apple mixture was leaking out everywhere, burning on the pan and making a mess.
The rice paper is more forgiving than you think. Even if it tears a little, you can usually patch it up or just overlap another piece of rice paper.
Turn them regularly while they’re baking. Otherwise one side gets brown while the other stays pale.
Let them cool before you bite into them. That apple filling is like lava when it first comes out of the oven. Learned that one the hard way too.
If the rice paper seems too delicate, you can double it up. Just use two sheets instead of one.
Different Ways to Serve These
Most of the time I just eat them as they are because they’re perfect. But sometimes I’ll serve them with a scoop of vanilla ice cream, especially if we have company.
My kids like to dip them in caramel sauce. My husband puts a little whipped cream on his.
They’re also really good at room temperature, so they work great for potlucks or packed lunches. Way more interesting than regular cookies or muffins.
You could probably make them with other fruits too. I bet pear would be amazing, or maybe peach in the summer.
Why These Are Better Than Regular Apple Pie
No pie crust to roll out. No worrying about whether the bottom will cook through. No giant pan to wash. Just simple wrapping and baking.
They look way fancier than they actually are. People always think I’ve been slaving in the kitchen when really it took me like 15 minutes to put them together.
Perfect portion size. With regular pie I always eat too much because it’s right there staring at me. These are just the right amount of sweet.
And they smell incredible while they’re baking. The whole house smells like cinnamon and apples and everyone starts hovering around the kitchen asking when they’ll be ready.
The Gluten Free Bonus
I wasn’t trying to make something gluten free, but it turns out rice paper doesn’t have any wheat in it. So now when my friend with celiac comes over, I can actually serve her dessert without having to make something special.
Same with my sister-in-law who’s vegan. No butter, no eggs, no dairy. Just apples and sugar and rice paper. She was so excited to have a dessert she could actually eat.
It’s nice to have something in my recipe collection that works for pretty much everyone without having to think about it.
Real Talk About This Recipe
These aren’t going to replace actual apple pie for Thanksgiving or anything. But for a Tuesday night when you want something sweet, or when you need to bring dessert somewhere and don’t want to stress about it, they’re perfect.
They’re the kind of recipe that makes you feel clever without actually being that hard to make. And when people ask how you made them, you get to sound all mysterious and creative.
Plus they use up those apples that are starting to get soft before they go completely bad. Nothing worse than throwing away fruit you paid good money for.
Baked Apple Pie Rice Paper Rolls
Ingredients
- 4-6 apples any kind
- 1/3 cup brown sugar
- 1 teaspoon cinnamon
- Rice paper wrappers about 12 sheets
- 2 tablespoons cooking oil
Instructions
- Prep the oven – Heat to 450°F. Line a baking sheet with parchment paper or brush with oil.
- Make the filling – Peel and thinly slice the apples. Mix with brown sugar and cinnamon in a bowl.
- Soften the rice paper – Fill a large bowl 1/4 full with room temperature water. Dip one rice paper sheet at a time just until it starts to soften. Don’t let it get too soggy.
- Wrap them – Place softened rice paper on counter. Put 1-2 tablespoons apple mixture in center. Fold bottom up, sides in, then top down like a burrito.
- Bake – Place on prepared baking sheet seam-side down. Brush tops with oil. Bake 25-30 minutes, turning every 8-10 minutes until golden brown and crispy.
- Cool and serve – Let cool for 5 minutes before eating (filling will be very hot).
Notes
- Don’t overfill or they’ll leak
- Rice paper should be pliable but not mushy
- Turn them regularly so they brown evenly
- Double up rice paper if it seems too delicate
- Let them cool – the filling is molten hot at first
- They’re good at room temperature too
- Keep leftovers covered for 2 days, though they’re best fresh.
Have you ever used rice paper for dessert? I’m thinking of trying other fruit combinations next – maybe pear and ginger!
Could you use canned pie filling instead of fresh fruit
have not made these yet, but love that they are gluten free and simple.