
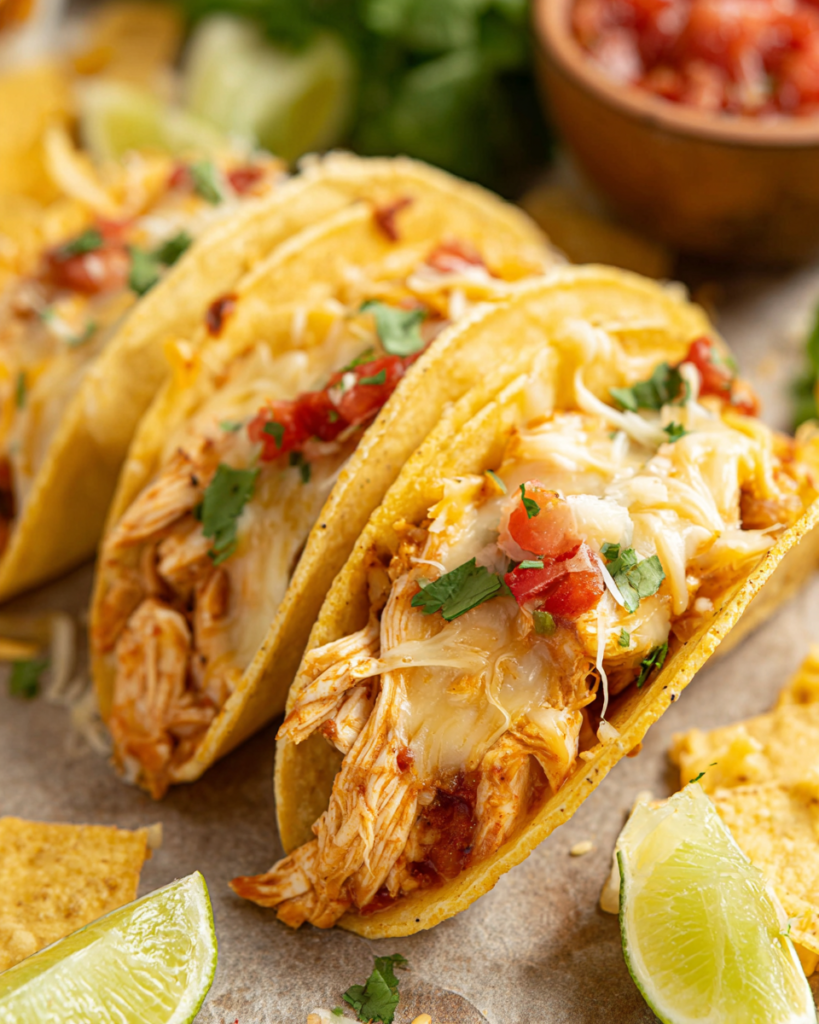
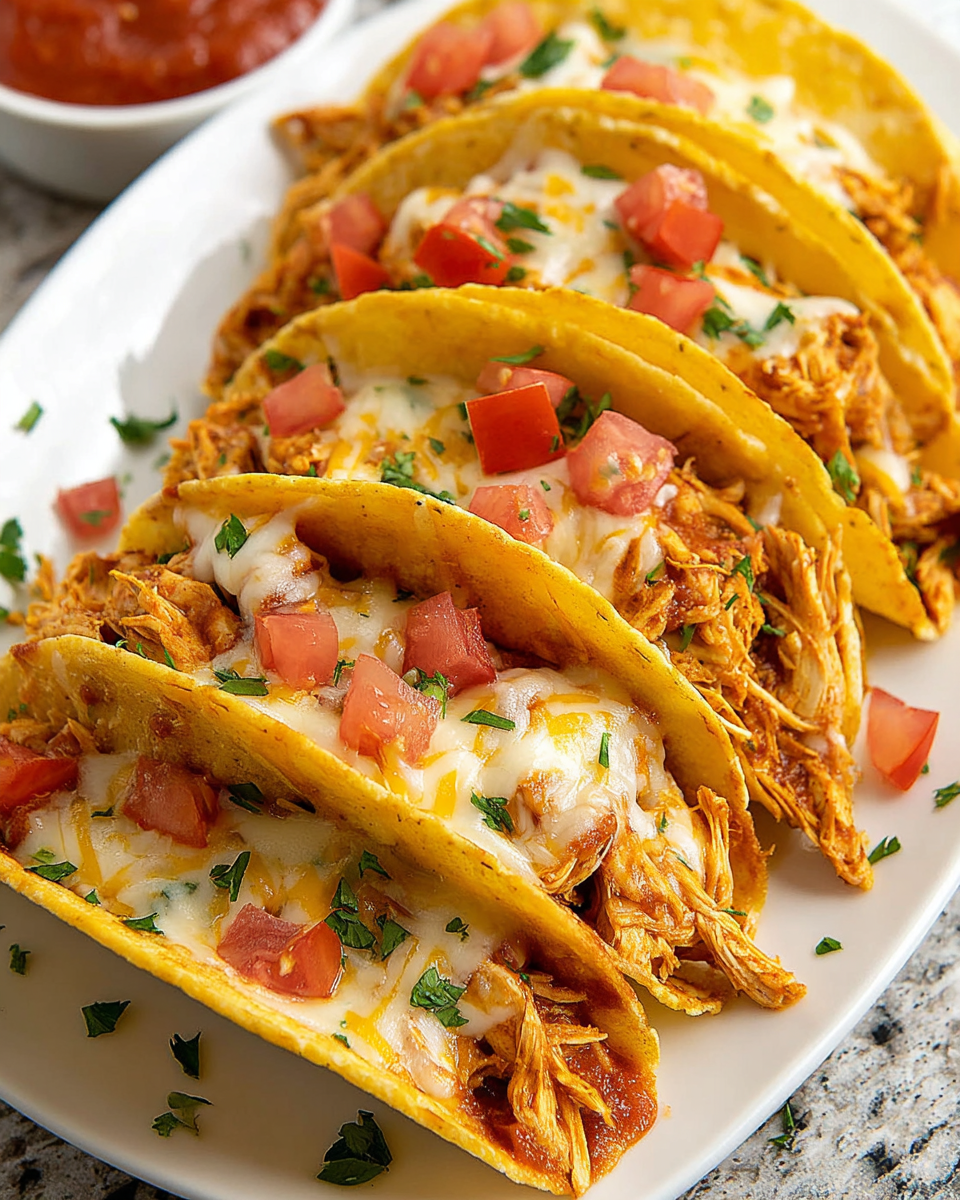
These Cheesy Baked Chicken Tacos are loaded with seasoned shredded chicken, melted cheese, and all your favorite toppings — all baked right in the taco shells until perfectly crispy and bubbly! This is one of those weeknight dinners that comes together so fast and the whole family goes absolutely crazy for them.
A Deliciously Easy Taco Recipe
I am a huge taco fan and I’m always looking for ways to switch things up from the classic stovetop version. These baked chicken tacos have become a serious staple in my house. I love that you just fill them, line them up in a baking dish, and let the oven do all the work. They come out with the most perfectly crispy shells and that melted, bubbly cheese on top is everything. Serve these with some refried beans and a side of Mexican rice and I am a happy camper!
What I also love about this recipe is how incredibly easy it is to customize. Picky eaters? Not a problem — just set out your toppings on the side and everyone can build their own. This is also a great recipe for meal prepping throughout the week. I’ve made a big batch on Sunday and we’ve been eating off of it for days!
“I made these for my family last Tuesday and they were an absolute hit! My kids who never agree on anything both asked for seconds. I used rotisserie chicken and it made the whole thing so simple. This is definitely going into our regular dinner rotation. Thank you so much!”
– Melissa
Frequently Asked Questions
What is the best way to prepare shredded chicken for this recipe?
You have a few great options here! The easiest route is to grab a store-bought rotisserie chicken — it’s already seasoned and shredded in minutes. You can also boil a couple of chicken breasts until cooked through and then shred them using two forks. Or roast your chicken breasts in the oven drizzled with a little olive oil, salt, and pepper at 400°F for about 35-40 minutes. If you have a stand mixer, toss your cooked chicken in the mixing bowl and use the paddle attachment to shred it super fast!
Do I have to use hard taco shells?
Hard taco shells are really what make this recipe so special because they get perfectly crispy in the oven. That said, you can absolutely use flour tortillas if that’s what you prefer — just fold them over like a quesadilla and bake. Keep in mind the texture will be different but still totally delicious!
Can I use a different type of cheese?
Absolutely! Monterey Jack, Pepper Jack (if you want a little kick!), a Mexican blend, or even sharp cheddar all work beautifully here. Use whatever your family enjoys most. This recipe is very easy to customize.
Can I make these ahead of time?
Yes! You can prepare the chicken filling in advance and store it in a covered container in the refrigerator for up to 3 days. When you’re ready to eat, just fill your shells and bake. I wouldn’t recommend assembling them too far ahead of time because the shells can start to soften.
How do I store leftovers?
Store leftover baked chicken tacos in an airtight container in the refrigerator for up to 3 days. To reheat, pop them in the oven at 350°F for about 10 minutes to get the shells crispy again. I don’t recommend the microwave as the shells will get soggy.
Can these be frozen?
I don’t recommend freezing the fully assembled tacos. However, the chicken filling freezes wonderfully for up to 3 months! Just thaw it in the refrigerator overnight, fill your shells, and bake when you’re ready.
Can I add beans or corn to the filling?
Yes, of course! A can of drained black beans or some frozen corn stirred right into the chicken mixture is a great way to bulk these up and add even more nutrition. Whatever you prefer!
Ingredients Needed: (See Recipe Card Below for the Full Recipe)
- shredded cooked chicken — rotisserie chicken is the easiest option here and gives you so much flavor. See my FAQ section above for other chicken prep methods.
- taco seasoning — use your favorite store-bought packet or mix up your own homemade taco seasoning blend. Either way works great.
- salsa — this gets mixed right into the chicken filling and keeps it incredibly moist and flavorful. Use mild, medium, or hot depending on your family’s preference.
- cream cheese — softened cream cheese makes the filling extra creamy and helps everything hold together inside the shell. Don’t skip this one!
- stand-and-stuff hard taco shells — the flat-bottom shells are ideal for this recipe because they stand upright in the baking dish on their own. Makes filling them so much easier!
- shredded Mexican cheese blend — shred your own or use store-bought pre-shredded. Either works perfectly fine here.
- diced green chiles — these add a subtle, mild flavor to the filling without making it spicy at all. If you cannot have even the tiniest bit of heat, just leave them out.
- garlic powder and cumin — just a touch of each to round out and deepen all the flavors in the filling.
- toppings of choice — sour cream, guacamole, pico de gallo, shredded lettuce, diced tomatoes, jalapeños. Whatever you love!

How to Make Cheesy Baked Chicken Tacos
Preheat your oven to 400°F. Spray a 9×13-inch baking dish with nonstick cooking spray. Stand your taco shells upright in the baking dish — they should fit snugly right next to each other, which actually helps keep them standing. This is where those flat-bottom shells really shine!
In a large bowl, combine your softened cream cheese, salsa, taco seasoning, garlic powder, cumin, and diced green chiles. Stir until everything is thoroughly combined and smooth. Add your shredded chicken to the bowl and mix until the chicken is fully coated in that creamy, flavorful mixture.
Spoon the chicken filling evenly into each taco shell, pressing it down gently so you can fit as much as possible. Don’t be shy — really pack them! Sprinkle a generous amount of shredded Mexican cheese blend over the top of every single taco. Cover the baking dish tightly with aluminum foil (I like to spray the inside of the foil with nonstick spray so the cheese doesn’t stick to it) and bake for 15 minutes.
Remove the foil and bake for another 5-7 minutes until the cheese is fully melted and starting to get those gorgeous golden-brown bubbly spots on top. Remove from the oven and let them rest for just a couple of minutes. Then add all your favorite cold toppings right on top and serve immediately!
Pro Tips for the Best Baked Chicken Tacos
- Make sure your cream cheese is fully softened before mixing. Cold cream cheese will be lumpy and won’t incorporate into the filling smoothly. Leave it on the counter for at least 30 minutes before you start.
- Don’t overcrowd your shells. You want them snug enough to stand upright and support each other, but they should not be so tightly packed that they crumble when you try to remove them. A standard 9×13-inch dish holds about 10-12 shells perfectly.
- Shred your own cheese if you can. Pre-shredded cheese has anti-caking agents added to it which can prevent it from melting as smoothly. Freshly shredded cheese melts into a much creamier, gooier topping.
- Keep your cold toppings separate. Add things like sour cream, lettuce, and fresh tomatoes only after the tacos come out of the oven. Adding them before baking will make everything soggy and sad!
- Use a rotisserie chicken on busy nights. It cuts the prep time down to almost nothing and is always packed with flavor. This is one of my best weeknight shortcuts and I use it all the time.
What to Serve with Baked Chicken Tacos
These tacos are a full meal on their own but I love rounding out the dinner table with some easy sides. Here are a few of my absolute favorites to serve alongside them:
- Mexican rice or cilantro lime rice
- Refried beans or black beans
- A simple green salad with a lime vinaigrette
- Corn on the cob
- Chips and guacamole or salsa on the side
How to Store Leftovers
Allow the baked chicken tacos to cool completely before storing. Place them in an airtight container and keep them in the refrigerator for up to 3 days. To reheat and keep the shells crispy, place them back in the oven at 350°F for about 8-10 minutes. I really don’t recommend the microwave here — the shells will lose that wonderful crunch that makes this recipe so good! The chicken filling on its own can be stored separately and frozen for up to 3 months.
Cheesy Baked Chicken Tacos
Ingredients
Method
- Preheat oven to 400°F. Spray a 9×13-inch baking dish with nonstick cooking spray. Stand 10 taco shells upright and snugly side by side in the baking dish.
- In a large bowl, combine the softened cream cheese, salsa, taco seasoning, garlic powder, cumin, and drained diced green chiles. Stir until smooth and fully combined.
- Add 3 cups of shredded cooked chicken to the bowl and mix until every bit of chicken is thoroughly coated in the creamy filling mixture.
- Spoon the chicken filling evenly into each of the 10 taco shells, pressing it down gently to pack as much filling as possible into each shell.
- Sprinkle 1½ cups of shredded Mexican cheese blend generously and evenly over the top of every taco.
- Spray the inside of a sheet of aluminum foil with nonstick spray and cover the baking dish tightly. Bake for 15 minutes.
- Remove the foil and continue baking for another 5-7 minutes until the cheese is fully melted, bubbly, and lightly golden on top.
- Remove from the oven and let rest for 2 minutes. Add all of your favorite cold toppings and serve immediately.