
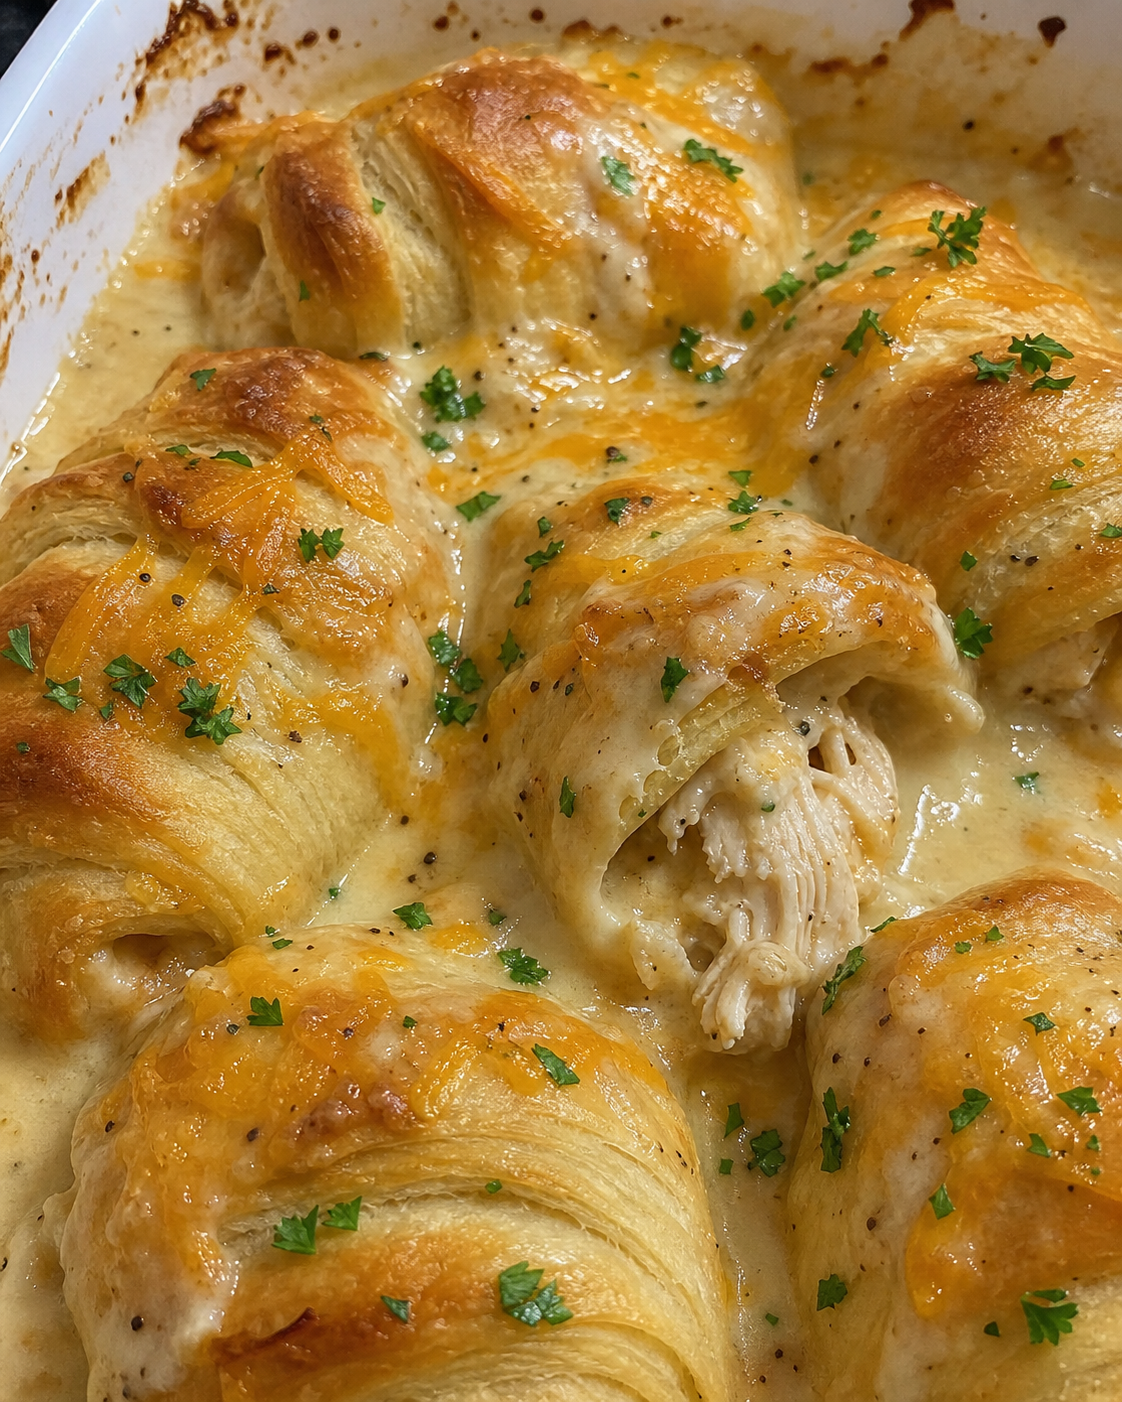
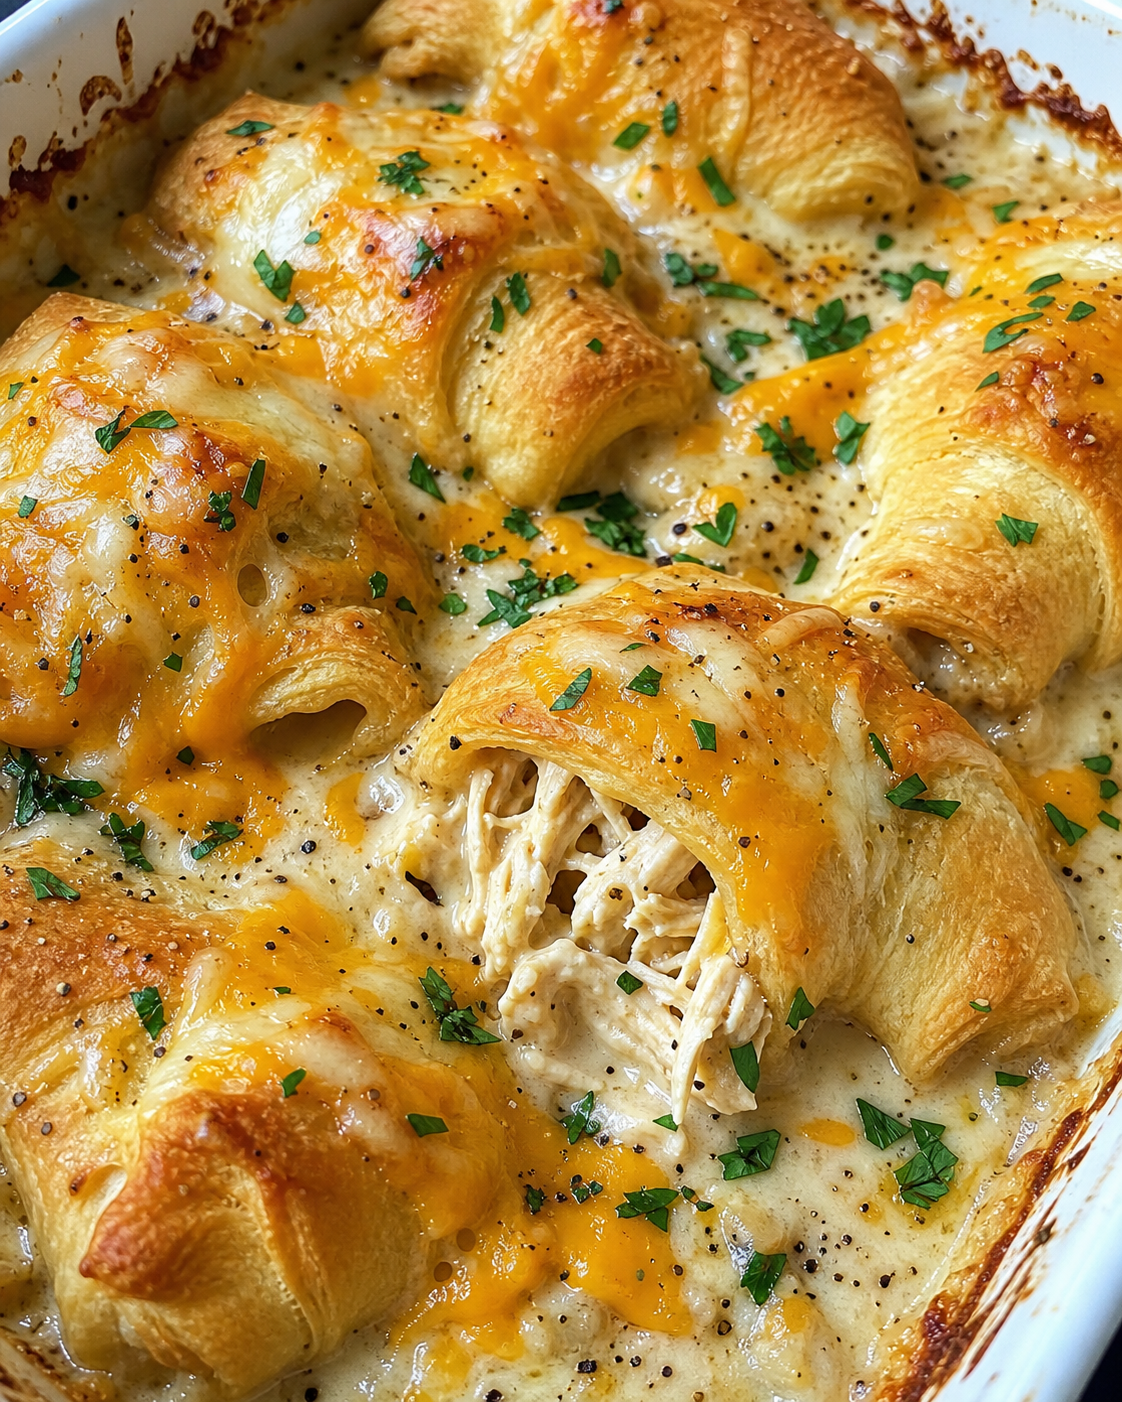
Tender, seasoned chicken and creamy filling wrapped up in buttery, flaky crescent dough and baked until golden — this is one of those dinners that looks impressive but comes together in no time at all!
A RIDICULOUSLY EASY WEEKNIGHT DINNER THE WHOLE FAMILY WILL LOVE!
I honestly cannot tell you how many times I’ve made these Crescent and Chicken Roll-ups. They are on repeat in my house — like, every single week someone is asking for them. There’s something about that warm, creamy chicken filling tucked inside soft, pillowy crescent dough that just hits differently on a busy Tuesday night. My kids absolutely devour them, and even my pickiest eater cleans his plate, which is basically a miracle!
These are the kind of weeknight meals I live for. They pull together quickly, use ingredients I almost always have on hand, and I can have them in the oven in under 15 minutes. When life is hectic and I need something that feels like comfort food without a mountain of dishes — this is my go-to. I’m not exaggerating when I say this is one of the most budget friendly recipes in my rotation.
For a complete meal, I love pairing these with a simple side salad or some roasted broccoli. A bowl of tomato soup on the side makes it feel extra cozy, especially in the colder months. Boom — dinner is served, and I am a happy camper!
“I made these on a whim on a Wednesday night and my whole family went absolutely crazy for them! My husband asked me to put them in our weekly dinner rotation immediately. This is such a keeper of a recipe — thank you so much for sharing!”
– Melissa
Frequently Asked Questions
Can I use rotisserie chicken instead of cooking chicken from scratch?
Absolutely! Rotisserie chicken is honestly one of my favorite shortcuts for this recipe. Just shred it up and you’re good to go. It’s a super simple swap that saves you even more time on busy weeknights, and the flavor is fantastic.
Can I make these ahead of time?
Yes, of course! You can assemble the roll-ups ahead of time and store them covered in the fridge for up to 24 hours before baking. Just pull them out when you’re ready and pop them straight into the oven. You may need to add a couple of extra minutes to the bake time if they’re going in cold.
Can I freeze Crescent and Chicken Roll-ups?
Absolutely! I recommend baking them first, then letting them cool completely before wrapping them individually and placing them in a freezer-safe bag. They’ll keep well in the freezer for up to 2 months. To reheat, just warm them in the oven at 350°F for about 10-12 minutes until heated through.
How do I store leftovers?
Store any leftover roll-ups in an airtight container in the refrigerator for up to 3 days. You can reheat them in the oven at 350°F for about 8-10 minutes, or in the air fryer at 325°F for about 5 minutes to get that crescent dough nice and crispy again. I do not recommend the microwave — it tends to make the dough a little soft and chewy.
What kind of cream cheese works best?
Regular full-fat block cream cheese gives you the richest, creamiest filling, and that’s what I always reach for. That said, you can absolutely use reduced-fat cream cheese if you prefer — it still tastes great and makes these a little lighter. Just make sure it’s softened to room temperature so it mixes smoothly.
Can I add vegetables to the filling?
Yes, of course! This recipe is super flexible. Finely diced broccoli, spinach, or even some corn or diced bell pepper would be wonderful mixed right into the filling. It’s a great way to sneak in some extra nutrition, especially for picky eaters who might not eat their veggies otherwise — I’m not judging!
Can I use a different cheese?
Absolutely! I use shredded cheddar in this recipe, but mozzarella, Colby jack, or a Mexican blend would all be delicious — whatever you prefer. The melty cheese factor is really what matters here, so just use what you have on hand and you’re good to go.
Ingredients Needed: (See Recipe Card Below for the Full Recipe)
- Crescent roll dough — Two cans of refrigerated crescent rolls. This is the magic wrapper that makes these so easy and so irresistibly flaky and golden.
- Cooked, shredded chicken — About 2 cups. Rotisserie chicken is a fantastic time-saver here, or you can use poached or baked chicken breast — whatever you have on hand works perfectly.
- Cream cheese — Softened to room temperature so it blends smoothly into that creamy filling. Full-fat block cream cheese is my pick, but reduced-fat works too.
- Shredded cheddar cheese — Adds that melty, gooey, cheesy goodness we all love. Feel free to swap in mozzarella or Colby jack if you prefer.
- Sour cream — Just a couple of tablespoons to add a little tang and extra creaminess to the filling. Greek yogurt is a great nutritious swap.
- Garlic powder — A must for flavor. It seasons the filling beautifully without being overpowering.
- Onion powder — Pairs perfectly with the garlic powder and adds a warm, savory depth to the chicken mixture.
- Salt and black pepper — Season to taste. Keep tasting and adjusting until the filling is seasoned just the way you like it.
- Fresh chives or parsley — Optional, but I love a little sprinkle of fresh herbs in the filling for color and freshness. Dried herbs work great too!
- Butter — Just a little melted butter brushed on top before baking gives you that gorgeous golden color and a little extra richness.
How to Make Crescent and Chicken Roll-ups
First things first — preheat your oven to 375°F and line a large baking sheet with parchment paper. While the oven is heating up, go ahead and make your filling. In a medium bowl, combine your softened cream cheese, sour cream, garlic powder, onion powder, salt, and pepper and mix until everything is nice and smooth. Then fold in your shredded chicken, shredded cheddar cheese, and fresh chives or parsley if you’re using them. You want the filling to be well-seasoned and creamy — give it a taste and adjust the seasoning until it’s just right.
Now, open up your crescent roll cans and carefully unroll the dough. Separate it along the perforated lines so you have individual triangles. I like to gently stretch each triangle just a tiny bit to give myself a little more surface area to work with — but don’t go too crazy or the dough will tear. Place a generous spoonful of the chicken filling at the wide end of each triangle. You want about 2 tablespoons of filling per roll-up — enough to feel generous but not so much that it oozes out everywhere when you roll them up.
Starting from the wide end, roll each crescent triangle up toward the pointed tip, just like you would a regular crescent roll. Tuck the sides in gently as you go to keep that filling snug inside. Place each roll-up on your prepared baking sheet with a little space between them — you want that hot air to circulate around each one so they bake up evenly golden on all sides. Once they’re all lined up, brush the tops lightly with melted butter for that beautiful color.
Slide the baking sheet into your preheated 375°F oven and bake for 13 to 16 minutes, or until the crescent dough is deep golden brown and cooked through. Keep an eye on them in the last few minutes — every oven is a little different and you don’t want them to over-brown on the bottom. Once they come out, let them rest for just 2-3 minutes before serving. They’ll be piping hot inside, so just give them a moment. Then serve them up and watch them disappear!
Pro Tips
- Soften your cream cheese properly — Make sure your cream cheese is fully softened to room temperature before mixing. Cold cream cheese will leave lumps in your filling and won’t blend smoothly with the other ingredients. I usually set mine out about 30 minutes before I start cooking.
- Don’t overfill the roll-ups — I know it’s tempting to pack in as much filling as possible, but overfilling will cause it to spill out all over the baking sheet. A heaping 2 tablespoons per triangle is the sweet spot for getting a great filling-to-dough ratio without the mess.
- Use parchment paper — Lining your baking sheet with parchment paper prevents sticking and makes cleanup so much easier. If any cheese does escape during baking, it won’t be welded to your pan!
- Stretch the dough gently — Giving each crescent triangle a gentle, slight stretch before filling it gives you a little more room to work with and helps create a tighter roll. Just be gentle — you don’t want any tears in the dough.
- Brush with butter right before baking — Don’t brush the butter on too far in advance or it can make the dough soggy before it even hits the oven. Right before it goes in is the perfect time for that golden, glossy finish.
- Shred your own chicken — If you’re not using rotisserie, poaching chicken breasts in seasoned broth instead of plain water adds so much more flavor to the meat. Just simmer until cooked through, then shred with two forks — it’s super simple and absolutely worth it.
What to Serve with Crescent and Chicken Roll-ups
These roll-ups are filling on their own, but a good side dish really rounds out the meal and makes it feel complete. Here are some of my favorite things to serve alongside them:
- Tomato Soup — My absolute personal favorite! Dipping these into a warm bowl of tomato soup is an experience. It’s pure comfort food magic.
- Simple Garden Salad — A crisp, fresh salad with a light vinaigrette is the perfect nutritious contrast to the richness of the roll-ups.
- Roasted Broccoli — Easy, nutritious, and delicious. Roast it at the same oven temp right alongside the roll-ups to save time.
- Mashed Potatoes — For a truly cozy, comfort food dinner, you really cannot go wrong with creamy mashed potatoes on the side.
- Steamed Green Beans — Simple, family friendly, and on the table in minutes. A little butter and garlic and they’re perfect.
- Corn on the Cob or Creamed Corn — A super simple, crowd-pleasing side that picky eaters always love — and it takes basically zero effort.
However you choose to serve these, I hope your family loves them as much as mine does — enjoy every single bite!
Crescent and Chicken Roll-ups
Ingredients
Method
- Preheat your oven to 375°F. Line a large baking sheet with parchment paper and set aside.
- In a medium mixing bowl, combine the softened cream cheese, sour cream, garlic powder, onion powder, salt, and black pepper. Stir until completely smooth and well combined.
- Fold in the shredded chicken, shredded cheddar cheese, and fresh chives or parsley if using. Taste the filling and adjust seasoning as needed.
- Open both cans of crescent roll dough and carefully unroll onto a clean surface. Separate the dough along the perforated lines to create 16 individual triangles.
- Gently stretch each triangle slightly to create a bit more surface area. Place approximately 2 tablespoons of the chicken filling at the wide end of each triangle.
- Starting at the wide end, roll each triangle up toward the pointed tip, gently tucking in the sides as you roll to keep the filling enclosed. Place on the prepared baking sheet, spacing them about 1 inch apart.
- Brush the top of each roll-up lightly with melted butter.
- Bake at 375°F for 13 to 16 minutes, or until the crescent dough is deep golden brown and cooked through. Let rest for 2-3 minutes before serving.