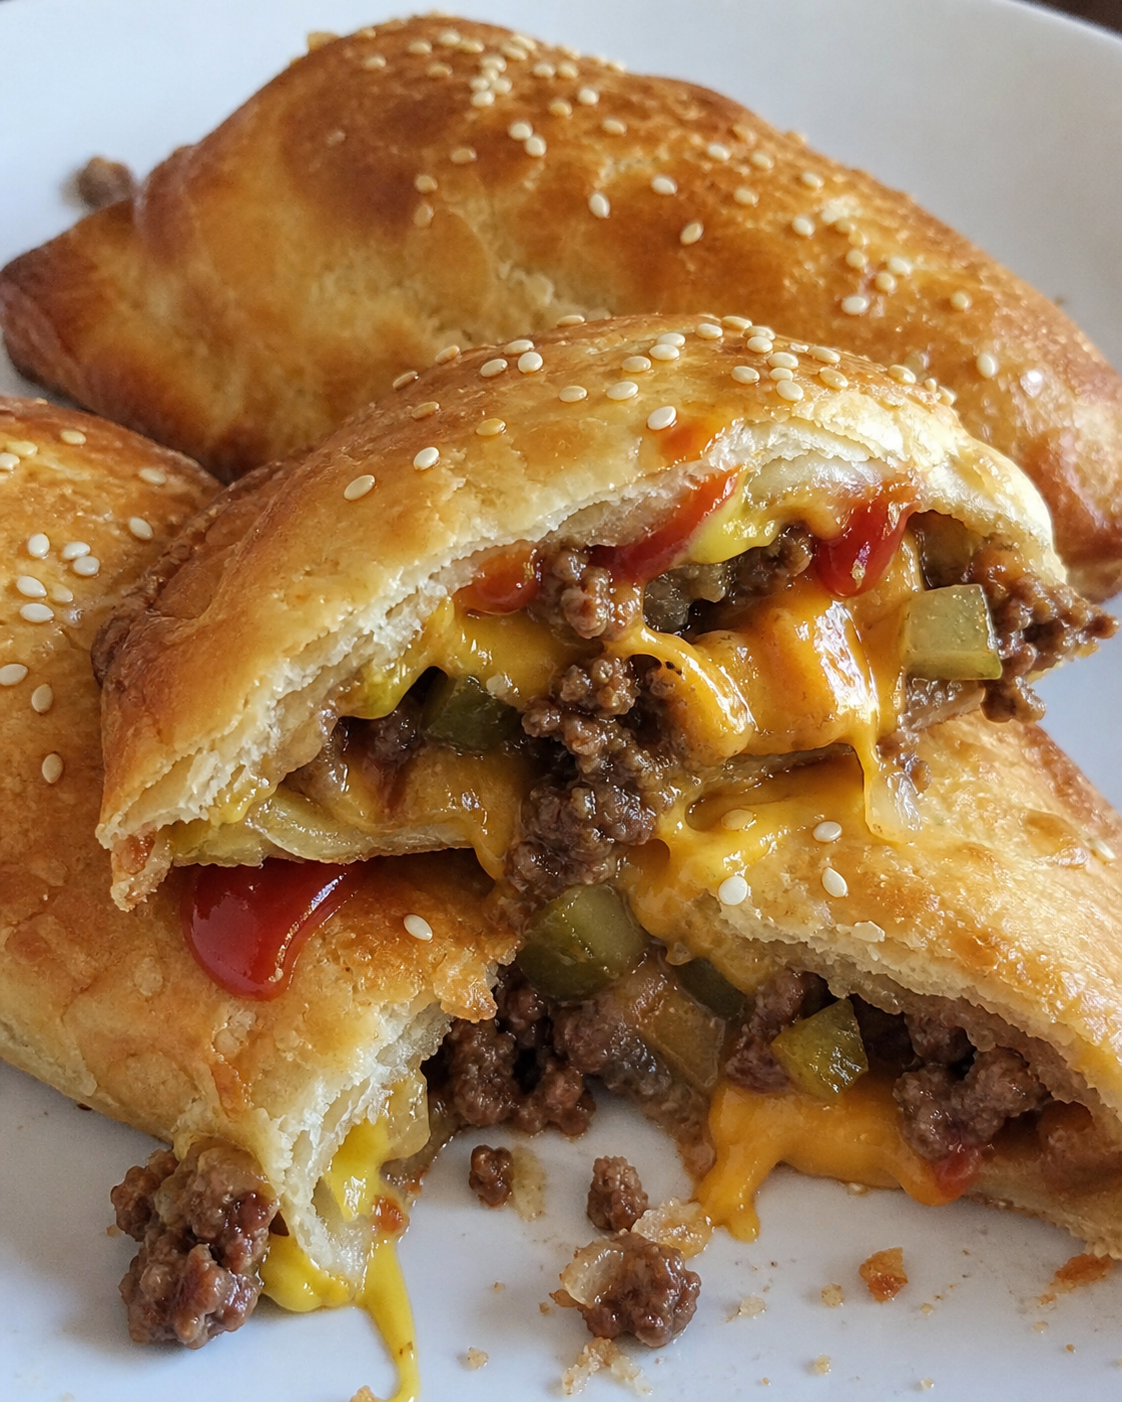
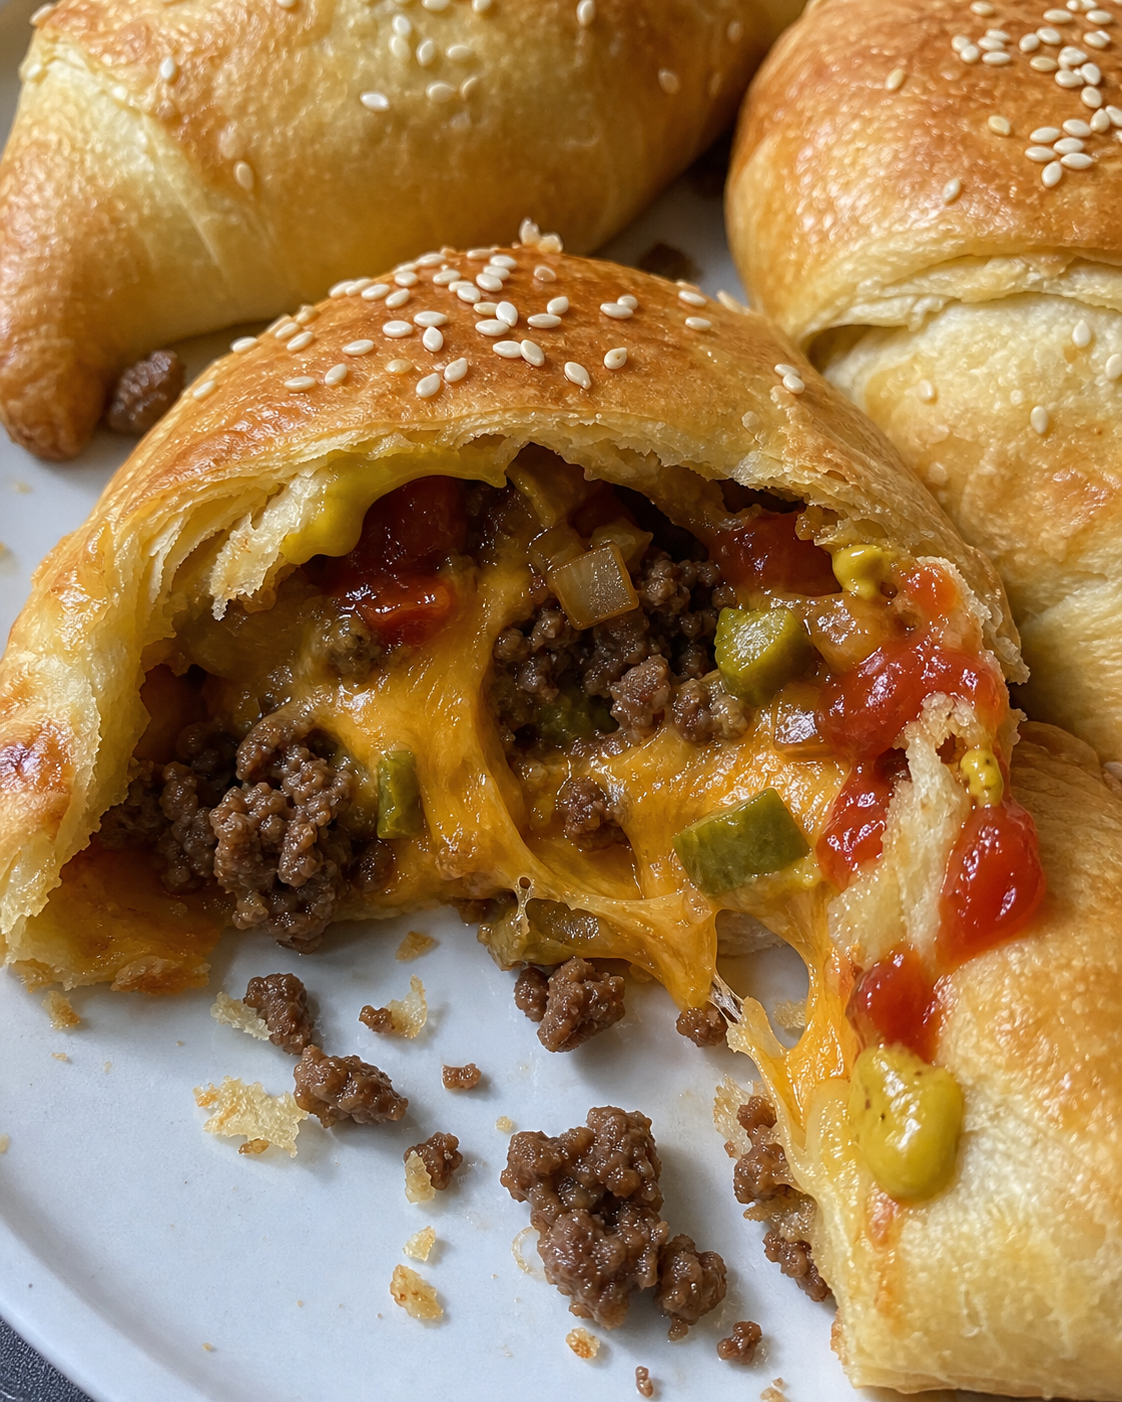
Golden, flaky dough stuffed with seasoned ground beef, melty cheddar, and all your favorite cheeseburger fixings — these Cheeseburger Pockets are the ultimate fun, crowd-pleasing weeknight meal the whole family will go crazy for!
THE EASIEST HANDHELD CHEESEBURGER DINNER EVER!
I am a happy camper every single time I pull these Cheeseburger Pockets out of the oven. Honestly, this recipe has been on repeat in my house for years now. My kids ask for it constantly — and I mean constantly — so I’ve basically memorized this one by heart at this point. There’s something so fun and nostalgic about a cheeseburger wrapped up in a warm, flaky pocket. It’s comfort food at its absolute finest!
This is one of those weeknight meals that comes together so fast, you’ll genuinely be shocked when you’re sitting down to eat. We’re talking about 15 minutes of prep and dinner is on the table in under 40 minutes total. I make a double batch at least twice a month because these freeze beautifully, which means future-me always has a quick dinner waiting in the freezer. Budget friendly, super simple, and completely from scratch on the filling — these are just the best.
To pull together a full dinner, I love serving these alongside a simple green salad, some oven-baked fries, or creamy coleslaw. You really can’t go wrong. These pockets are a complete meal on their own, but a little dipping sauce on the side — ketchup, mustard, special sauce — takes everything right over the top!
“These were an absolute hit in my house! My three kids devoured them and my husband said they were better than a real cheeseburger. I made a double batch and froze half — reheated perfectly for lunch the next day. This is absolutely a keeper of a recipe, thank you so much!”
– Melissa
Frequently Asked Questions
Can I use a different type of dough?
Absolutely! I use refrigerated crescent roll dough or pizza dough here, but puff pastry works beautifully if you want an extra flaky, buttery result. Biscuit dough is another great option if that’s what you have on hand. Whatever you prefer will work — just be sure to seal the edges tightly so the filling doesn’t escape while baking.
Can I make these ahead of time?
Yes, of course! You can assemble the pockets completely, place them on a baking sheet, cover tightly with plastic wrap, and refrigerate them for up to 24 hours before baking. Just pull them out of the fridge about 10 minutes before popping them in the oven. They’re perfect for meal prepping a busy week ahead!
Can I freeze Cheeseburger Pockets?
Absolutely! These freeze really well both baked and unbaked. For baked pockets, let them cool completely, then wrap individually and store in a freezer-safe bag for up to 3 months. Reheat in the oven at 350°F for about 10-15 minutes until warmed through and the dough is crispy again. I’m not judging if you eat one straight from the microwave though — I’ve done it!
How do I keep the pockets from leaking?
The key is not overfilling them — you want about 2 to 3 tablespoons of filling per pocket. Make sure you press the edges firmly together with a fork to crimp and seal them well. Also, make sure your meat filling is not too wet; drain off any excess fat and liquid from the beef after cooking so the dough stays nice and flaky rather than soggy.
Can I swap out the ground beef for something else?
Yes, absolutely! Ground turkey or ground chicken works great and makes for a slightly lighter, nutritious option. You could even use a plant-based ground meat if that’s your preference. Just season it the same way and you’ll get the same amazing cheeseburger flavors wrapped up in that golden dough.
What cheese works best in this recipe?
Cheddar is my go-to because it melts perfectly and gives you that classic cheeseburger flavor. Pepper jack is amazing if you want a little heat, and American cheese gets super melty and creamy — which is totally that classic diner-style vibe. Honestly, use whatever cheese your family loves most. I’ve made these with a mix of cheddar and mozzarella and they were incredible!
How do I store leftovers?
Store any leftover Cheeseburger Pockets in an airtight container in the refrigerator for up to 4 days. Reheat them in the oven or air fryer at 350°F for about 8-10 minutes to get the dough nice and crispy again. The microwave works in a pinch but the dough won’t be quite as flaky — still delicious though!
Ingredients Needed: (See Recipe Card Below for the Full Recipe)
- Ground Beef (80/20) — The fat content keeps the filling juicy and flavorful. You can use lean ground beef or ground turkey for a lighter, nutritious swap.
- Refrigerated Pizza Dough — This is my go-to for its chewiness and easy handling. Crescent roll dough or puff pastry are both great alternatives.
- Cheddar Cheese — Shredded from a block melts much better than pre-shredded. Sharp cheddar gives you the boldest cheeseburger flavor.
- Yellow Onion — Diced small so it cooks quickly and blends right into the filling. White onion works just as well, whatever you prefer.
- Garlic — Fresh minced garlic adds so much flavor to the beef filling. Garlic powder works in a pinch — about ½ teaspoon.
- Ketchup — Adds a touch of sweetness and that classic burger flavor to the filling. Don’t skip it!
- Yellow Mustard — Just a small amount cuts through the richness and gives the filling that unmistakable cheeseburger taste.
- Worcestershire Sauce — My secret weapon for deep, savory flavor in any ground beef recipe. A little goes a long way.
- Dill Pickle Slices — Totally optional but highly recommended if you love that classic cheeseburger tang. Chop them small and mix right in.
- Salt and Black Pepper — Keep tasting and seasoning your filling until it tastes exactly the way you like it.
- Egg + Water (Egg Wash) — Brushing the tops of the pockets before baking gives you that gorgeous golden, glossy crust.
- Sesame Seeds (optional) — Sprinkle on top before baking for that classic burger bun look! Totally fun and a great visual touch.
How to Make Cheeseburger Pockets
Start by preheating your oven to 400°F and lining a large baking sheet with parchment paper. While the oven heats up, heat a large skillet over medium-high heat and add your ground beef and diced onion together. Cook, breaking the beef apart as you go, for about 6-8 minutes until the beef is browned all the way through and the onion is nice and soft. Drain off any excess fat — you really don’t want a greasy filling or your dough will get soggy.
Once the beef is drained, reduce the heat to medium and add the minced garlic right into the pan. Cook for about 30 seconds until fragrant — don’t let it burn! Now stir in the ketchup, yellow mustard, and Worcestershire sauce. Season generously with salt and black pepper. Give it all a good stir and let it cook together for another 1-2 minutes so all those flavors come together. If you’re using chopped pickles, stir them in right now. Pull the pan off the heat and let the filling cool for about 5 minutes before you start assembling — this prevents the dough from getting soggy.
While the filling cools, roll out your pizza dough on a lightly floured surface into a rectangle and cut it into 8 equal squares — roughly 4×4 inches each. You want to make sure your squares are large enough to fold over the filling and seal properly. Place about 2-3 tablespoons of the beef filling in the center of each square, then top with a generous pinch of shredded cheddar cheese. Don’t overstuff them — I know it’s tempting, but you want those edges to seal tight!
Fold the dough over the filling to form a rectangle or triangle shape, then press the edges firmly together with your fingers. Go around the edges with a fork and press down to crimp and seal them well. Place each pocket on your prepared baking sheet with a little space between them. Whisk together your egg and a tablespoon of water and brush the tops of each pocket generously with the egg wash. Sprinkle with sesame seeds if you’re using them — I absolutely love this little detail!
Bake at 400°F for 18-22 minutes, until the pockets are deeply golden brown on top and the dough is cooked through. Let them rest for about 5 minutes before serving because the filling inside gets really hot. Boom — dinner is served! Set out some ketchup, mustard, and special sauce for dipping and watch these disappear in minutes.
Pro Tips
- Cool Your Filling First — Let the beef mixture cool for at least 5 minutes before assembling. Hot filling creates steam that makes the dough soggy and harder to seal properly.
- Don’t Skip the Egg Wash — It’s such a small step but it makes a huge difference. You get that gorgeous, bakery-style golden crust that makes these pockets look as good as they taste.
- Shred Your Own Cheese — Pre-shredded cheese is coated with anti-caking agents that prevent it from melting as smoothly. Shredding your own cheddar from a block gives you that perfectly gooey, melty cheese pull in every bite.
- Seal the Edges Well — Press the edges firmly with your fingers first, then crimp with a fork all the way around. If you see any gaps, just press them back together. A well-sealed pocket means all that cheesy, beefy goodness stays right where it belongs — inside!
- Make a Double Batch — These freeze so well that it truly makes sense to double the recipe every single time. Wrap individually in foil, store in a freezer bag, and you have a family friendly lunch or quick dinner ready to go on those crazy busy nights.
- Add Your Toppings After Baking — If you love fresh toppings like shredded lettuce, tomato, or extra pickles, add them after the pockets come out of the oven. It gives you that full cheeseburger experience with fresh, cool toppings against the warm, cheesy pocket.
What to Serve with Cheeseburger Pockets
These pockets are a total meal on their own, but if you want to round out the dinner spread, there are so many great sides that go perfectly alongside them. My personal favorite is a batch of crispy oven-baked fries — it just feels right!
- Oven-Baked Fries — My all-time favorite pairing. Crispy, golden, and perfect for dipping.
- Creamy Coleslaw — The cool, creamy crunch is the perfect contrast to the warm, cheesy pockets.
- Simple Garden Salad — A light, nutritious option that balances out the richness of the filling beautifully.
- Corn on the Cob — Sweet, buttery corn is such a fun and family friendly summer side with these.
- Tomato Soup — Great for dipping and makes this feel like the ultimate cozy comfort food dinner.
- Macaroni Salad — Cold, creamy, and a total crowd-pleaser — especially with picky eaters at the table!
Whatever you decide to serve alongside these, I promise dinner is going to be a huge hit tonight!
Cheeseburger Pockets
Ingredients
Method
- Preheat your oven to 400°F and line a large baking sheet with parchment paper. Set aside.
- Heat a large skillet over medium-high heat. Add the ground beef and diced onion and cook, breaking the meat apart, for 6-8 minutes until the beef is fully browned and the onion is softened. Drain off any excess fat.
- Reduce heat to medium. Add the minced garlic and cook for 30 seconds until fragrant. Stir in the ketchup, mustard, Worcestershire sauce, salt, and black pepper. Cook for 1-2 minutes until combined. Stir in chopped pickles if using. Remove from heat and cool for 5 minutes.
- Lightly flour a clean surface and roll out the pizza dough into a large rectangle approximately 12x16 inches. Cut into 8 equal squares, roughly 4x4 inches each.
- Place 2-3 tablespoons of the beef filling in the center of each dough square. Top each with about 3 tablespoons of shredded cheddar cheese.
- Fold the dough over the filling to create a rectangular pocket. Press the edges firmly together with your fingers, then crimp all around with a fork to seal tightly. Place on the prepared baking sheet.
- In a small bowl, whisk together the egg and water. Brush the tops of each pocket generously with the egg wash. Sprinkle with sesame seeds if desired.
- Bake at 400°F for 18-22 minutes, until the pockets are deep golden brown on top. Let rest 5 minutes before serving. Serve with ketchup, mustard, or your favorite dipping sauce.