
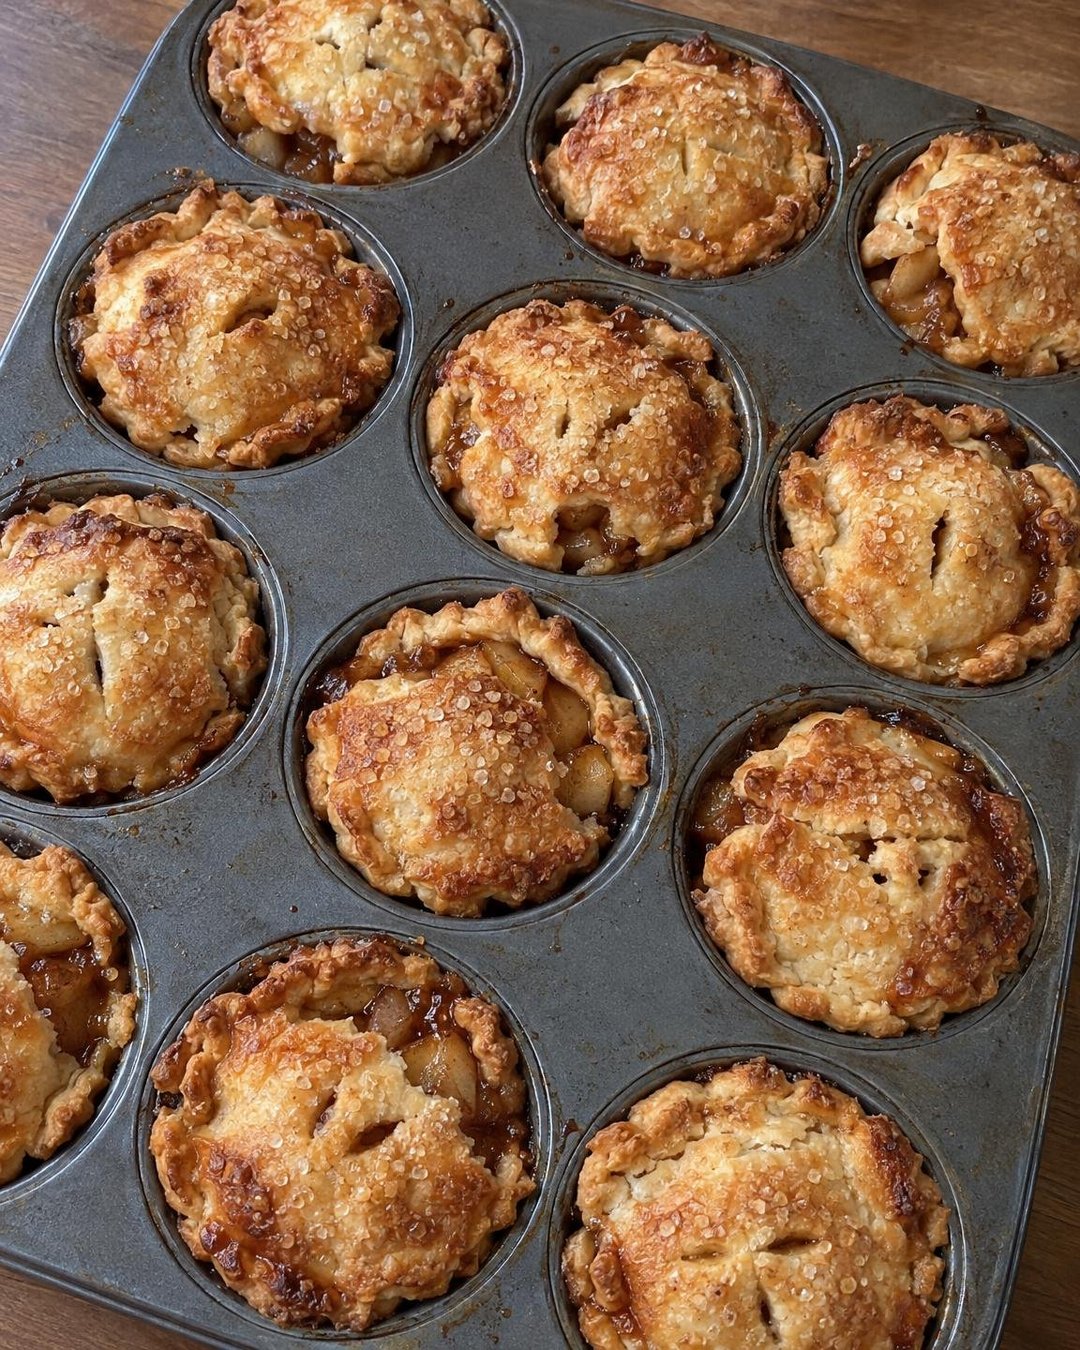
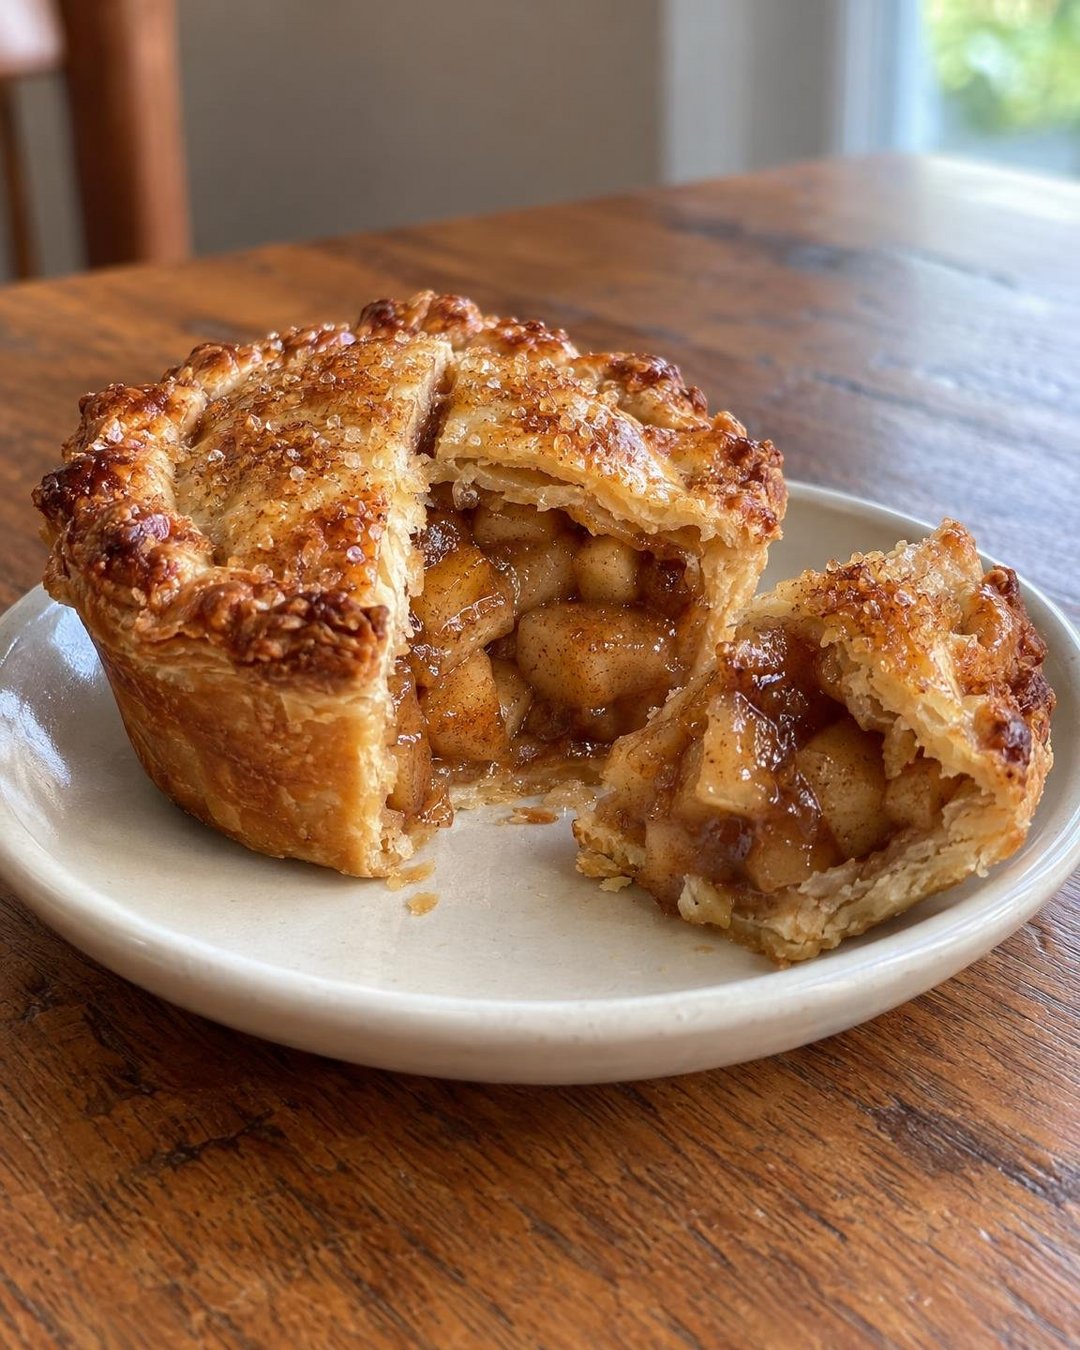
Flaky, buttery little pies baked right in a muffin tin and filled with tender cinnamon apples. They taste just like classic apple pie, only they’re perfectly portioned and so much easier to serve!
THE CUTEST LITTLE APPLE PIES EVER!
I have a confession: I love apple pie, but I don’t always love making a whole pie. That’s why these mini apple pies have been on repeat in my kitchen every fall (and honestly, all year long). They have everything I want from a homemade pie, including a golden crust, tender spiced apples, and a sprinkle of sparkly sugar on top. My kids get so excited when they see that muffin tin come out of the oven. Each one gets their own little pie, so there’s no arguing over who got the bigger slice!
These are super simple to pull together, and they’re a budget friendly dessert since a few apples and some pie crust go a long way. They’re family friendly and perfect for bake sales, holidays, or a cozy Sunday treat. We have a weeknight meal like a simple roast chicken or a pot of chili, pop these in the oven, and boom — dinner is served, with dessert right behind it! Serve them warm with a scoop of creamy vanilla ice cream or a drizzle of caramel and I am a happy camper.
“These were a huge hit at our Thanksgiving dessert table! They were so much easier to serve than a full pie, and the kids loved having their own. Definitely a keeper of a recipe!”
– Melissa
Frequently Asked Questions
Can I make my own pie crust from scratch?
Absolutely! Any homemade double-crust recipe will work beautifully here. You’ll want enough dough for two double-crust pies to get 12 bottoms and 12 tops with a little extra for re-rolling. Store-bought refrigerated crust is a great shortcut on busy days, though, and I’m not judging one bit!
What kind of apples are best for mini apple pies?
I love a mix of Granny Smith and Honeycrisp. The Granny Smith gives you that nice tartness and holds its shape, while the Honeycrisp adds natural sweetness. Braeburn, Pink Lady, Jonagold, and Gala are also great options. Use whatever you prefer or whatever you have on hand!
Can I make these ahead of time or freeze them?
Yes, of course! You can bake them up to a day ahead and store them covered at room temperature. To freeze, let the baked pies cool completely, then freeze them in a single layer before transferring to a freezer bag for up to 3 months. Reheat from frozen at 350°F for about 12 to 15 minutes, until warmed through and the crust is crisp again.
Why do you pre-cook the apple filling?
Great question! Apples shrink as they bake, and in a whole pie that can leave a big gap under the crust. Cooking the filling for just a few minutes on the stovetop softens the apples and thickens the juices, so your mini pies stay nice and full and the bottoms don’t get soggy. It only takes about 5 minutes and it makes a big difference.
How should I store leftovers?
Leftover mini pies keep covered at room temperature for up to 2 days or in the fridge for up to 5 days. I like to rewarm them in a 350°F oven or toaster oven for 5 to 8 minutes to bring back that flaky crust. The microwave works in a pinch, but the crust will be softer.
Can I reduce the sugar?
Absolutely! Sweet apples like Honeycrisp or Fuji let you cut the brown sugar down to 3 tablespoons without losing much flavor. The cinnamon and a pinch of salt do a lot of work to make the filling taste sweet and cozy. It’s an easy way to make these a little more nutritious while still keeping them a fun treat.
Ingredients Needed: (See Recipe Card Below for the Full Recipe)
- Refrigerated pie crust — Two boxes (4 crusts) give you plenty for the bottoms and tops. Homemade crust works great too!
- Apples — A mix of tart and sweet is my favorite. Dice them small (about ¼ inch) so they fit nicely in the mini crusts and cook evenly.
- Lemon juice — Keeps the apples from browning and brightens up the flavor.
- Unsalted butter — For cooking the filling. It adds a rich, caramel-y flavor.
- Light brown sugar — Gives a cozy, molasses-y sweetness. Dark brown sugar or granulated sugar work too.
- Cornstarch — Thickens the juices so the filling isn’t runny. You can swap in 2 tablespoons of all-purpose flour if that’s what you have.
- Cinnamon and nutmeg — The classic apple pie duo. Feel free to use 1½ teaspoons of apple pie spice instead.
- Vanilla extract — A little splash adds warmth and depth.
- Salt — Just a pinch to balance the sweetness. Don’t skip it!
- Egg — Beaten with a splash of milk for a golden, shiny egg wash.
- Coarse sugar — Turbinado or sanding sugar gives the tops a bakery-style crunch. Regular granulated sugar is fine too.
How to Make Mini Apple Pies
Start by preheating your oven to 375°F and greasing a standard 12-cup muffin tin really well with butter or nonstick spray. Peel, core, and dice your apples into small ¼-inch pieces, then toss them with the lemon juice so they don’t brown while you get everything else ready.
Next, melt the butter in a large skillet over medium heat. Add the apples, brown sugar, cinnamon, nutmeg, and salt, and cook for about 4 to 5 minutes, stirring often, until the apples just start to soften. You don’t want them mushy, only slightly tender! Sprinkle in the cornstarch and stir for another minute or so until the juices turn thick and glossy. Take it off the heat, stir in the vanilla, and let the filling cool for at least 10 to 15 minutes. Warm filling will melt the crust, so be patient here.
While the filling cools, roll out your pie crusts on a lightly floured surface. Use a 4-inch round cutter (or a wide-mouth glass) to cut 12 circles for the bottoms, and press them gently into the muffin cups so they come about three-quarters of the way up the sides. Re-roll the scraps as needed. Then cut 12 smaller 3-inch circles for the tops, or slice the dough into thin strips if you’d like to do a little lattice.
Spoon the cooled filling into each crust, filling them right to the top and mounding slightly. Lay the tops over the filling and pinch the edges together to seal. If you used solid tops, cut a small slit or two in each one so the steam can escape. Brush the tops with egg wash and sprinkle generously with coarse sugar.
Bake for 22 to 26 minutes, until the crust is deep golden brown and you can see the filling bubbling a little through the vents. Let the pies cool in the pan for 10 to 15 minutes so the filling can set, then run a thin knife around the edges and gently lift them out. Serve warm and enjoy!
Pro Tips
- Keep the dough cold — Cold dough bakes up flakier and is easier to work with. If it gets soft or sticky, pop the filled muffin tin in the fridge for 10 minutes before baking.
- Dice the apples small — Small, even pieces fit better in the little crusts and cook through evenly, so you don’t end up with crunchy bites.
- Cool the filling first — Hot filling melts the butter in the crust and leads to soggy bottoms. A few minutes of waiting pays off!
- Grease the pan generously — The filling can bubble over and act like glue. A well-greased pan (including the top surface around each cup) helps the pies pop right out.
- Don’t pull them too early — You want a deep golden crust, not a pale one. If the edges are browning faster than the tops, loosely tent with foil for the last few minutes.
- Get creative with the tops — Mini cookie cutters like leaves, stars, or hearts make these extra fun for holidays, and they’re a great job for little helpers.
What to Serve with Mini Apple Pies
These little pies are wonderful on their own, but a few simple add-ons make them feel extra special. Whether you’re serving a crowd at the holidays or just treating the family after dinner, here are some of our favorite ways to enjoy them:
- Vanilla ice cream — My personal favorite! A scoop of creamy vanilla melting over a warm mini pie is pure comfort food.
- Homemade whipped cream — Lightly sweetened with a dash of cinnamon.
- Salted caramel sauce — A drizzle over the top is always highly requested at our house.
- Sharp cheddar cheese — An old-fashioned pairing that’s surprisingly delicious!
- Greek yogurt with honey — A lighter, protein-packed option for a more nutritious twist.
- Hot apple cider or coffee — The perfect cozy drink to go alongside.
However you serve them, I just know these mini apple pies are going to become a family favorite in your home, too!
Mini Apple Pies
Ingredients
Method
- Preheat the oven to 375°F. Generously grease a standard 12-cup muffin tin with butter or nonstick spray.
- Toss the diced apples with 1 tablespoon lemon juice in a large bowl.
- Melt 2 tablespoons butter in a large skillet over medium heat. Add the apples, ⅓ cup brown sugar, 1 teaspoon cinnamon, ¼ teaspoon nutmeg, and ⅛ teaspoon salt. Cook for 4 to 5 minutes, stirring often, until the apples just begin to soften.
- Sprinkle 1 tablespoon cornstarch over the apples and stir constantly for 1 to 2 minutes, until the juices are thick and glossy. Remove from heat, stir in 1 teaspoon vanilla, and let cool for at least 15 minutes.
- On a lightly floured surface, roll the pie crusts slightly thinner. Cut out 12 circles with a 4-inch cutter and press them into the muffin cups. Re-roll scraps as needed.
- Cut 12 smaller 3-inch circles (or thin strips for a lattice) from the remaining dough for the tops.
- Divide the cooled filling evenly among the crusts, about ⅓ cup each, mounding slightly. Place the tops over the filling and pinch the edges to seal. Cut a small slit in each solid top to vent.
- Whisk 1 egg with 1 tablespoon milk and brush over the tops. Sprinkle evenly with 2 tablespoons coarse sugar.
- Bake for 22 to 26 minutes, until the crust is deep golden brown and the filling is bubbling. Tent loosely with foil if the edges brown too quickly.
- Cool in the pan for 10 to 15 minutes, then run a thin knife around each pie and gently lift out. Serve warm or at room temperature.