Turmeric is best known as the vibrant golden spice that adds warmth and vibrancy to curries. But did you know that with just a little care, you can easily grow this superfood at home?
Why Grow Your Own Turmeric?
Turmeric contains curcumin, a compound with powerful anti-inflammatory and antioxidant properties. Thousands of studies show curcumin helps regulate blood pressure, improves memory and arthritis symptoms, may help prevent cancer, and more.
When you grow your own, you enjoy fresh turmeric with superior flavor and health benefits compared to store-bought powder. Homegrown turmeric boasts a sweeter, more nuanced flavor. Plus higher curcumin levels, which impart the deep orange color.
It’s also fun and rewarding to grow exotic tropical plants – even in cold climates! Turmeric’s lush foliage and plump technicolor rhizomes are a sight to behold.
Overview of the Turmeric Plant
Turmeric (Curcuma longa) is a perennial herb native to India and closely related to ginger.
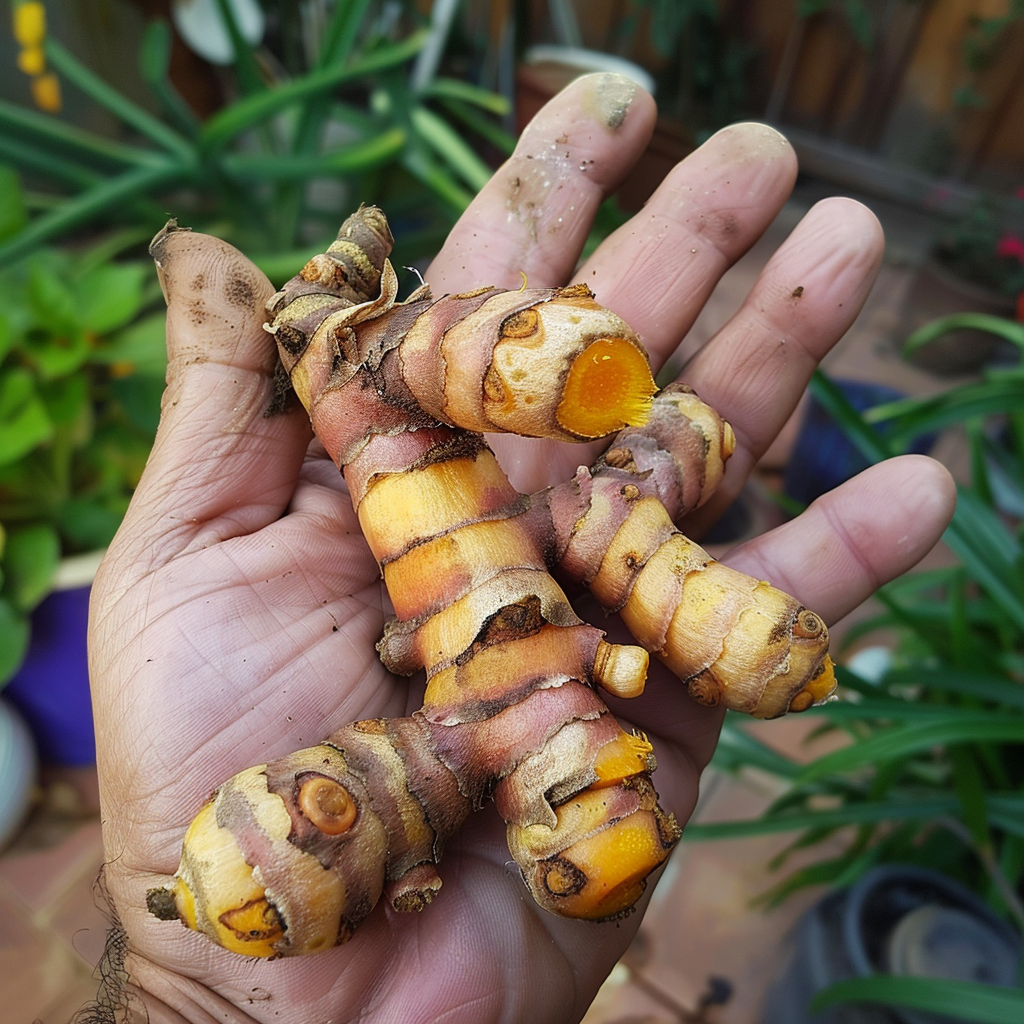
Rather than growing from seeds, turmeric propagates from rhizomes – knobbly underground stem pieces. Each rhizome sprouts leaves and additional orange-fleshed rhizome “fingers” spreading from a central cluster.
Above ground, turmeric reaches 1-3 feet tall depending on conditions. Its broad lance-shaped leaves extend off upright hollow stems. Funnel-shaped pale yellow flowers emerge from the center in summer.
Below ground, turmeric forms fat finger-like rhizomes spreading from the mother rhizome. These orange roots are dried and ground to flavor foods or make golden milk. Rhizomes also contain the medicinal compounds.
Ideal Growing Conditions
- Full sun to partial shade
- Temps of 70-90°F
- Rich, loose, well-draining soil
- Moderate moisture
- At least 8 months frost-free
Luckily for home growers, turmeric can thrive in containers. Let’s look at how to plant and care for your crop!
Growing Turmeric in Containers
With some simple preparation and adjustments for climate, you can cultivate turmeric just about anywhere.
1. Obtain High Quality Rhizomes
Seek out plump, organically grown seed rhizomes for planting. Some natural grocers sell fresh turmeric root. Or order rhizomes online to start your crop. Select sweeter, deep orange varieties high in curcumin versus paler yellow types. Hawaiian Red and Indira Poorna offer excellent flavor and curcumin levels.
2. Prepare the Right Container
Turmeric needs ample room to stretch its subterranean fingers. Use at least a 10 inch deep, wide pot with drainage holes. Add rich organic potting mix amended with worm castings or compost. To promote drainage, include perlite and horticultural charcoal. Or try a fabric smart pot.
For indoor growing, choose a portable plastic, ceramic, or woven container. Outdoors, you might use whiskey barrels or raised beds. Just ensure adequate drainage.
Tip: Wine barrels need holes drilled in the bottom for drainage before adding rocky substrate and soil on top.
3. Plant Rhizomes Properly
Timing matters! Count back 9-10 months from your first fall frost to determine ideal spring planting time.
In early spring after danger of frost passes, plant rhizomes 2-4 inches deep and 4 inches apart. Gently firm moist soil over the tops and water well. Expect sprouts emerging in around 2 months.
Place rhizomes upright with growing nubs facing up and the top slightly exposed. This orientation maximizes healthy sprouting potential. If started too deep, they may rot or fail to emerge.
Note: In colder zones, begin 8-12 weeks before last spring frost indoors. Allow sprouted seedlings to gradually acclimate to outdoors in late spring.
4. Care for Your Growing Turmeric
Watering: After sprouting, keep soil consistently moist but not soggy. Drought can stunt plants. But overwatering promotes rhizome rot. Allow containers to partially dry out between waterings. Decrease watering come fall.
Sun: Site containers in full sun to partial afternoon shade. Extreme summer heat slows growth. Consider 40-50% shade cloth to protect outdoor pots in zones 8+ during hottest months if showing distress.
Fertilizing: Work compost or organic fertilizer into soil at planting for gentle nutrients. Once sprouted, feed every 3-4 weeks with compost tea, fish emulsion, seaweed extract, or organic all-purpose fertilizer per label instructions. Discontinue feeding a month before expected harvest time.
Overwintering: In zones 7 or less, bring containers indoors before first fall frost to a sunny, 60-70°F spot. Reduce watering for dormancy. Return outside after danger of spring frost passes.
Pests & Disease: Ensure good soil drainage and avoid overwatering to limit rhizome rot risk. Pick off leaf-chewing pests. Remove yellowing leaves promptly.
5. Harvesting Your Bounty
Come fall when foliage dies back, carefully dig up rhizomes using a trowel. Expect smaller roots the first year. Size and yield increase in subsequent seasons.
Rinse, dry, and rub off loose skins before storing. Refrigerate up to 3 weeks before flavors fade. Or preserve via dehydrating or freezing.
Try This: Brew dried or grated fresh turmeric into anti-inflammatory golden milk. Combine with black pepper to amp absorption of curcumin!
That covers the basics of container turmeric! With some adjustments for climate, you can yield an abundance of homegrown golden spice almost anywhere.