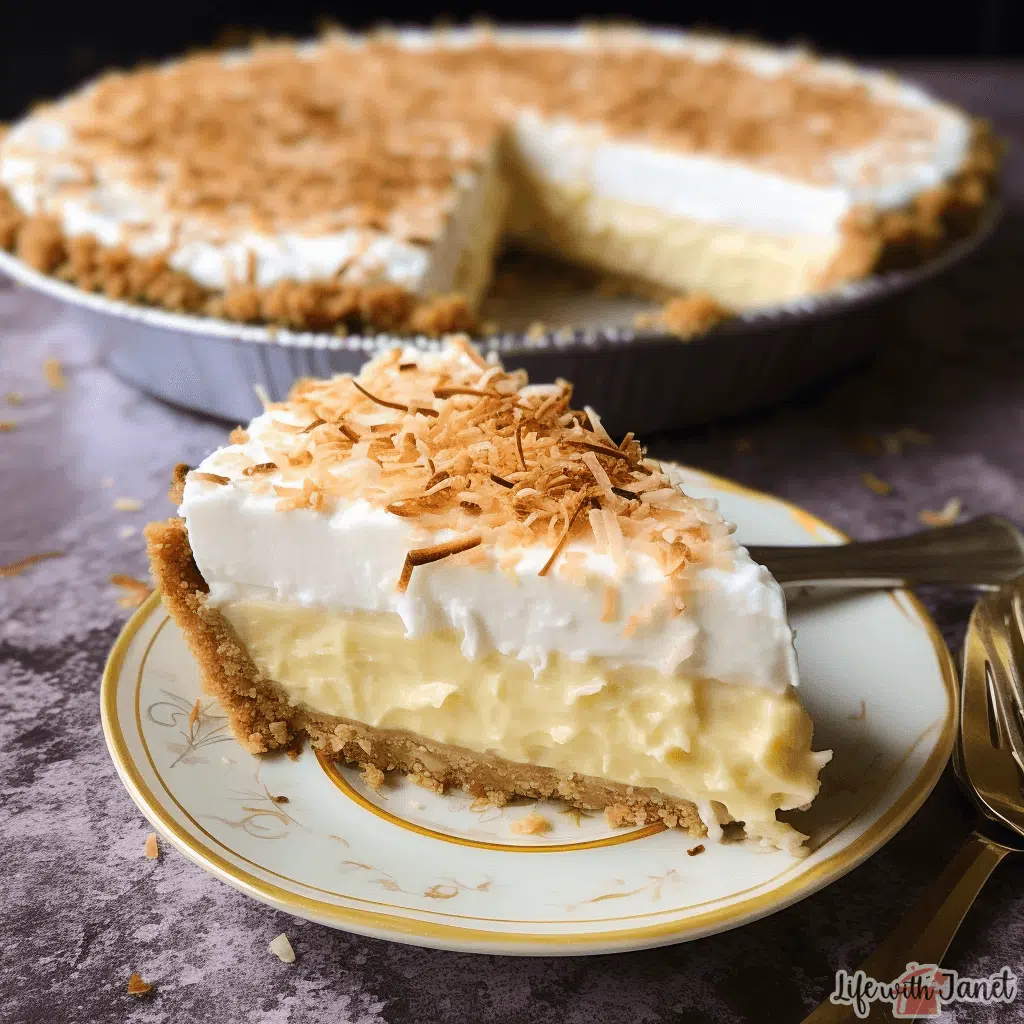
Coconut Cream Pie is the epitome of dessert indulgence, where luscious filling and a buttery crust culminate in a tropical escapade for your taste buds. From the holidays to everyday celebrations, this pie is a showstopper. Having honed this recipe to perfection, I’m here to tell you that this is the Coconut Cream Pie you’ve been dreaming of.
Trust me, one slice and you’ll find yourself transported to dessert nirvana.
Can You Substitute Regular Milk for Canned Coconut Milk?
Ah, the age-old question. While it’s tempting to replace canned coconut milk with something more “accessible” like regular milk, resist that urge. The canned coconut milk provides a rich, coconut-infused foundation that regular milk just can’t replicate. If you’re a die-hard fan of coconut like me, there’s no substitution for the genuine article.
Why is My Coconut Cream Pie Filling Runny?
Did your pie turn into a tropical puddle? Not to worry! The trick lies in the tempering of your egg yolks and the utilization of cornstarch. If either of these steps is skipped or done incorrectly, you might end up with a less-than-stellar consistency. Remember to add the boiling coconut milk mixture gradually to the egg yolks while whisking briskly.
Don’t rush the process; patience is a virtue even in pie-making.
Can You Make the Coconut Cream Pie Ahead of Time?
The answer is an unequivocal yes! The filling needs at least three hours to set anyway, making it a prime candidate for advance preparation. You can actually refrigerate the pie for up to a full day before serving. Just ensure that those hungry eyes stay away from this masterpiece until it’s time to feast.
Advance planning has never tasted so good.
To Toast or Not To Toast the Coconut Topping?
Ah, the finishing touch! You’ve got two schools of thought here. Some prefer their shredded coconut untoasted, reveling in its pure, unadulterated form. Others swear by toasting the coconut for that added layer of nutty, golden flavor. If you’re into multi-dimensional taste experiences like me, go ahead and toast those lovely shreds.
Either way, you can’t really go wrong—it’s the crown jewel atop your Coconut Cream Pie throne.
Freezing Tips: Can Coconut Cream Pie be Frozen?
Yes, indeed! If you have the Herculean willpower to not devour the whole pie in one sitting, freezing is a great option. Just remember to properly seal the pie in airtight packaging to prevent freezer burn. When you’re ready to relish this coconut delight, thaw in the refrigerator before serving.
It’s like finding a tropical treasure in your freezer.
Serving Suggestion: Whipped Cream or Meringue?
While whipped cream is the go-to garnish for many, meringue makes for an equally compelling topping. If you’re looking to utilize those leftover egg whites, a meringue topping is a delightful alternative. But, let’s be real—when it comes to Coconut Cream Pie, there’s no wrong way to top it off.
Choose your adventure, either way, it’s a win-win.
Homemade Coconut Cream Pie
Ingredients
For the Pie Filling:
- 4 large Egg Yolks
- 30 g Cornstarch
- 14 ounces Coconut Milk full fat
- 240 ml Half-and-Half
- 130 g Granulated Sugar
- 1/4 teaspoon Salt
- 80 g Shredded Coconut sweetened
- 30 g Unsalted Butter softened
- 1 teaspoon Vanilla Extract
- 1/2 teaspoon Coconut Extract optional
For the Whipped Cream:
- 360 ml Heavy Cream cold
- 20 g Confectioners’ Sugar or Granulated Sugar
- 3/4 teaspoon Vanilla Extract
Optional for Garnish:
- Coconut Shavings unsweetened
Instructions
The Pie Crust
- Early Prep: Prepare your pie dough the night before, as it requires a minimum of 2 hours in the fridge to chill.
- Baking the Crust: Preheat your oven to 375°F (190°C). Proceed to fully blind bake your pie crust. Once baked, let it cool completely. This step can be done up to three days in advance. Just wrap the cooled crust tightly and store it in the refrigerator until you’re ready to fill it.
The Creamy Coconut Filling
- Initiating the Process: Whisk together egg yolks and cornstarch, then set aside.
- Heat Dynamics: In a medium saucepan, combine the coconut milk, half-and-half, granulated sugar, and salt. Bring this to a boil over medium heat, stirring occasionally.
- Egg Yolk Incorporation: Extract about 1/2 cup of the hot mixture and gradually whisk it into the egg yolk and cornstarch blend. This tempers the yolks, preventing them from scrambling.
- Confluence: Slowly pour the tempered egg mixture back into the saucepan. The liquid will bubble and thicken almost instantaneously. Cook and whisk for another 1 minute and 30 seconds.
- Finishing Touches: Remove from heat and blend in the shredded coconut, softened butter, vanilla, and optional coconut extract.
Assembling the Pie
- Layering: Pour the warm filling into the completely cooled pie crust.
- Chilling: Cover tightly with plastic wrap directly on the surface to avert skin formation. Refrigerate for at least 3 hours, or until thickened.
Whipped Cream Extravaganza
- Whipping: Utilize either a hand mixer or a stand mixer with a whisk attachment to whip the heavy cream, sugar, and vanilla until you achieve medium peaks.
- Garnish and Serve: Adorn your pie with the whipped cream and additional coconut, if desired.
Notes
Storage and Make-Ahead Tips
- The pie crust can be prepped in advance and stored either in the fridge for up to 5 days or in the freezer for up to 3 months.
- For those who plan way ahead, you can also freeze the assembled pie, minus the whipped cream. Just ensure the filling has fully cooled before wrapping it in an extra layer of plastic wrap and freezing. Thaw in the fridge or on the counter before adding the whipped cream.
Additional Notes
- Coconut Milk: Ensure you are using canned, full-fat, unsweetened coconut milk typically found near Thai food products. Do not use the carton variety found in the refrigerated section.