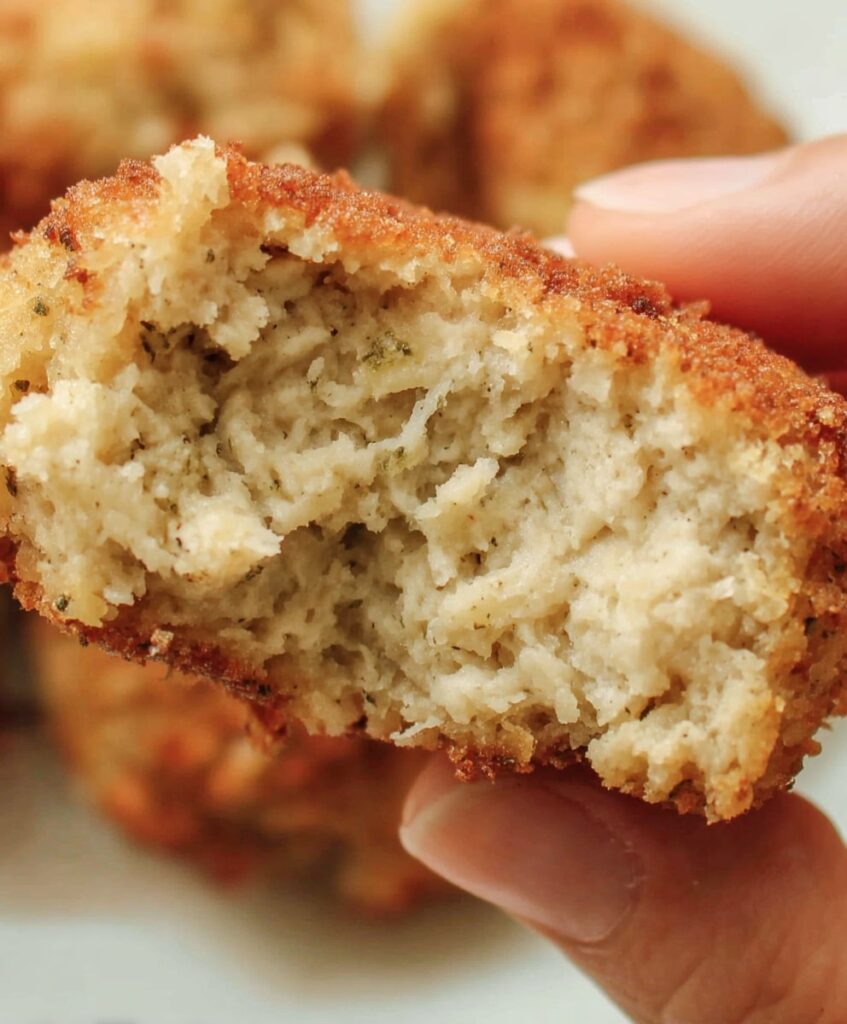
When you’re juggling work, school runs, and everything in between, getting dinner on the table quickly is key. These Easy Chicken Rissoles are here to save the day. Made with lean chicken mince, grated veggies, and a sprinkle of cheese, they’re nutritious, fuss-free, and a total hit with the kids. Plus, they’re freezer-friendly, which makes them a lifesaver for meal prep.

Chicken mince is one of those underrated ingredients that really doesn’t get the spotlight it deserves. It’s lean, quick to cook, and pairs beautifully with almost any seasoning or vegetable you have on hand. Whether you’re whipping up homemade chicken nuggets, Thai-style meatballs, or even a rustic chicken sausage roll, mince-based meals are a go-to in family households.
If you’re into chicken-based recipes that suit picky eaters and busy schedules, you might also love trying out Homemade Chicken Nuggets, Healthy Chicken Veggie Nuggets, or my Baked Thai Chicken Meatballs. All simple, satisfying, and perfect for family meals. They’re especially handy for batch cooking and stocking up the freezer with midweek lifesavers.
Why You’re Going To Love This Recipe
There are plenty of reasons this chicken rissole recipe will become a favorite in your kitchen:
- Great Finger Food for Kids: Ideal for little hands and baby-led weaning. These are soft enough for toddlers to manage and tasty enough for everyone else to want in on.
- Hot or Cold – Still Delicious: Serve them warm from the pan or pack them cold in lunchboxes – they’re just as good either way.
- Simple Ingredients: Nothing fancy here – everything can be found in your pantry or fridge.
- Freezer-Friendly: Make a double batch and freeze half for a rainy day.
- Quick and Easy: From grating to frying, dinner is done in under 30 minutes.
- Customizable: Switch out the herbs, add corn, or give them a spicy kick with a little paprika or cumin.
- Thermomix or Not: Works beautifully with or without kitchen gadgets.
What You Need
Here’s a closer look at the ingredients that make these rissoles so tasty:
- Brown Onion: Adds natural sweetness and depth. Grated so it blends right into the mixture.
- Carrot & Zucchini: Sneaky veggies that bring moisture and nutrition without overpowering the flavor.
- Cheddar Cheese: Go for a sharp cheddar for maximum flavor. Freshly grated is ideal, but pre-grated will work in a pinch.
- Chicken Mince: Lean, mild-flavored and fast to cook. A budget-friendly protein choice.
- Panko Breadcrumbs: Japanese-style breadcrumbs that add a light texture. If unavailable, regular breadcrumbs are a fine substitute.
- Egg: Acts as the binding agent to hold everything together.
- Chives or Parsley: Fresh herbs lift the flavor – use what you have on hand.
- Salt & Pepper: Simple seasoning goes a long way.
- Olive Oil: Used for frying. Any neutral oil will work.
Equipment Required
You don’t need fancy equipment for this recipe. Just a few basics:
- Grater and Large Mixing Bowl: For prepping and mixing ingredients.
- Frying Pan: Medium to large, with a non-stick surface if possible.
- Thermomix (Optional): Great for chopping and mixing in a flash.
Step By Step Instructions
Step 1: Grate the Vegetables and Cheese
Grate your onion, carrot, zucchini, and cheese. This helps the ingredients meld together more easily and evenly.
- Thermomix Tip: Add all to bowl, chop for 6 seconds on Speed 8.
Step 2: Mix it All Together
Add the grated veggies and cheese to a large mixing bowl. Toss in the chicken mince, breadcrumbs, egg, herbs, and seasoning. Mix until well combined.
- Thermomix Tip: Add ingredients, mix 10 seconds on Speed 4. Scrape and repeat as needed.
Step 3: Shape the Rissoles
Scoop up a small handful (about 2 tablespoons) and roll it into a ball. Flatten slightly for even cooking. Wet your hands first – it makes shaping easier.
Step 4: Cook Until Golden
Heat olive oil in a frying pan over medium heat. Cook the rissoles for about 4-5 minutes on each side or until golden brown and cooked through. Repeat with the rest.
Step 5: Serve or Store
Serve warm, or let them cool and refrigerate or freeze for later.
Expert Tips
- Double Batch It: These rissoles go fast, so make extra.
- Use Wet Hands: Prevents the sticky mixture from clinging to your fingers.
- Mini or Meal Size: Shape small for snacks or big for dinner portions.
- Sauce It Up: These taste even better with tomato sauce, aioli, or a tangy chutney.
- Storage: Keep leftovers in an airtight container for up to 2 days. They reheat well in the oven or microwave.
- Freezing Uncooked: Layer between baking paper in an airtight container. Defrost before frying.
- Freezing Cooked: Store in an airtight container. Reheat straight from frozen or thaw overnight.
FAQs
Can I use turkey or beef mince instead?
Absolutely! Just keep in mind that flavor and fat content will vary.
Can I make these gluten-free?
Yes. Use gluten-free breadcrumbs and check your cheese and seasonings.
Are these good for school lunchboxes?
Perfect! Serve cold with a small container of sauce for dipping.
What should I serve these with?
Mashed potato and steamed greens are classic. Or tuck them into wraps with lettuce and mayo.
How long do they last in the fridge?
Up to 2 days when stored properly.

Easy Chicken Rissoles Recipe
Ingredients
- 1 medium brown onion grated
- 1 medium carrot grated
- 1 small zucchini grated
- 120 g 1 cup cheddar cheese, grated
- 500 g chicken mince
- 45 g 3/4 cup panko breadcrumbs
- 1 large egg
- 1 tbsp chives or parsley chopped
- Salt & pepper to taste
- Olive oil for frying
Instructions
- Combine grated onion, carrot, zucchini, and cheese in a large bowl.
- Add chicken mince, breadcrumbs, egg, herbs, salt, and pepper. Mix well.
- Form small patties by hand, flatten slightly.
- Heat oil in a pan over medium heat. Cook rissoles for 4-5 minutes on each side until golden and cooked through.
Notes
- Make extra and freeze for later
- Use fresh herbs for added flavor
- Serve with your favorite dipping sauce
- Ideal for lunchboxes or quick weeknight dinners


Can you cook the Cicken Rissole in air fryer?