What is the difference between a taco and a chicken chalupa?
The very essence of a chicken chalupa varies distinctively from a traditional taco. Tacos usually feature a folded or rolled tortilla filled with various mixtures, including beef, chicken, seafood, vegetables, and cheese. In essence, the taco is a versatile dish that can be customized in numerous ways.
A chalupa, on the other hand, begins with masa dough that is deep-fried to create a cup-like shape. The masa dough gives it a unique texture and flavor. The dough shell can then be filled with your choice of meat, fresh veggies, and a blend of delicious Mexican cheeses.
Because of its deep-fried nature, a chalupa often delivers a crunch that stands apart from the softer texture of traditional tacos. Moreover, while tacos can be either soft-shelled or hard-shelled, chalupas maintain their integrity through the deep-fried masa shell, giving it a boat-like appearance.
However, the fast-food renditions, notably from Taco Bell, tend to deviate from this tradition. For instance, Taco Bell’s version of the chalupa involves a thick, fried tortilla shell that is different from the authentic Mexican version.
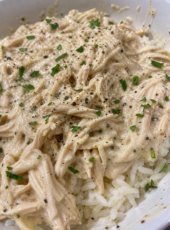
If you are a fan of Mexican-inspired recipes, my Melt-in-Your-Mouth Chicken is another treat you might want to consider. It brings together the flavors of the Southwest in a way that’s both satisfying and delicious.
In sum, the primary difference between a taco and a chalupa lies in the preparation of their respective shells and the variety of fillings each can accommodate.
How do you make a homemade chicken chalupa shell?
Creating your own chicken chalupa shell at home may seem like a complex task, but it’s far more straightforward than you’d think. All you really need are some basic ingredients: flour, baking powder, salt, and shortening. And you can’t forget the milk; it acts as the binding agent that pulls all the dry ingredients together.
To make the dough, you’ll combine the flour, baking powder, salt, and shortening. Use a fork or your hands to integrate these components until the mixture resembles crumbs. Then, add the milk gradually, working it into the dry ingredients until a dough forms.
Now, this dough needs some kneading. Get those hands in there and knead until it’s smooth. Divide this dough into smaller balls, about the size of golf balls, depending on how big you want your chalupas to be. Roll out these balls into flat, round shapes, akin to small-sized tortillas.
Here comes the frying part: heat up some canola oil in a pan to around 350 degrees Fahrenheit. This is the perfect temperature for deep frying. Poke the rolled dough with a fork to prevent puffing, then immerse it in the hot oil. Keep it in shape with some tongs.
Flip, turn, and observe as your dough turns a golden brown. Now, take it out and let it drain on a paper towel. You’ve just made a chalupa shell!
This is quite a different beast compared to my Doritos Chicken Casserole, but they both offer an explosion of flavors.
And there you have it! Creating chalupa shells at home is an engaging process, but the results are exceptionally rewarding.
What kind of meat can you use in a chicken chalupa?
The beauty of the chalupa is its versatility; while “chicken chalupa” implies the use of chicken, you can easily substitute other meats or protein sources to suit your preferences. Ground beef is a common alternative, offering a rich, hearty flavor.
For a blend of textures and flavors, you might consider a combination of ground pork and ground beef. Steak strips also make a luxurious filling, providing a chewy contrast to the chalupa’s crispy shell.
For those seeking a vegetarian option, beans serve as an excellent meat substitute. They offer both protein and fiber, while still allowing the other chalupa ingredients to shine. Whether you prefer black, pinto, or refried beans, the choice is yours.
If you’re a fan of chicken but are looking for something different, why not try my Rotisserie Chicken and Stuffing Casserole? It’s a homey, comforting dish that might just become a new favorite.
Fish and shrimp can also serve as a delightful filling. The flakiness of the fish pairs beautifully with the crispiness of the chalupa shell, resulting in a balanced blend of textures.
In essence, your options for chalupa fillings are nearly endless, governed only by your imagination and palate.
How can you make a chicken chalupa healthier?
Health consciousness need not deter you from enjoying a scrumptious chalupa. Several modifications can be made to turn this indulgent dish into a more nutritious option. The first obvious step is to focus on the shell. Instead of deep-frying, consider baking or using an air fryer. This reduces the calorie and fat content significantly.
Lean meats, like chicken breast or turkey, serve as excellent fillings. They are high in protein and low in fat, making them ideal for a health-conscious meal. Adding vegetables, such as lettuce, tomatoes, and bell peppers, further elevates the nutritional value.
Cheese is a key ingredient in chalupas, but not all cheeses are created equal. Opt for low-fat or skim cheeses to reduce calorie intake. If you’re a cheese aficionado, you might appreciate the tanginess of feta or the richness of mozzarella, both of which come in lighter versions.
If you like your chalupa saucy, consider making homemade sauces that use yogurt as a base instead of mayonnaise or sour cream. It might not be the traditional route, but it’s a healthier alternative that still offers creaminess.
In a similar vein, my Mayonnaise and Parmesan Chicken could also be modified for a healthier option by using a yogurt-based sauce.
Remember, a chalupa doesn’t have to be a guilty pleasure. With these healthier choices, you can relish the same delicious flavors without compromising your dietary goals.
What is the history of the chalupa?
The chalupa, a staple in Mexican cuisine, has an interesting history that dates back to the Aztecs. The term “chalupa” is derived from the Spanish word for “boat,” and indeed, the shape of this dish resembles a small boat. Traditionally, chalupas were made using masa harina, a type of corn flour, and were shaped by hand before being fried or baked.
Historically, chalupas were considered a street food, sold primarily in markets and fairs. Over time, they gained popularity and made their way into restaurants and home kitchens alike. The basic recipe of masa dough filled with meat and vegetables has remained largely unchanged over the centuries, although regional variations do exist.
The Americanization of the chalupa came into play when fast-food chains like Taco Bell added it to their menu. Their version involves a thicker, softer shell and a variety of toppings that are not necessarily traditional, but have been embraced by a wide audience.
Even with these changes, the essence of the chalupa remains—a delicious, boat-shaped delight that can be customized to individual taste preferences. As trends change and fusion cuisine continues to evolve, it will be interesting to see how the chalupa adapts and what new forms it might take.
Despite its rich history, the chalupa remains a flexible dish that can be modified and enjoyed in countless ways. Whether you prefer to stick to the traditional recipe or experiment with new ingredients, there’s no denying the lasting appeal of this classic Mexican dish.
Can you freeze chalupa shells?
Absolutely, yes—you can freeze chalupa shells! Doing so can be a real time-saver for those busy weeknights when cooking from scratch seems daunting. However, there are some guidelines to keep in mind for optimal results. After frying your shells, let them cool down to room temperature; putting them in the freezer while hot can result in a soggy texture.
Once they’ve cooled, wrap each shell individually in plastic wrap. Make sure they’re tightly sealed to prevent freezer burn. Then, put these individually wrapped shells into a resealable freezer bag, squeeze out as much air as possible, and store them in the freezer.
When you’re ready to use them, allow the shells to thaw in the fridge for several hours. If you’re in a hurry, you can heat them directly from the freezer, but this may result in a texture that’s less than ideal.
It’s best to use these frozen chalupa shells within 2-3 months. Any longer, and they may start to lose their flavor and texture. But let’s be honest, they’re so tasty, what are the chances they’ll stay in your freezer that long?
Freezing is a great way to enjoy chalupas on a whim, without the hassle of making shells from scratch every time. So the next time you’re in the cooking mood, why not make an extra batch to freeze for later? It’s a convenient option that allows you to enjoy homemade chalupas whenever the craving strikes.
Ingredients
Method
- Gather and measure all your ingredients.
- In a large skillet, pour in about 2 inches of canola oil and heat until the temperature reaches 350°F.
- In a small mixing bowl, blend together paprika, garlic powder, chili powder, and cumin. Season both sides of the chicken breasts.
- In another skillet, pour a tablespoon of olive oil and heat until shimmering. Place the chicken breasts and cook for about 5–7 minutes on each side or until the thermometer reads 165°F. Allow it to rest for 5 minutes before slicing it into strips.
- Dice the Roma tomatoes and segregate them in a bowl. Place the shredded lettuce, sour cream, and cheese in separate bowls for easy assembly later.
- In a large bowl, combine flour, baking powder, salt, and shortening.
- Introduce the milk and stir until a dough forms.
- Flour a countertop and roll out the dough flat. Shape it back into a ball. Cut it in half, then divide it into 8 even sections.
- Roll each portion into a ball and flatten them into 4-inch circles using a rolling pin.
- With a fork, puncture holes across the surface to keep it from puffing up too much.
- With tongs in hand, fold the shell in half and submerge one side in hot oil. Fry each side for about 30 seconds, flipping and frying additional 15-second intervals. Once golden, remove and place on paper towels to drain.
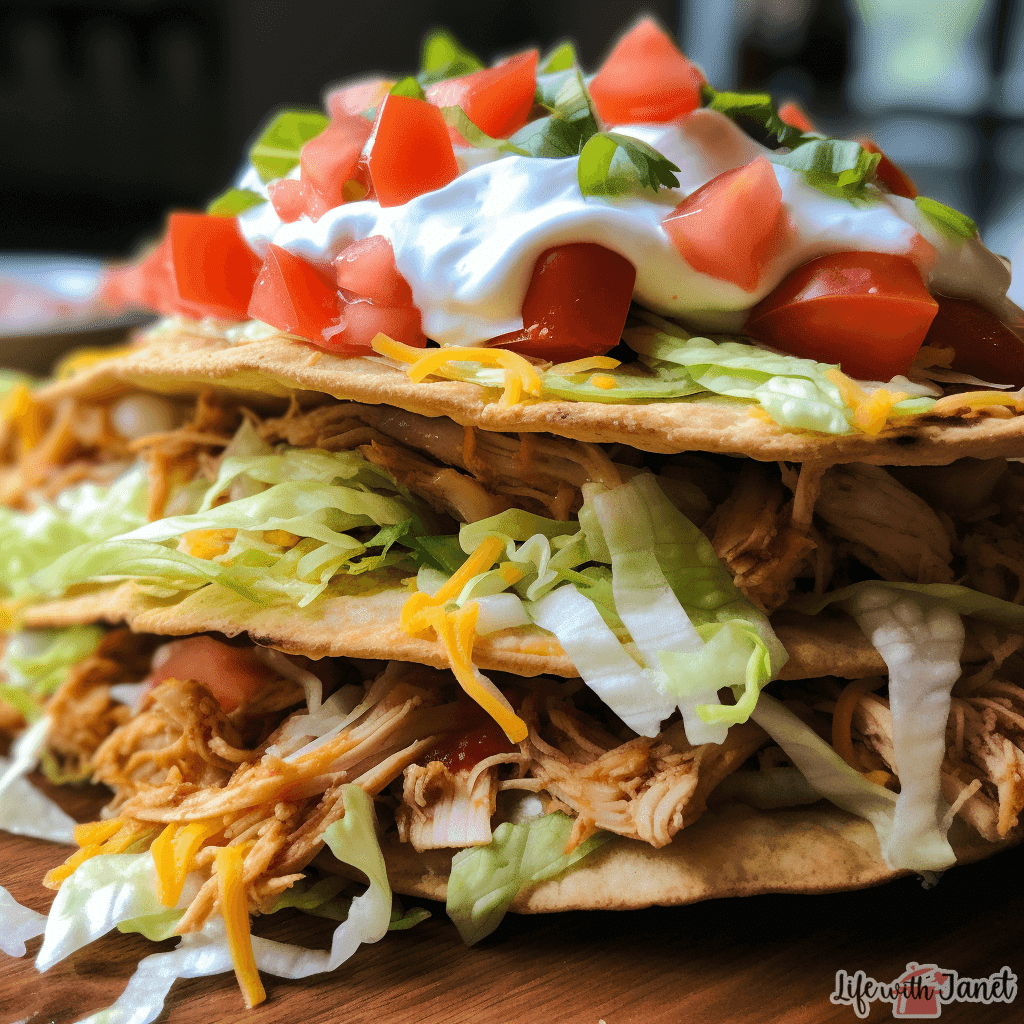
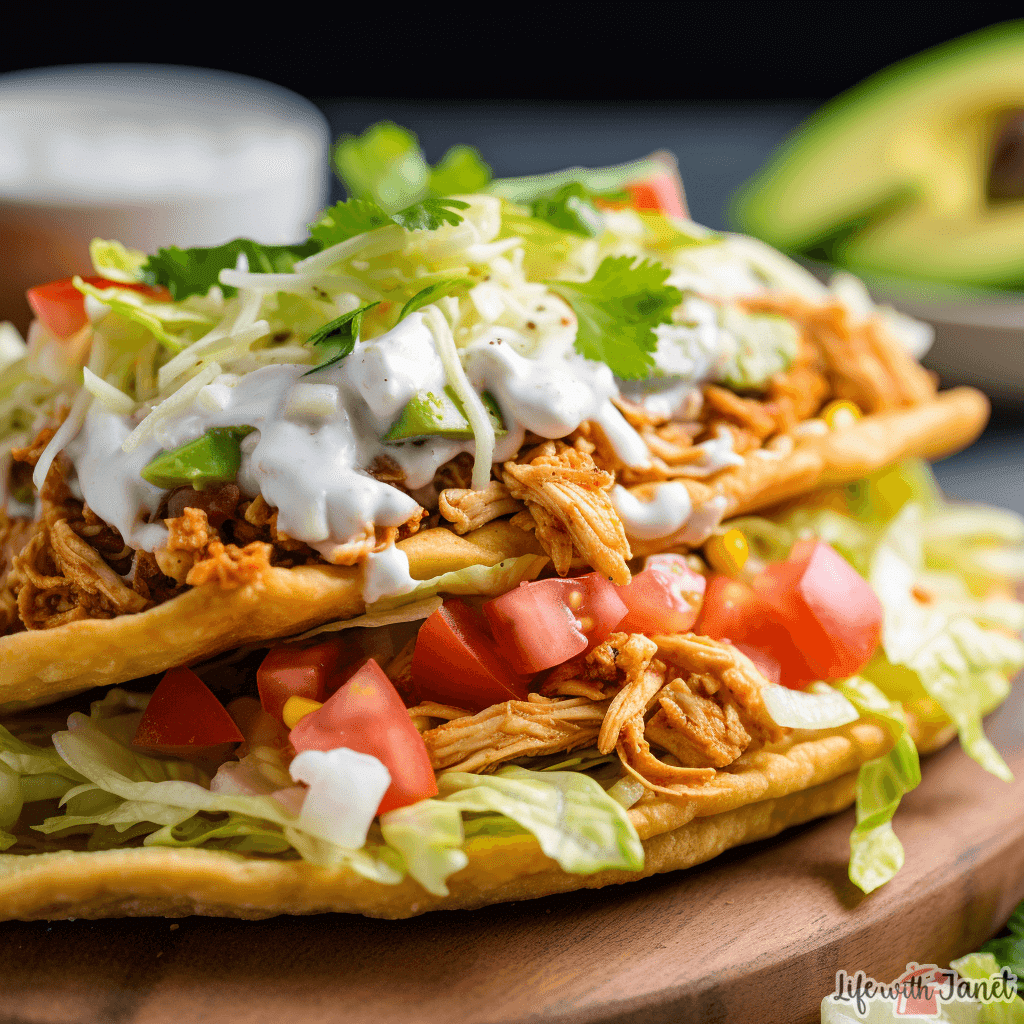
- Now comes the fun part—stuffing the chalupas! Layer in the seasoned chicken, a dollop of sour cream, lettuce, tomatoes, and a smattering of shredded cheese.
- Top off with a sprinkle of cilantro and serve hot with your sauce of choice. Relish every bite; you’ve earned it!